Exploring the Rich History and Authentic Origins of Greek Chicken Gyros
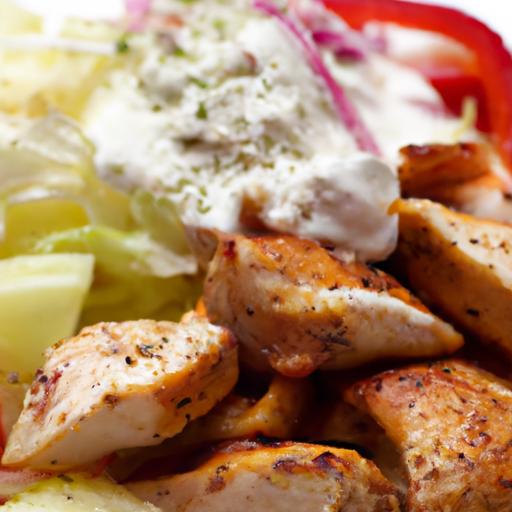
Greek chicken gyros are more than just a beloved street food; they’re a appetizing testament to centuries of Mediterranean history and culture. Originating as a simple, portable meal in Greece’s bustling urban centers, these savory wraps have evolved from humble beginnings to global acclaim.The warm aroma of perfectly seasoned chicken, kissed by conventional herbs and spices, paired with creamy tzatziki and fresh vegetables, makes each bite an irresistible celebration of Greek culinary heritage. My first encounter with authentic gyro chicken was on a sunlit sidewalk in Athens-where the balance of flavors instantly captivated my palate, inspiring this ultimate, approachable recipe to bring that magic to your kitchen.
Prep and Cook Time
- Planning: 15 minutes
- Marinating: 2 hours (or overnight for best flavor)
- Cooking: 15 minutes
- Total Time: 2 hours 30 minutes
Yield
Serves 4 generously filled chicken gyros
Difficulty Level
Easy to Medium – Perfect for home cooks looking to explore authentic Greek street cuisine without fuss.
Ingredients
- 1 ½ lbs boneless, skinless chicken thighs, trimmed and sliced thin
- 3 cloves garlic, minced
- 2 tablespoons extra-virgin olive oil
- 1 tablespoon dried oregano
- 1 teaspoon ground cumin
- 1 teaspoon smoked paprika
- ½ teaspoon dried thyme
- Juice of 1 lemon
- Salt and freshly ground black pepper to taste
- 4 large pita breads, warmed
- 1 cup Greek tzatziki sauce (homemade or store-bought)
- 1 medium cucumber, thinly sliced
- 1 small red onion, thinly sliced
- Handful of fresh parsley, chopped
- Cherry tomatoes, halved for garnish (optional)
Instructions
- Marinate the chicken: In a large bowl, combine the garlic, olive oil, oregano, cumin, smoked paprika, thyme, lemon juice, salt, and pepper. Add the sliced chicken thighs and toss until well coated. Cover and refrigerate for at least 2 hours, ideally overnight to deepen the flavors.
- Prepare the grill or skillet: Heat a grill pan or large skillet over medium-high heat. Lightly oil the surface to prevent sticking.
- Cook the chicken: Place the marinated chicken in a single layer and cook for about 7-8 minutes per side until golden brown and cooked through. Avoid overcrowding; cook in batches if necessary. The chicken should be juicy yet slightly charred for authentic flavor.
- Warm the pita: Wrap each pita in foil and warm in a 350°F oven for 5 minutes, or toast lightly on the grill pan for a minute per side until pliable and slightly crispy.
- Assemble the gyros: Lay warm pita breads flat. Spread a generous spoonful of tzatziki on each. Layer sliced chicken, cucumber, red onion, and sprinkle with fresh parsley. Fold the pita around the filling for easy eating.
Tips for Success
- Marinating matters: For the richest Greek chicken gyros flavor, marinate the chicken overnight.This tenderizes the meat and infuses it with Mediterranean warmth.
- Choose thighs over breast: Chicken thighs stay juicy and absorb marinade better, making your gyros irresistibly tender.
- Homemade tzatziki: If you want to elevate your gyros, try making tzatziki with Greek yogurt, grated cucumber, lemon juice, minced garlic, and fresh dill-allow it to chill for at least an hour.
- Grill marks count: If using a grill, let the chicken get those charred stripes to mimic traditional gyro meat’s smoky goodness.
- Make-ahead tip: Marinated chicken can be kept in the fridge for up to 24 hours; cook just before serving for optimal freshness.
Serving Suggestions
Present your Greek chicken gyros wrapped in parchment paper or lightly foil-wrapped for an authentic street-food vibe. Pair with crispy Greek lemon potatoes or a refreshing village salad. Garnish with a few halved cherry tomatoes or a sprinkle of crumbled feta for added color and flavor contrast. Serve with a wedge of lemon on the side to brighten each bite.A chilled glass of sparkling water with fresh mint complements this meal beautifully.

| Nutrient | Amount per Serving |
|---|---|
| Calories | 420 kcal |
| Protein | 38 g |
| Carbohydrates | 30 g |
| Fat | 14 g |
For those eager to deepen their knowledge of authentic Greek cuisine and history, explore detailed resources like britannica’s exploration of the gyro, which offers great context on this classic dish’s cultural evolution.
Mastering the Art of Marinating for Tender and Flavorful Chicken
Savor the Flavor by mastering the marinade-the very heart of tender and flavorful chicken that elevates Greek Chicken Gyros from everyday fare to an unforgettable culinary experience. Originating in the bustling streets of Athens, this marinade infuses the chicken with the quintessential herbs and tantalizing citrus notes, creating a symphony of taste with every bite. Whether you’re new to Mediterranean dishes or a seasoned home cook, understanding how to balance acidity, oils, and spices can transform your cooking and dazzle your guests.
Prep and Cook Time
- Preparation: 15 minutes
- Marinating: 4 hours (minimum) to overnight for optimal flavor
- Cooking: 12-15 minutes
- Total Time: Approximately 5 hours (including marinating)
yield
Serves 4 generous portions
Difficulty Level
Easy to Medium - Perfect for beginners eager to impress and home cooks craving authentic taste
Ingredients
- 1½ lbs chicken thighs, boneless and skinless
- ¼ cup extra virgin olive oil
- 3 tablespoons freshly squeezed lemon juice
- 4 garlic cloves, minced
- 2 teaspoons dried oregano
- 1 teaspoon ground cumin
- 1 teaspoon smoked paprika
- ½ teaspoon sea salt
- ½ teaspoon freshly ground black pepper
- 1 tablespoon plain Greek yogurt (optional, for added tenderness)
- Fresh parsley, finely chopped for garnish
Instructions: Creating the Perfect Marinade and Cooking the Chicken
- Prepare the marinade: In a medium bowl, whisk together olive oil, lemon juice, minced garlic, dried oregano, ground cumin, smoked paprika, salt, and black pepper. Add the Greek yogurt if using, blending smoothly for extra moisture and tenderizing effect.
- Marinate the chicken: Place chicken thighs in a resealable plastic bag or shallow dish. Pour the marinade over, ensuring every piece is coated evenly. Seal and refrigerate for at least 4 hours,or preferably overnight. This slow infusion allows the flavors to deeply penetrate, enhancing tenderness and complexity.
- Preheat your grill or skillet: For optimal searing, heat a grill pan or cast iron skillet over medium-high heat. Lightly oil the surface to prevent sticking.
- Cook the chicken: Remove chicken from marinade, allowing excess to drip off. Lay pieces on the hot surface, cooking for about 6-7 minutes per side or until the internal temperature reaches 165°F (74°C). look for a golden,slightly charred crust,sealing those vibrant juices inside.
- Rest and slice: transfer chicken to a cutting board and let rest for 5 minutes. This step locks in moisture. Slice the chicken thinly against the grain, preparing for perfect gyro assembly.
Tips for Success: Unlock Bold and Succulent Results
- Marinate with patience: For the richest flavor, marinate overnight. The acids and herbs softness the meat, resulting in juicy, tender chicken.
- Use skinless thighs: they remain juicy under heat, unlike lean breasts, which can dry out without care.
- Don’t overcrowd your pan: Cook in batches if needed to achieve that coveted golden sear instead of steaming.
- Try grilling outdoors: A charcoal grill will add an authentic smoky aroma reminiscent of Greek street vendors.
- Substitution alert: No Greek yogurt on hand? A drizzle of extra virgin olive oil and a splash of fresh lemon will still yield a lovely marinade.
Serving Suggestions: bring the Gyro to Life
Layer your sliced chicken on warm, fluffy pita bread.Top with crisp sliced cucumbers, ripe tomatoes, tangy red onions, and a generous dollop of homemade tzatziki sauce. Fresh parsley sprinkled atop not only adds color but a burst of herbaceous brightness. For an authentic finishing touch, serve alongside classic greek salad and perhaps crisp fries for balance.

| Nutrient | Per Serving |
|---|---|
| Calories | 320 |
| Protein | 38g |
| Carbs | 3g |
| Fat | 16g |
For a deeper dive into the history and science of marinating, check out the insightful guide from Serious Eats on the food science of marinades.
Crafting the perfect Pita Wrap with Traditional Toppings and Sauces
Greek chicken gyros have long been a vibrant symbol of Mediterranean street food,celebrated for their irresistible blend of spices,tender meat,and fresh,zesty toppings. Mastering the perfect pita wrap layered with traditional toppings and sauces invites you into a world where simple ingredients combine to create an explosion of flavor. Each bite is a harmonious balance of smoky grilled chicken, tangy tzatziki, crisp vegetables, and the warm embrace of soft pita bread-an experience that’s as much about texture and aroma as it is indeed taste.
Prep and Cook Time
- Preparation: 20 minutes
- Marinating: 2 hours (can be overnight for deeper flavor)
- Cooking: 15 minutes
- Total Time: 2 hours 35 minutes
Yield
Serves 4 generous pita wraps
Difficulty Level
Medium – ideal for intermediate home cooks looking to impress with layered flavors.
Ingredients
- For the Chicken Marinade:
- 1.5 lbs boneless, skinless chicken thighs, sliced thinly
- 3 tbsp olive oil
- 2 tbsp fresh lemon juice
- 4 garlic cloves, minced
- 2 tsp dried oregano
- 1 tsp ground cumin
- 1 tsp smoked paprika
- Salt and freshly ground black pepper, to taste
- For the Pita Wrap:
- 4 large pita breads, warmed
- 1 cup tzatziki sauce (see the note below for homemade tips)
- 1 medium cucumber, thinly sliced
- 2 medium tomatoes, diced
- ⅓ cup thinly sliced red onions, soaked briefly in cold water to mellow
- ½ cup crumbled feta cheese
- handful fresh parsley, chopped
Instructions
- Prepare the Marinade: In a bowl, whisk together olive oil, lemon juice, garlic, oregano, cumin, paprika, salt, and pepper.
- Marinate the Chicken: Add the sliced chicken thighs to the marinade and toss to coat evenly.Cover and refrigerate for at least 2 hours or overnight for best flavor.
- Cook the Chicken: Heat a grill pan or skillet over medium-high heat. Add the chicken slices in a single layer.Sauté until golden brown and cooked through,about 7-8 minutes,flipping halfway. avoid overcrowding the pan to get a nice sear.
- Warm the Pita: Wrap pitas in foil and warm in the oven at 350°F (175°C) for 5-7 minutes or heat them quickly on a dry skillet until pliable and lightly toasted.
- Assemble the Wraps: Lay each pita flat,spread ¼ cup of tzatziki sauce down the center,followed by a generous portion of the grilled chicken.
- Add Fresh Toppings: Layer slices of cucumber, diced tomatoes, and soaked red onions atop the chicken. Sprinkle with crumbled feta cheese and chopped parsley.
- Wrap It Up: Fold the pita over the fillings snugly,securing with parchment paper or foil if needed for easier eating.
- Serve Promptly: For the best taste and texture, serve while the chicken is warm and the pita is soft yet slightly crisp on edges.
Tips for Success
- Allowing the chicken to marinate overnight not only tenderizes the meat but infuses every bite with richer flavor.
- For homemade tzatziki sauce, combine Greek yogurt, grated cucumber (squeezed dry), minced garlic, lemon juice, chopped dill, olive oil, salt, and pepper for a fresher, personalized touch.
- If red onions feel too sharp even after soaking, substitute with pickled onions for an added tangy crunch.
- To keep wraps from becoming soggy, layer sauces first and vegetables last, and serve promptly.
- Use boneless chicken thighs over breasts for juicier,more flavorful meat that remains tender after grilling.
- Make-ahead tip: Grill chicken ahead and store separately; assemble wraps just before serving to preserve freshness and texture.
Serving Suggestions
Present your pita wraps on a rustic wooden board for a casual Mediterranean vibe. Garnish with extra fresh parsley and a wedge of lemon for squeezing on top.Accompany with a side of homemade or high-quality tzatziki sauce for dipping. Crispy baked potato fries or a vibrant Greek salad complement this meal beautifully, offering varied textures and brightness.
To elevate presentation, sprinkle smoked paprika lightly over the assembled wraps and add a drizzle of extra virgin olive oil for a glossy finish. The marriage of tender, smoky chicken with cool, creamy tzatziki nestled in soft pita is not just food-it’s an invitation to savor every moment.

| Nutrient | Per Serving |
|---|---|
| Calories | 480 kcal |
| Protein | 38 g |
| Carbohydrates | 35 g |
| Fat | 18 g |
Ready for more tantalizing Mediterranean delights? Explore our homemade tzatziki sauce recipe to perfect your sauce game and complete your gyro experience!
Serving Suggestions and Pairings to Elevate Your Greek Gyro experience
Greek Chicken Gyros are a celebration of vibrant Mediterranean flavors wrapped in warm, fluffy pita bread. From the sun-soaked streets of Athens to your kitchen table, this iconic dish combines tender, marinated chicken with a melody of fresh vegetables and zesty tzatziki. Bringing the authentic greek Chicken Gyros experience home is easier than you think, and knowing how to enhance your gyro with perfect pairings will elevate every bite into a culinary adventure.
Prep and Cook Time
Preparation: 20 minutes | Marinating: 1 hour (recommended) | Cooking: 15 minutes | Total: 1 hour 35 minutes
Yield
Serves 4 generous gyros,perfect for sharing with family or friends.
Difficulty Level
Easy to Medium: Ideal for cooks ready to explore Greek flavors without fuss.
Ingredients
- 1.5 lbs boneless, skinless chicken thighs, cut into thin strips
- 3 tbsp olive oil, extra virgin for marinade
- 2 tbsp fresh lemon juice
- 4 garlic cloves, minced
- 2 tsp dried oregano, preferably Greek
- 1 tsp smoked paprika
- Salt and freshly ground black pepper, to taste
- 4 large pita breads, warmed
- 1 cup tzatziki sauce, chilled
- 1 medium red onion, thinly sliced
- 1 large tomato, sliced
- 1 cup cucumber slices, thin
- Fresh parsley and mint leaves, for garnish
Instructions
- Prepare the marinade: In a medium bowl, whisk together olive oil, lemon juice, minced garlic, oregano, paprika, salt, and pepper.Add chicken strips and toss well to coat evenly. Cover and refrigerate for at least 1 hour to allow flavors to infuse deeply.
- Cook the chicken: Heat a large skillet over medium-high heat. Add marinated chicken in a single layer, cooking for about 5-7 minutes per side, or until golden and fully cooked through. Avoid overcrowding the pan; cook in batches if necessary. This ensures a beautifully caramelized exterior.
- Warm the pita breads: Wrap each pita in foil and heat in a 350°F (175°C) oven for 5-7 minutes, or briefly toast on a dry skillet until soft and pliable.
- Assemble your gyros: Place a warmed pita on a plate, spread a generous 2-3 tablespoons of tzatziki, then top with hot chicken strips.Layer with sliced red onion, tomato, and cucumber. Finish with fresh parsley and mint leaves for bursts of herbaceous brightness.
- Serve immediately, folding pita around the fillings snugly. Offer additional tzatziki and lemon wedges on the side for personalization.
Tips for Success
- Marinating time is key: If short on time, even 30 minutes helps; however, a full hour yields the best tenderness and flavor absorption.
- Chicken thighs vs. breast: Thighs stay juicy and tender, but if you prefer leaner meat, boneless chicken breasts can substitute, just watch cooking time carefully to avoid dryness.
- Vegetable freshness: Use crisp,fresh vegetables for crunch and contrast against the tender chicken and creamy tzatziki.
- Make-ahead tzatziki: Prepare your tzatziki sauce a day in advance,allowing the flavors of garlic,cucumber,and dill to meld harmoniously. Store covered in the fridge.
- For extra char: Finish cooked chicken briefly on a hot grill or grill pan to infuse smoky flavor reminiscent of authentic street gyros.
Serving Suggestions to Elevate Your Greek Gyro Experience
To truly savor the Greek Chicken Gyros magic, presentation and complementary pairings are essential. Consider serving with a side of crispy, golden sweet potato fries dusted lightly with smoked paprika and sea salt, echoing the spices of the marinade. A fresh Mediterranean salad-think kalamata olives,ripe cherry tomatoes,cucumber ribbons,and a sprinkle of feta-adds bright,tangy contrast and colorful appeal.
Garnishing your gyro plate with a few lemon wedges invites diners to brighten each bite with a spritz of citrus, enhancing the herbs and balancing richness. For an extra herbaceous finish, scatter chopped fresh dill or oregano atop the tzatziki or chicken before serving.
Pair your meal with a refreshing chilled Greek yogurt drink, known as kefir or ayran, to soothe the palate and complete the Mediterranean profile. Alternatively, a sparkling lemonade infused with mint offers a zesty, effervescent complement.
For visual inspiration, arrange your gyros open-faced on a rustic wooden board, embracing vibrant colors and textures that invite an Instagram-worthy moment before digging in.
| nutrient | per Serving |
|---|---|
| Calories | 450 kcal |
| Protein | 38 g |
| Carbohydrates | 32 g |
| Fat | 18 g |

To further explore the rich heritage of Greek cuisine and complement your gyro experience,check out our related article on Authentic Greek Salad.Embrace the flavors and deepen your culinary journey with these timeless Mediterranean classics.
Q&A
Q&A: Savor the Flavor – Ultimate Guide to Greek Chicken Gyros
Q1: What exactly is a Greek chicken gyro?
A1: A Greek chicken gyro is a beloved street food featuring juicy, marinated chicken cooked to perfection and thinly sliced, then wrapped in warm, fluffy pita bread. Accompanied by fresh vegetables and creamy tzatziki sauce, it’s a harmonious blend of bold Mediterranean flavors in every bite.
Q2: How is the chicken traditionally marinated for gyros?
A2: The magic lies in a marinade bursting with fragrant herbs and spices-typically garlic, oregano, lemon juice, olive oil, and a touch of smoked paprika. This blend tenderizes the chicken while infusing it with that unmistakable tangy and aromatic profile that makes Greek gyros unforgettable.
Q3: Can I make chicken gyros at home without specialized equipment?
A3: Absolutely! While traditional gyros are cooked on a vertical rotisserie, you can replicate delicious results by grilling, pan-searing, or baking marinated chicken strips. The key is high heat and careful timing to develop that slightly charred, succulent texture.
Q4: What toppings and accompaniments bring the chicken gyro to life?
A4: Fresh is best! Crisp cucumber slices, ripe tomatoes, thinly sliced red onions, and a sprinkle of fresh parsley or dill create a vibrant crunch. The star condiment? Creamy tzatziki-a cool yogurt-based sauce with cucumber, garlic, and dill-perfectly balances the warm spices of the chicken.
Q5: Are there vegetarian or vegan options inspired by chicken gyros?
A5: While not chicken, many plant-based gyros use marinated and grilled mushrooms, seitan, or chickpeas to capture the gyro’s savory spirit. However, for authentic Greek chicken gyros, the focus is on that tender, herb-kissed poultry.
Q6: What’s the best type of pita bread for gyros?
A6: Soft, slightly chewy pita is essential-it should be sturdy enough to hold all fillings yet tender enough to fold around the chicken bundle snugly. Warm pita, lightly grilled or toasted, adds a lovely smoky nuance and pliability.
Q7: How can someone customize their gyro for an authentic Greek experience?
A7: Embrace simplicity and fresh ingredients. Use high-quality extra virgin olive oil, freshly squeezed lemon, and herbs like oregano and thyme. Keep the toppings straightforward but fresh, and don’t be shy with tzatziki-it’s practically the soul of the gyro!
Q8: What’s the origin story behind the chicken gyro?
A8: The gyro traces its roots to Greek street food culture, influenced by Middle Eastern shawarma and Turkish döner kebab. Chicken became a popular choice for gyros due to its lean texture and ability to absorb the vibrant Mediterranean spices, becoming a staple in Greece and beyond.
Q9: Can chicken gyros be made gluten-free?
A9: Yes! Swap traditional pita with gluten-free flatbreads or lettuce wraps for a lighter, gluten-free alternative. Just ensure that all seasoning blends and sauces are free from hidden gluten ingredients.
Q10: what’s the best way to serve chicken gyros for a casual gathering?
A10: Set up a gyro bar! Lay out grilled chicken, various fresh veggies, warm pita bread, and bowls of tzatziki and othre Mediterranean dips. Guests can build their own, customizing every flavorful bite-and the vibrant spread becomes part of the fun.
Embark on your gastronomic journey and savor the authentic taste of Greek chicken gyros-where every mouthful tells a story of sun-soaked islands and timeless culinary tradition!
to sum up
As you wrap up your journey through the vibrant world of Greek chicken gyros, remember that this beloved dish is more than just a meal-it’s a celebration of heritage, flavor, and conviviality. Whether you’re layering juicy, marinated chicken with crisp veggies and tangy tzatziki, or perfecting the warm, fluffy pita that cradles it all, every bite brings you closer to a timeless Mediterranean tradition. So go ahead, embrace the art of gyro-making, and let your taste buds savor the irresistible harmony of spices and textures that make Greek chicken gyros truly unforgettable. Opa to your culinary adventure!
]]>
one Pan Wonders Unlocking Flavorful Combinations for a Complete Meal
One-Pan Chicken Feast offers a brilliant way to indulge in a hearty, home-cooked meal without the fuss of juggling multiple pots and pans. This effortless sheet pan recipe originated from the need to create a wholesome combination of flavors-all roasting together for a harmony of taste and texture. Imagine juicy,golden-brown chicken thighs nestled among seasoned vegetables,each bite bursting with the essence of herbs and spices,while the pan drippings elevate every element. This is not only a time-saver but a comforting centerpiece perfect for busy weeknights or casual gatherings.
Prep and Cook Time
- Preparation Time: 15 minutes
- cook Time: 40-45 minutes
- Total Time: 60 minutes
Yield
Serves 4 hearty portions
Difficulty Level
Easy – perfect for home cooks of all skill levels
Ingredients
- 6 bone-in, skin-on chicken thighs, trimmed
- 1 large red bell pepper, sliced into strips
- 1 medium yellow onion, cut into wedges
- 2 cups baby potatoes, halved
- 1 cup cherry tomatoes
- 2 tablespoons extra virgin olive oil
- 1 teaspoon smoked paprika
- 1 teaspoon garlic powder
- 1 teaspoon dried oregano
- Salt and freshly ground black pepper, to taste
- Fresh rosemary sprigs for garnish
- Juice of half a lemon
Instructions
- Preheat your oven to 425°F (220°C).This high heat ensures crispy chicken skin and perfectly roasted vegetables.
- In a large bowl, combine the olive oil, smoked paprika, garlic powder, oregano, salt, and pepper. Toss the chicken thighs until they are fully coated in this vibrant spice blend.
- Arrange the chicken thighs skin-side up on a large sheet pan, leaving enough space for the vegetables.
- Add the baby potatoes and coat them with any remaining seasoned oil in the bowl. Place them around the chicken on the sheet pan.
- Scatter the onion wedges and red bell pepper strips evenly alongside the chicken and potatoes. Finish with the cherry tomatoes placed strategically to roast without crushing.
- Roast in the oven for 40-45 minutes, or until the chicken reaches an internal temperature of 165°F (74°C) and the vegetables are tender and caramelized.
- About 5 minutes before the end of the cooking time, squeeze the lemon juice over the pan to add a fresh, citrusy brightness that balances the richness.
- Remove from the oven and let rest for 5 minutes. Garnish with fresh rosemary sprigs before serving.
Tips for Success with Your One-Pan Chicken Feast
- Ensure even cooking: For beautifully roasted potatoes, cut them into uniform halves or quarters, depending on their size.
- Variation idea: Swap out red bell pepper for sweet yellow or orange peppers, or add a handful of green beans for extra color and crunch.
- Make it ahead: Marinate the chicken in the spice blend for up to 4 hours ahead of time to deepen the flavour.
- Keep the skin crispy: Avoid overcrowding the sheet pan-give each piece of chicken and vegetable enough breathing room.
- Easy cleanup: Line your sheet pan with parchment paper or a silicone liner before roasting.
Serving Suggestions
Serve this one-pan chicken feast straight from the sheet pan for rustic appeal or plate it elegantly alongside a crisp green salad tossed in lemon vinaigrette.Garnish with freshly chopped parsley or a sprinkle of flaky sea salt to elevate the experience. Accompanying creamy mashed cauliflower or a crusty artisan bread allows diners to soak up every last bit of flavorful juices. For a vibrant contrast, add a dollop of tzatziki or a tangy mustard-mayo dip on the side.

| Nutrient | Per Serving |
|---|---|
| Calories | 490 |
| Protein | 38g |
| Carbohydrates | 30g |
| fat | 22g |
Looking to expand your sheet pan repertoire? check out our Easy Sheet Pan Vegetable Medley for a vibrant plant-based companion. For an expert guide to selecting quality chicken, visit Serious Eats: Choosing the Best Chicken to ensure every meal shines with top-tier ingredients.
Mastering the Art of Timing: How to Cook Protein and Vegetables Perfectly Together
One-Pan Chicken Feast: Easy Sheet Pan Meal Magic invites home cooks to unlock the secret of harmonious roasting-where succulent chicken and crisp-tender vegetables come together in perfect synchrony. This method ensures every bite bursts with flavor and texture, proving that effortless meals can be truly spectacular.
Balancing the cook times for your protein and veggies is the cornerstone of this classic comfort dish.This approach optimizes caramelization on the outside, while locking in juicy tenderness inside, crafting a colorful medley that makes cleanup a breeze and dinner a delight.
Prep and Cook Time
- Preparation: 15 minutes
- Cooking: 35-40 minutes
- Total Time: 50-55 minutes
Yield
Serves 4 generously
Difficulty Level
Easy – perfect for busy weeknights and beginner cooks alike
Ingredients
- 4 boneless, skin-on chicken thighs, trimmed
- 1 lb baby potatoes, halved
- 2 cups broccoli florets, trimmed and washed
- 1 large red bell pepper, cut into 1-inch strips
- 3 tbsp olive oil
- 1 tsp smoked paprika
- 1 tsp garlic powder
- 1 tsp dried oregano
- Salt and freshly ground black pepper, to taste
- Juice of 1 lemon
- Fresh parsley, chopped for garnish
Instructions
- Preheat your oven to 425°F (220°C). This high temperature is key to achieving a crispy exterior on your chicken and roasted vegetables.
- Prepare the chicken marinade: In a small bowl, whisk together olive oil, smoked paprika, garlic powder, oregano, lemon juice, salt, and pepper.
- Toss the chicken thighs in half of the marinade
- In a large mixing bowl, combine baby potatoes and bell peppers.
- Spread the potatoes and peppers in a single layer
- Place the sheet pan in the oven
- Remove the pan briefly and nestle the chicken thighs
- Return the pan to the oven
- Add the broccoli florets during the last 7-8 minutes of cooking
- Remove from oven and let the dish rest for 5 minutes
- Serve warm, spooning pan juices over the top
Tips for Success
- Timing is everything: starting the potatoes and peppers ahead gives them a head start without overcooking the chicken or broccoli.
- use skin-on chicken thighs: For the crispiest skin and juiciest meat, skin-on is a must.
- Cut vegetables uniformly: This promotes even cooking and a balanced texture.
- Try swapping the broccoli for asparagus or green beans
- For extra flavor, add thin slices of garlic or shallots
- make it ahead: Marinate the chicken up to 4 hours before cooking to intensify the flavors.
Serving Suggestions
This one-pan chicken feast shines shining on its own but pairs beautifully with a light mixed greens salad or crusty artisan bread to mop up those amazing pan juices. For a festive touch, sprinkle with toasted pine nuts or a few dollops of tangy Greek yogurt. A fresh lemon wedge on each plate invites an extra burst of brightness, enhancing the roast’s savory depth.

| Nutrient | Per Serving |
|---|---|
| Calories | 420 kcal |
| Protein | 35 g |
| Carbohydrates | 28 g |
| Fat | 18 g |
For an even deeper dive into balancing roasting times with varied vegetables, check out our thorough roasting guide. To understand how the Maillard reaction develops those irresistible golden crusts, visit this serious Eats article.
Seasoning Secrets to Elevate Your Sheet Pan Chicken Feast
One-Pan Chicken Feast recipes come alive with the magic of perfectly balanced seasoning that transforms a simple sheet pan meal into an unforgettable culinary party. This secret lies not just in the spices you choose but in how they harmonize to enhance the natural juiciness of roasted chicken and vibrant vegetables. Weather you’re craving a zesty, herbaceous aroma or a smoky, warm embrace of spices, layering flavors thoughtfully will elevate your dish from ordinary to extraordinary.
Prep and Cook Time
- Preparation: 15 minutes
- Cooking: 35-40 minutes
- Total Time: 50-55 minutes
Yield
Serves 4 generously,perfect for a family dinner or casual gathering.
Difficulty Level
Easy: Ideal for beginner cooks and busy weeknights, this recipe is designed for minimal fuss and maximum flavor.
Ingredients
- 4 bone-in, skin-on chicken thighs (about 1.2 lbs)
- 1 large red bell pepper, sliced into 1-inch strips
- 1 medium red onion, cut into thick wedges
- 2 medium Yukon gold potatoes, cubed
- 3 tablespoons olive oil
- 1 teaspoon smoked paprika
- 1 teaspoon garlic powder
- 1 teaspoon dried oregano
- ½ teaspoon ground cumin
- ½ teaspoon crushed red pepper flakes (optional for heat)
- Salt and freshly ground black pepper, to taste
- Fresh parsley, chopped for garnish
- 1 lemon, zested and quartered
Instructions
- Preheat your oven to 425°F (220°C). This high heat encourages crispy skin and caramelized veggies.
- In a large bowl, combine the olive oil, smoked paprika, garlic powder, oregano, ground cumin, crushed red pepper flakes, salt, and pepper. Whisk until they form a vibrant, aromatic marinade.
- Add the chicken thighs to the bowl, gently coating each piece under the spice blend. Let them sit while you prep the veggies; this helps the flavors penetrate the meat.
- In a separate bowl, toss the potatoes, red bell pepper, and onion slices with a drizzle of olive oil and a light sprinkle of salt and pepper, ensuring even coverage.
- Arrange the vegetables in a single layer on a rimmed sheet pan, leaving enough space between pieces for heat to circulate.
- Place the seasoned chicken thighs skin-side up on top of the vegetables. The chicken drippings will infuse the veggies as they roast, creating melded flavors and rich textures.
- Roast in the oven for about 35-40 minutes, or until the chicken skin is golden and crisp, and an internal thermometer reads 165°F (74°C). Stir the vegetables once halfway through for even roasting.
- Remove from oven and squeeze fresh lemon juice over the entire pan, scattering lemon zest and parsley for a final burst of freshness and color.
- Serve instantly, spooning the caramelized vegetables beside the juicy chicken thighs. Garnish with extra parsley and lemon quarters for an inviting presentation.
Tips for Success
- For extra crispiness, pat the chicken skin dry with paper towels before seasoning. Moisture hinders browning.
- Marinate longer: For deeper flavor, coat chicken with spices a few hours ahead and refrigerate.
- Veggie swaps: Swap potatoes with sweet potatoes or add Brussels sprouts for variety and color contrast.
- One-pan cleanup: Line your baking sheet with parchment paper or foil to make washing easier without losing any seasoning.
- Make-ahead option: Pre-chop veggies and pre-mix spices; assemble just before roasting for time-savvy meal prep.
Serving Suggestions
Serve this One-Pan Chicken Feast alongside a crisp green salad dressed with a light vinaigrette to balance the richness of the roasted chicken and veggies. A side of warm crusty bread or garlic aioli dip adds comfort and decadence. Garnish with lemon wedges and freshly chopped parsley for that elevated, restaurant-style finish that will impress anyone gathered around your table.

| Nutrient | Per Serving |
|---|---|
| Calories | 450 kcal |
| Protein | 35 g |
| Carbohydrates | 25 g |
| Fat | 22 g |
Curious about more one-pan wonders? Check out our collection of easy sheet pan dinners to simplify your weekly meal planning. For a deeper dive into spice blends and roasting techniques, explore this guide from Serious Eats, a trusted authority in culinary science.
Essential Tips for Cleanup and Reheating Without Losing Deliciousness
One-Pan Chicken Feast recipes bring a blend of simplicity and rich, homey flavors that transform busy weeknights into cozy culinary celebrations. This delightful sheet pan meal magic is designed to be effortless,letting you revel in juicy,perfectly roasted chicken paired with fragrant vegetables-all baked together for a harmony of textures and tastes that feels both comforting and special.
Prep and Cook Time
Preparation: 15 minutes
Cooking: 40 minutes
Total Time: 55 minutes
Yield
Serves 4 hearty portions
Difficulty Level
Easy – perfect for beginners and busy home cooks alike
Ingredients
- 4 bone-in, skin-on chicken thighs (about 1.5 lbs)
- 1 lb baby potatoes, halved
- 1 large red bell pepper, sliced into strips
- 1 medium red onion, cut into wedges
- 3 cloves garlic, minced
- 2 tbsp olive oil
- 1 tsp smoked paprika
- 1 tsp dried thyme
- 1 tsp sea salt
- ½ tsp freshly ground black pepper
- Juice of 1 lemon
- Fresh parsley for garnish
Instructions
- Preheat the oven to 425°F (220°C).Line a large rimmed baking sheet with parchment paper or lightly grease it for easy cleanup.
- Prepare the marinade: In a medium bowl, combine olive oil, smoked paprika, thyme, sea salt, black pepper, minced garlic, and lemon juice. Whisk until well blended.
- Coat the chicken and vegetables: Place the chicken thighs, halved baby potatoes, red bell pepper strips, and red onion wedges into the bowl. Toss gently, ensuring everything is evenly covered with the marinade.
- Arrange on the sheet pan: Spread the chicken and vegetables out in a single layer, skin side up for the chicken, leaving space in between for roasting rather than steaming. This helps achieve crisp skin and caramelized veggies.
- Roast for 40 minutes: Bake in the center of the oven for about 40 minutes or until the chicken registers 165°F (74°C) internally and the potatoes are tender when pierced with a fork.
- Crisp the skin (optional): For extra crispy chicken skin, broil on high for the last 3-5 minutes of cooking, keeping a close eye to prevent burning.
- Garnish and serve: Sprinkle fresh parsley over the dish just before serving to add a burst of color and fresh herbaceous notes.
Tips for Cleanup and Reheating Without Losing Deliciousness
After savoring your One-Pan Chicken feast, cleanup can feel like a breeze if approached with a few tried-and-true tricks.To avoid stubborn baked-on residue, soak your sheet pan in warm soapy water immediately after removing the food. Using a silicone spatula to gently scrape off any stuck bits will maintain the integrity of your pan and extend its life. With sheet pan meals, parchment paper or a silicone baking mat can be your best freind-minimizing mess while keeping flavors intact.
When it comes to reheating, preserving the succulence of the chicken and the texture of the roasted veggies is key.Reheat your leftovers in a preheated oven at 350°F (175°C) for about 15 minutes, uncovered.This method gently warms everything through while restoring crispness to the chicken skin and preventing your potatoes from becoming soggy. Alternatively, a toaster oven works beautifully for individual portions. avoid microwaving whenever possible, as fast heating often leads to rubbery chicken and limp vegetables. For a rapid refresh, a light spritz of olive oil before reheating can revive the original gloss and flavor harmony of the dish.
Chef’s Notes
- You can swap chicken thighs for boneless breasts, but reduce cooking time to avoid drying out the meat.
- Feel free to experiment with seasonal vegetables-zucchini, cherry tomatoes, or green beans add vibrant color and nutrition.
- make this dish ahead by prepping all the ingredients and marinating the chicken overnight, so it’s ready to pop in the oven after a busy day.
Serving Suggestions
Serve your One-Pan chicken Feast with a crisp green salad dressed with a balsamic vinaigrette or alongside a fluffy quinoa pilaf to round out the meal. Garnish with extra lemon wedges for dashes of brightness. A sprinkle of toasted pine nuts or freshly grated Parmesan elevates the dish to restaurant quality. Pair with a chilled glass of sparkling water infused with fresh herbs to balance the smoky, savory notes.
| Nutrient | Per Serving |
|---|---|
| Calories | 430 kcal |
| Protein | 35 g |
| Carbohydrates | 25 g |
| Fat | 20 g |
Looking for more easy sheet pan inspirations? Check out our Roasted Vegetable Sheet Pan Dinner for a vegetarian twist. For evidence-based cooking insights, visit the Serious Eats resource.
Q&A
One-Pan Chicken Feast: Easy Sheet Pan Meal Magic - Q&A
Q1: What makes a one-pan chicken feast such a special meal?
A1: The magic lies in its simplicity and soul-satisfying flavor.By roasting everything together on one sheet pan, the chicken and veggies cook in harmony, allowing their juices and seasonings to mingle and create a beautifully balanced dish. It’s an effortlessly elegant meal that turns busy weeknights into cozy culinary celebrations.
Q2: How do I choose the best vegetables for a sheet pan chicken dinner?
A2: Go for sturdy, roasting-kind veggies that can handle the heat without turning mushy. Think vibrant carrots, earthy potatoes, sweet bell peppers, tender broccoli, and even tart cherry tomatoes. The key is choosing veggies with similar cooking times or adding quicker-cooking ones later in the roasting process.
Q3: what’s the secret to crispy, golden chicken skin in a sheet pan meal?
A3: Patting the chicken dry before seasoning is essential-it removes excess moisture that hinders crispiness. A drizzle of olive oil or a brush of melted butter helps promote browning, and roasting at a high temperature ensures that irresistible crunch, while locking in juicy tenderness.
Q4: Can I customize the flavor profile of my one-pan chicken feast?
A4: Absolutely! The beauty of this dish is its versatility. Whether you prefer a Mediterranean twist with rosemary, garlic, and lemon zest, a smoky paprika and cumin blend, or a fresh herb medley with thyme and oregano, your seasoning palette can roam free. Experiment to find your signature magic.
Q5: How can I prevent my veggies from turning soggy when cooking alongside chicken?
A5: Timing and arrangement are your friends hear. Place denser vegetables that need longer roasting closer to the chicken, and add more delicate ones later in the last 10-15 minutes. Also, spreading everything out on the pan ensures even heat circulation and keeps veggies beautifully roasted rather of steamed.
Q6: Is a sheet pan meal healthy and balanced?
A6: Yes! This one-pan wonder offers a perfect balance of lean protein from chicken and nutrient-packed vegetables, all cooked with minimal oil. Plus, roasting preserves vitamins and minerals while enhancing flavor-making it an ideal wholesome dinner choice.
Q7: What’s a good way to serve or garnish the one-pan chicken feast?
A7: A sprinkle of fresh herbs – like parsley, basil, or chives - adds a bright finishing touch. For a pop of color and texture, grate some lemon zest over the top or drizzle with a garlic-infused olive oil. Serving alongside a simple grain like quinoa or couscous can transform this solo act into a full-fledged feast.Q8: Can I prep the ingredients ahead of time?
A8: Definitely! You can season the chicken and chop your veggies in advance, storing them separately in the fridge.When ready to cook, just arrange everything on the sheet pan and pop it in the oven-making dinner both quick and stress-free.
Dive into the ease and enchantment of a one-pan chicken feast and let this simple sheet pan meal bring magic to your table!
To wrap It Up
As the aroma of your one-pan chicken feast settles and the last bite is savored, it’s clear that simplicity and flavor can coexist beautifully on a single sheet pan. This magic of minimal cleanup paired with maximum taste transforms weeknight dinners into effortless celebrations. Whether you’re a busy cook or a culinary beginner, embracing the ease of one-pan meals opens the door to countless delicious possibilities. So next time you crave a hearty, home-cooked meal without the fuss, remember: sometimes, all you need is one pan-and a little bit of kitchen magic.
]]>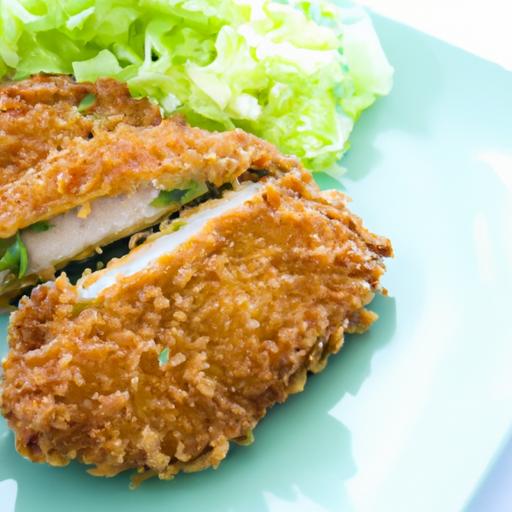
Crafting the Perfect Crispy Chicken Katsu for Meal Prep
Power-Packed Chicken Katsu Curry invites you to create a meal that’s as exhilarating to make as it is indeed comforting to eat. This classic Japanese-inspired dish blends the perfect crispy, golden fried chicken katsu with a rich, flavorful curry sauce-ideal for anyone craving a hearty yet approachable meal prep option. Originating from Japanese yoshoku cuisine,chicken katsu curry balances textures and bold tastes,making it a global favorite. Whether it’s your first time or your fiftieth, this recipe will guide you through crafting irresistibly crunchy chicken strips fit for busy weekdays or weekend feasts.
Prep and Cook Time
- Preparation: 20 minutes
- Cooking: 25 minutes
- Total: 45 minutes
Yield
serves 4 generous portions, perfect for meal prep lunches or dinners.
Difficulty Level
Medium-requires some frying skills but fully approachable with clear guidance.
Ingredients
- For the chicken Katsu:
- 4 boneless, skinless chicken breasts (about 6 oz each), pounded to ½ inch thickness
- 1 cup all-purpose flour, sifted
- 2 large eggs, beaten
- 1 ½ cups panko breadcrumbs
- 1 tsp kosher salt
- ½ tsp freshly ground black pepper
- Vegetable oil for frying (about 2 cups)
- For the Curry Sauce:
- 2 tbsp vegetable oil
- 1 medium onion, finely chopped
- 2 cloves garlic, minced
- 1 medium carrot, grated
- 2 tbsp Japanese curry powder or roux
- 2 tbsp all-purpose flour
- 3 cups chicken broth
- 1 tbsp soy sauce
- 1 tsp honey or maple syrup
- Salt and pepper to taste
- To Serve:
- Steamed Japanese short-grain rice (about 4 cups)
- Thinly sliced green onions or fresh parsley (optional garnish)
Instructions
- Prepare the Chicken: Season the chicken breasts evenly with salt and pepper. Set three shallow dishes: one with flour,one with beaten eggs,and one with panko breadcrumbs.
- Coat the Chicken: Dredge each chicken breast first in flour, shaking off excess. Next, dip in the beaten eggs, and finally press firmly into panko breadcrumbs, ensuring a full, even coating.
- Heat the oil: Pour vegetable oil into a large skillet to a depth of ½ inch. Heat over medium heat until a breadcrumb dropped in sizzles instantly (about 350°F or 175°C).
- Fry the Chicken: Carefully place the coated chicken breasts in the hot oil. Fry for about 3-4 minutes per side or until the crust is golden brown and crisp. Use tongs to turn gently. Avoid overcrowding the pan-fry in batches if necessary.
- Drain and Rest: Transfer cooked katsu to a wire rack or paper towel-lined plate to drain excess oil. Let rest 5 minutes before slicing into fingers or strips.
- Make the Curry Sauce: In a separate saucepan, heat 2 tbsp of vegetable oil over medium heat. Sauté the onions until soft and translucent, about 5 minutes. Add garlic and grated carrot; cook for another 2 minutes, stirring.
- Add Curry Roux: Sprinkle in curry powder and flour; stir constantly for 1-2 minutes to form a roux and avoid lumps.
- Simmer the Sauce: Gradually whisk in chicken broth, bringing the mixture to a gentle boil. Reduce heat and simmer for 10-15 minutes until thickened, stirring frequently.
- Finish the Curry: stir in soy sauce and honey.season with salt and pepper to taste.Remove from heat once the sauce reaches a luscious, velvety consistency.
- Assemble and serve: Spoon steamed rice onto plates or meal prep containers. lay sliced chicken katsu on top or beside the rice. generously ladle curry sauce over the dish. Garnish with sliced green onions or parsley for a fresh pop of color and flavor.
Tips for Success: Perfect Crispy Chicken Katsu Every Time
- Pound Evenly: Use a meat mallet or rolling pin to pound chicken breasts uniformly-this ensures speedy, even cooking.
- Panko Mastery: Press the chicken firmly into panko to create a thick,crunchy crust. For added flavor, try toasting the panko lightly before coating.
- Oil Temperature Is key: Keep your frying oil steady around 350°F. If it’s too cool, the katsu absorbs oil and becomes soggy. Too hot, and it burns before the inside cooks through.
- Make Ahead: Prepare chicken and curry sauce separately, then store chilled. Reheat in the oven or on a skillet to maintain crispiness-avoid microwaving the katsu directly.
- Vegan Variation: Swap chicken for thick slices of firm tofu or eggplant, following the same breading and frying technique.
Serving Suggestions
For a visually stunning plating, slice chicken katsu into neat strips and fan out over a mound of fluffy steamed rice. Pour warm curry sauce generously but carefully around the edges, so the katsu stays crisp.Garnish with thinly sliced green onions or a sprinkle of toasted sesame seeds.Pair with a crunchy Asian slaw or pickled ginger on the side for an exciting contrast that wakes the palate with every bite.
| Nutrient | Per Serving |
|---|---|
| Calories | 520 kcal |
| Protein | 38 g |
| carbohydrates | 45 g |
| Fat | 18 g |

Looking for more flavorful meal prep ideas? Dive into our Easy Japanese Meal Prep Recipes to keep your lunches exciting. For further depth on authentic japanese curry techniques, check out this informative guide from Serious Eats.
Mastering the Rich and Flavorful curry Sauce from Scratch
Power-Packed Chicken Katsu Curry begins with -it’s the soul of the dish that elevates this Japanese classic to a hearty, comforting meal perfect for meal prep. This sauce boasts a harmonious balance of umami spices and a velvety texture, inviting you to create a kitchen aroma that’s warming and intoxicating. Crafting this curry sauce yourself means every bite bursts with freshness and personality, no shortcuts, just pure culinary satisfaction.
Prep and Cook Time
- preparation: 15 minutes
- Cooking: 40 minutes
- Total: 55 minutes
Yield
Serves 4 hearty portions
Difficulty Level
Medium - approachable for home cooks ready to deepen their technique
Ingredients
- 2 tbsp vegetable oil (neutral, such as canola or sunflower oil)
- 1 large onion, finely diced
- 2 cloves garlic, minced
- 1 tbsp fresh ginger, grated
- 2 medium carrots, peeled and diced
- 1 large potato, peeled and chopped into small cubes
- 3 tbsp all-purpose flour
- 2 tbsp mild curry powder (adjust to taste)
- 1 tbsp garam masala
- 1 tsp turmeric powder
- 3 cups chicken broth (low sodium preferred)
- 1 tbsp soy sauce
- 1 tbsp honey or maple syrup
- 1 tsp Worcestershire sauce (vegetarian-friendly if preferred)
- Salt and freshly ground black pepper, to taste
Instructions
- Heat the oil in a large saucepan over medium heat.Once shimmering, add the finely diced onion and sauté until soft and golden, about 8 minutes. Stir often to avoid burning.
- Add the garlic and ginger and cook for another 1-2 minutes until fragrant.
- Incorporate the diced carrots and potatoes, stirring well to combine. Cook for 5 minutes, allowing the vegetables to soften slightly while absorbing the aromatic base.
- Sprinkle the flour over the vegetables. Stir constantly for 2 minutes to form a roux-this step thickens the sauce and builds a subtle nuttiness.
- Mix in the curry powder, garam masala, and turmeric, ensuring even coating. Sauté the spices for another 1-2 minutes to bloom their flavors.
- Gradually pour in the chicken broth,stirring continuously to avoid lumps. Bring to a gentle simmer.
- Add the soy sauce, honey, and Worcestershire sauce and stir to integrate these layers of flavor.
- Allow the curry to simmer on low heat for 20-25 minutes, stirring occasionally, until the sauce thickens and the vegetables are tender to the bite.
- Using an immersion blender or regular blender, carefully puree the sauce until smooth but still slightly textured for body. Adjust seasoning with salt and pepper.
- Your power-packed curry sauce is now ready to complement your crispy chicken katsu, transforming the dish into an unforgettable experience!
Tips for Success
- For an extra depth of flavor: Roast the vegetables briefly before sautéing to enhance natural sweetness.
- Thickness control: If the sauce thickens too much, thin it out with a splash of water or broth. Conversely, simmer longer if too thin.
- Make-ahead magic: The sauce improves overnight as flavors meld. Refrigerate in an airtight container for up to 3 days, or freeze for 1 month.
- Substitution advice: For a gluten-free version, replace all-purpose flour with chickpea flour or cornstarch slurry.
- Spice variation: Adjust curry powder to taste-mild for family-friendly, more robust for heat lovers.
Serving Suggestions
This sumptuous sauce beautifully blankets your golden, crispy chicken katsu.Serve it alongside fragrant steamed jasmine rice or even cauliflower rice for a lighter option. Garnish with freshly chopped green onions and a sprinkle of toasted sesame seeds to add vibrant color and a textural pop. A side of pickled ginger or crisp shredded cabbage salad balances richness with brightness. for an extra pop of umami,add a drizzle of Japanese katsu curry sauce variations after plating.

| Nutrient | Per Serving |
|---|---|
| Calories | 320 kcal |
| Protein | 8 g |
| Carbohydrates | 42 g |
| Fat | 10 g |
For those ready to go beyond the curry sauce, explore our crispy chicken katsu recipe to complete your power-packed meal prep perfectly.
Essential Tips for Storing and Reheating Your Chicken Katsu Curry
Power-Packed chicken Katsu Curry is not just a meal; it’s an experience-a perfect fusion of crispy, golden chicken cutlets paired with a rich, velvety Japanese curry sauce. Originating from Japan, this dish has captivated food lovers worldwide, becoming a beloved comfort food that can easily be made ahead for busy weekdays. Whether you’re prepping for a week of delicious lunches or craving a hearty dinner that reheats without losing its magic, mastering the art of storing and reheating this dish ensures you enjoy its full flavor and texture every time.
Prep and Cook Time
Preparation: 20 minutes | Cooking: 30 minutes | Total Time: 50 minutes
yield
Serves 4 generous portions
Difficulty Level
Medium - ideal for confident cooks eager to impress with meal prep finesse
Ingredients
- 4 boneless, skinless chicken breasts, pounded to even thickness
- 1 cup all-purpose flour, sifted
- 2 large eggs, beaten
- 1 ½ cups panko breadcrumbs
- vegetable oil, for frying (about 1 inch deep)
- 2 large onions, finely chopped
- 2 medium carrots, peeled and diced
- 3 cloves garlic, minced
- 1 tbsp ginger, freshly grated
- 3 tbsp curry powder
- 2 tbsp tomato paste
- 500 ml chicken stock
- 1 tbsp soy sauce
- 1 tbsp honey
- Salt and freshly ground black pepper, to taste
- Steamed white rice, to serve
- Chopped fresh parsley or scallions, for garnish
Instructions
- Prepare the chicken katsu: Season each chicken breast with salt and pepper. Dredge the chicken pieces first in the flour, shaking off excess, then dip into the beaten eggs, and finally coat evenly with panko breadcrumbs. Press gently to adhere well.
- Heat oil in a deep skillet over medium heat. Once shimmering, carefully fry the breaded chicken until golden brown and cooked through, about 4-5 minutes per side. Transfer to a wire rack to retain crispiness and drain excess oil.
- Make the curry sauce: In a large saucepan, sauté onions and carrots until softened and translucent, about 8 minutes. Stir in garlic and ginger – cook for 1 minute until fragrant.
- Add curry powder and tomato paste, stirring constantly for 2 minutes to bloom the spices.
- Pour in chicken stock, soy sauce, and honey, then bring to a simmer. Cook, stirring occasionally, until the sauce thickens and vegetables are tender, about 15-20 minutes. Adjust seasoning with salt and pepper.
- Slice the chicken katsu into thick strips and ladle the curry sauce over cooked steamed rice. Place sliced chicken atop the curry, garnishing with fresh parsley or scallions.
To preserve the crispy allure of your Power-Packed Chicken Katsu Curry when storing, separate the chicken cutlets from the curry sauce. Wrap the chicken katsu individually in parchment or paper towels to absorb moisture, then place in an airtight container. Store the curry sauce in a separate container to prevent sogginess. Refrigerate both parts within two hours of cooking, and consume within 3 days for optimal freshness.
When reheating, the secret lies in restoring the katsu’s crunch and warming the curry without compromising the textures. Reheat the curry sauce gently on the stovetop over low heat until warm and slightly thickened, stirring occasionally to prevent sticking.For the chicken, avoid microwaving, which can soften the crust; rather, reheat cutlets on a wire rack in a preheated oven at 350°F (175°C) for 8-10 minutes to revive crispness.
For a speedy lunch, consider microwaving the curry sauce with steamed rice and then briefly popping the sliced chicken katsu in a toaster oven or skillet to crisp - an effortless way to replicate the freshly made experience.
Freeze cooked chicken katsu and curry separately for up to one month by tightly wrapping each and using freezer-safe containers. Defrost overnight in the fridge before reheating as described. This method keeps your meal just as flavorful and visually enticing after thawing.
Remember, presentation is key-even after reheating! Arrange slices of chicken atop the curry, drizzle with a little extra soy sauce or sriracha for a zing, and sprinkle with sesame seeds or scallions to elevate your Power-Packed Chicken Katsu Curry to a restaurant-worthy plate.
Chef’s notes and Tips for Success
- Panko is your best friend: The light,airy texture of Japanese breadcrumbs keeps katsu irresistibly crunchy.
- Double dredging: For extra thick, crunchy coating, dip chicken back into the eggs and panko a second time before frying.
- Make curry sauce ahead: The sauce often tastes even better the next day, making this meal perfect for meal prep.
- Use a thermometer: Fry chicken until it reaches an internal temp of 165°F (74°C) for juiciest results.
- Rice tip: Use freshly steamed Japanese short-grain rice or sushi rice for authenticity and optimal texture.
Serving Suggestions
Serve your Power-Packed Chicken Katsu Curry on a bed of fluffy steamed rice with a side of pickled ginger or crunchy cabbage slaw to brighten the palate. A simple drizzle of tonkatsu sauce or a scatter of toasted sesame seeds adds depth and enhances the vibrant presentation. For an easy weeknight dinner,pair with steamed greens or a crisp cucumber salad for balance and color.

| Nutrient | Per Serving |
|---|---|
| Calories | 650 kcal |
| Protein | 45 g |
| Carbohydrates | 60 g |
| Fat | 25 g |
For additional meal prep inspiration, check out our guide on Easy Weeknight Dinners. To deepen your understanding of Japanese curry origins and variations, visit Japan-Guide.com.
Creative Variations to Elevate Your Weekly Meal Prep Routine
Power-Packed Chicken Katsu Curry is not just a meal; it’s an invitation to bring vibrant flavors and satisfying textures into your weekly meal prep. Originating from Japanese comfort cuisine, this dish melds the crispy golden chicken katsu with a rich, aromatic curry sauce that’s both soothing and deeply flavorful. Bringing this dish into your meal prep routine means embracing a fantastic balance of protein, spice, and crunch – perfect for those who crave something hearty yet wholesome. Let’s dive into exciting ways to personalize this classic and keep your lunches fresh and inspiring.
Prep and Cook Time
- Prep Time: 20 minutes
- Cook Time: 25 minutes
- Total Time: 45 minutes
Yield
serves 4 hearty portions,ideal for batch preparation and portion control throughout the week.
Difficulty level
Medium – approachable for most home cooks, with clear steps to get that perfectly crispy coating and luscious curry sauce.
Ingredients
- For the chicken Katsu:
- 4 boneless, skinless chicken breasts
- 1 cup all-purpose flour, sifted
- 2 large eggs, beaten
- 1 ½ cups panko breadcrumbs
- ½ tsp salt
- ¼ tsp black pepper
- Vegetable oil, for frying
- For the Curry Sauce:
- 2 tbsp unsalted butter
- 1 medium onion, finely chopped
- 2 cloves garlic, minced
- 1 tbsp ginger, grated
- 2 tbsp all-purpose flour
- 3 cups low-sodium chicken broth
- 1 tbsp mild curry powder
- 1 tsp garam masala
- 1 tsp soy sauce
- 1 tsp honey or maple syrup
- salt and pepper, to taste
- Optional Garnishes:
- Chopped scallions
- Sesame seeds
- Fresh cilantro
- Prepare the chicken: Butterfly each chicken breast by slicing horizontally but keeping them hinged. Pound lightly to even thickness (about ½ inch). Season with salt and pepper.
- Set up the dredging station: Place the flour in one shallow dish, beaten eggs in another, and panko breadcrumbs in a third.
- Coat the chicken: Dredge each piece first in flour, shaking off excess. Dip in the egg wash, then press firmly into the panko breadcrumbs until evenly coated. Set aside on a plate.
- Fry the chicken: Heat vegetable oil in a deep skillet over medium heat until shimmering (around 350°F). carefully fry the cutlets for 3-4 minutes per side, or until golden and cooked through. Drain on paper towels.
- Make the curry sauce: In a separate saucepan, melt the butter over medium heat. add onions and sauté until translucent and fragrant, about 5 minutes. Stir in garlic and ginger, cooking 1 minute more.
- Create the roux: Sprinkle flour over the softened onions. Stir constantly to cook the raw flour taste out, about 2 minutes, until light golden.
- Add broth and spices: Gradually whisk in the chicken broth to avoid lumps. Stir in curry powder, garam masala, soy sauce, and honey. Bring to a simmer and cook until sauce thickens, about 10 minutes.Season with salt and pepper.
- serve: Slice the chicken katsu and pour generous amounts of curry sauce over the top. Garnish with scallions, sesame seeds, or cilantro for added freshness.
- Crunch Factor: For ultra-crispy chicken katsu, double-dip the panko layer by repeating the egg and breadcrumb steps. This also helps seal in moisture.
- Spice Customization: adjust the curry powder to your spice tolerance – or try adding a dash of smoked paprika for a smoky undertone.
- Make-Ahead Magic: prepare the curry sauce and chicken separately. Store in airtight containers in the fridge for up to 4 days. Reheat gently on the stove to preserve crispiness.
- Gluten-Free Variation: Use rice flour and gluten-free panko breadcrumbs for a gluten-free alternative that doesn’t compromise texture.
- Vegetable Boost: Stir roasted sweet potatoes, steamed broccoli, or sautéed mushrooms into your curry sauce for added nutrition and color.
Instructions
Tips for Success
Serving Suggestions
power-Packed Chicken Katsu Curry shines when served over fluffy steamed jasmine rice or sticky short-grain rice.For a lighter twist, opt for cauliflower rice or soba noodles. A side of pickled ginger or crunchy shredded cabbage salad adds a refreshing balance. Drizzle with a little extra soy sauce or a squeeze of fresh lime to brighten the dish. Consider topping with a soft-boiled egg for richness.
| Nutrient | Per Serving |
|---|---|
| calories | 520 kcal |
| Protein | 42 g |
| Carbohydrates | 45 g |
| Fat | 18 g |
Excited to explore more bold and wholesome meal prep ideas? Check out our Hearty Asian-Inspired Batch Cooking guide for a flavorful week ahead. For detailed culinary science behind perfect curry roux,visit Serious Eats.
Q&A
Q&A: Power-Packed Chicken Katsu Curry – Meal Prep Made Easy
Q1: What makes Chicken Katsu Curry a power-packed meal?
A1: Chicken Katsu Curry combines tender, crispy chicken cutlets with a rich, flavorful japanese curry sauce packed with veggies and spices. It’s a balanced meal offering protein, vital nutrients, and comforting carbs-all in one bowl. This hearty combo fuels your body and satisfies your taste buds, making it perfect for an energizing lunch or dinner.
Q2: how can chicken Katsu Curry simplify meal prep for busy weeks?
A2: The dish’s components-breaded chicken, curry sauce, and rice-can be made in batches ahead of time. Prepare the chicken and sauce on the weekend, portion them out, and refrigerate or freeze individual servings.When ready to eat, simply reheat, add fresh greens or steamed veggies, and enjoy a restaurant-quality meal in minutes.
Q3: What’s the secret to achieving crispy chicken katsu without deep frying?
A3: Baking or air-frying the breaded chicken cutlets offers a healthier alternative to deep frying while still delivering crispiness. Using panko breadcrumbs adds extra crunch, and a light mist of oil before cooking helps achieve that golden crust-perfect for meal preppers aiming for ease and texture without the mess.
Q4: Can the Japanese curry sauce be customized for different dietary needs?
A4: Absolutely! The sauce’s base is typically a blend of onions, carrots, potatoes, and curry roux, which you can tweak to suit vegan or gluten-free needs by using plant-based butter and gluten-free curry blocks or spice blends. Adding extra vegetables like mushrooms or spinach boosts fiber and nutrients without sacrificing flavor.
Q5: How long does Chicken Katsu Curry keep in the fridge, and can it be frozen?
A5: Stored in airtight containers, cooked Chicken Katsu Curry lasts about 3-4 days in the fridge. It also freezes beautifully-just portion the chicken and sauce separately in freezer-safe containers. When freezing, omit rice for best texture; prepare fresh or keep separately frozen. Reheat gently to maintain crispness and warmth.
Q6: What side dishes or accompaniments work well with Chicken Katsu Curry?
A6: Simple steamed rice is classic, but you can swap in cauliflower rice or quinoa for a different twist. Fresh pickled vegetables, shredded cabbage salad, or lightly steamed green beans provide a zingy crunch and freshness that balance the rich curry flavors, rounding out your power-packed meal.
Q7: How can beginners master the Chicken Katsu Curry at home without hassle?
A7: Start by prepping each element separately-coat and bake the chicken while simultaneously simmering the curry sauce. Use pre-made curry roux for simplicity or create your own spice blend for a personal touch. Keep the chopping straightforward by using common vegetables, and set a timer to avoid overcooking. Practice makes perfect, and the results are more than worth it!
This Q&A guides you through the essentials of creating a flavorful, nourishing Chicken Katsu Curry perfect for meal prep, with tips to keep cooking efficient, healthy, and delicious-no fuss, just pure satisfaction on your plate.
Wrapping Up
As the aroma of golden, crispy chicken katsu mingles with the rich, velvety curry sauce, you realize that meal prep doesn’t have to be mundane-it can be a flavorful adventure. This power-packed Chicken katsu Curry isn’t just a dish; it’s your new secret weapon for delicious, hassle-free meals that fuel your busy life.Whether you’re batch-cooking for the week or simply craving a comforting dinner, this recipe promises convenience without compromise. So go ahead, roll up your sleeves, and bring a taste of Japan to your kitchen-meal prep made easy never tasted so good.
]]>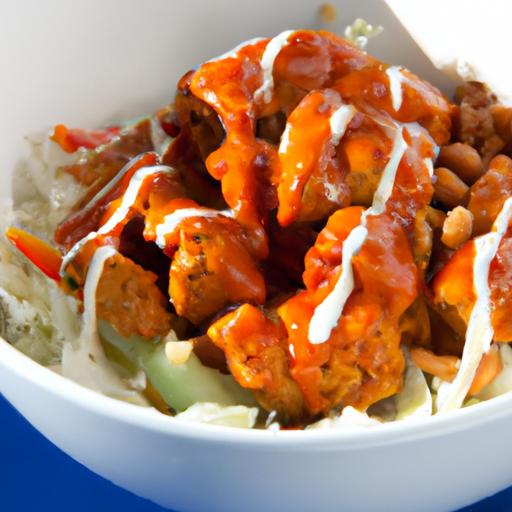
Understanding the Bold Flavors behind the Spicy Buffalo Chicken Bowl
Spicy Buffalo Chicken Bowl with Creamy Ranch Delight offers an exhilarating dance of flavors that instantly warms the soul and ignites your taste buds. This vibrant dish celebrates the timeless appeal of buffalo sauce – a tangy, fiery concoction born in Buffalo, New York – combined with tender, juicy chicken, all balanced by the cooling, silky smoothness of a homemade ranch dressing. It’s more than just a meal; it’s a harmonious clash of heat and creaminess that delivers every bite with boldness and comfort.
What makes this bowl truly special is it’s versatility and the clever layering of textures and flavors. From the crispness of fresh vegetables to the tender chicken coated in a mouthwatering spicy glaze, each element contributes to a sensory experience that’s both approachable and exciting. Whether you’re craving a quick weeknight dinner or an impressive dish for guests, this recipe promises satisfaction without fuss.
Prep and Cook Time
- Planning: 15 minutes
- Cooking: 20 minutes
- Total Time: 35 minutes
Yield
Serves 4 generous portions
Difficulty Level
Easy – perfect for those looking to elevate thier weeknight dinners with minimal effort
Ingredients
- 1 lb boneless,skinless chicken breasts,cut into bite-sized pieces
- 2 tablespoons olive oil
- 1/2 teaspoon smoked paprika
- 1/2 teaspoon garlic powder
- 1/4 teaspoon onion powder
- Salt and freshly ground black pepper,to taste
- 1/2 cup buffalo sauce (preferably homemade or a quality bottled version)
- 2 cups cooked jasmine or basmati rice
- 1 cup shredded romaine lettuce
- 1/2 cup diced celery
- 1/2 cup shredded carrots
- 1/4 cup blue cheese crumbles (optional)
- For the Creamy Ranch delight:
- 1/2 cup Greek yogurt
- 1/4 cup mayonnaise
- 1 tablespoon fresh chopped chives
- 1 teaspoon dried dill weed
- 1/2 teaspoon garlic powder
- 1/2 teaspoon onion powder
- 1 tablespoon fresh lemon juice
- Salt and pepper to taste
Instructions
- Prepare the chicken: In a medium bowl,toss the chicken pieces with olive oil,smoked paprika,garlic powder,onion powder,salt,and black pepper until evenly coated.
- Cook the chicken: Heat a large skillet over medium-high heat.Add the seasoned chicken in a single layer and sauté until golden brown and cooked through, about 6-8 minutes. Stir occasionally to ensure even cooking.
- Coat the chicken in buffalo sauce: Reduce heat to low, pour in the buffalo sauce, and gently toss the chicken to coat.Simmer for 2 minutes, allowing the sauce to soak into every piece.
- Prepare the creamy ranch: While the chicken cooks, whisk together Greek yogurt, mayonnaise, chives, dill, garlic powder, onion powder, lemon juice, salt, and pepper in a small bowl. Adjust seasoning according to taste and chill until serving.
- Assemble the bowl: divide the cooked rice into four serving bowls. Layer with shredded lettuce, diced celery, shredded carrots, and buffalo chicken on top.
- Finish and garnish: Drizzle the creamy ranch delight evenly over each bowl and sprinkle with blue cheese crumbles if desired. For a vibrant finish, add freshly chopped chives or a dash of smoked paprika.
Tips for Success
- Balance the heat: Adjust the buffalo sauce quantity to match your spice tolerance; start with less and add more for a livelier kick.
- Make-ahead ranch: Prepare the creamy ranch dressing up to 2 days in advance to let the flavors meld beautifully in the fridge.
- Substitutions: Use boneless, skinless chicken thighs for a juicier texture or swap rice with quinoa or cauliflower rice for a lighter option.
- Freshness matters: Crisp vegetables like celery and carrots bring a refreshing crunch that complements the spicy chicken perfectly.
- Leftovers tip: Store components separately; reheat chicken with extra sauce and drizzle fresh ranch before serving to maintain texture and flavor.
Serving Suggestions
For a complete meal, pair this bold and spicy bowl with a chilled cucumber salad or classic coleslaw to counterbalance the bold buffalo heat.A garnish of thinly sliced green onions or fresh cilantro adds a pop of color and freshness. Serve with tortilla chips or warm pita wedges for added crunch and to scoop every delicious bite.

| Nutrient | Per Serving |
|---|---|
| Calories | 480 kcal |
| Protein | 38 g |
| Carbohydrates | 35 g |
| Fat | 18 g |
Discover more flavor-packed recipes like this in our Spicy chicken Recipes Guide and learn about the history of buffalo sauce at Bon Appetit.
Crafting the Perfect Balance with Creamy Ranch Delight
The Spicy Buffalo Chicken Bowl with Creamy Ranch Delight is a harmonious blend of bold, fiery flavors and soothing, cool creaminess that dances on your palate with every bite. This dish draws inspiration from classic American bar fare,reinvented for a wholesome,satisfying bowl that’s perfect for dinner any night of the week. The bright heat of buffalo sauce meets the lush softness of ranch dressing, creating a vibrant, crave-worthy experience that’s as visually stunning as it is indeed delicious. Whether you’re craving comfort food or looking to impress friends, this recipe brings irresistible flavor and texture contrast into a bowl brimming with fresh, colorful ingredients.
Prep and cook Time
- Preparation Time: 15 minutes
- Cooking Time: 20 minutes
- Total Time: 35 minutes
Yield
Serves 4 hearty portions
Difficulty Level
Easy – Perfect for home cooks of any skill level
Ingredients
- 1 lb boneless, skinless chicken breasts, cut into bite-sized pieces
- 1/2 cup buffalo sauce (choose your preferred level of heat)
- 1 tbsp olive oil
- 1 tsp smoked paprika
- 1/2 tsp garlic powder
- Salt and fresh ground black pepper, to taste
- 2 cups cooked brown rice or quinoa
- 1 cup shredded romaine lettuce
- 1/2 cup cherry tomatoes, halved
- 1/4 cup thinly sliced red onion
- 1/2 cup shredded sharp cheddar cheese
- 1/3 cup creamy ranch dressing
- 2 tbsp chopped fresh chives or green onions, for garnish
- Optional: celery sticks or cucumber slices to add extra crunch and freshness
Instructions
- Marinate the chicken: In a medium bowl, toss the chicken pieces with olive oil, smoked paprika, garlic powder, salt, and pepper until evenly coated. This seasoning builds a smoky base that complements the buffalo heat.
- Cook the chicken: Heat a large non-stick skillet over medium-high heat.Add the chicken and sauté until golden brown and cooked through, about 6-8 minutes. Stir occasionally for even cooking and to prevent sticking.
- Toss with buffalo sauce: Remove the skillet from heat and transfer the chicken to a bowl. Immediately mix in the buffalo sauce, coating every piece so the spicy flavor shines with a tangy kick.
- Prepare the bowls: Divide cooked brown rice or quinoa into four bowls as the hearty base.
- Layer the greens and veggies: Evenly distribute the shredded romaine, cherry tomatoes, and red onions over the grains for freshness and crunch.
- Add the buffalo chicken: Spoon the buffalo-coated chicken atop the bowls, ensuring each gets plenty of that vibrant, spicy goodness.
- Drizzle with creamy ranch: Generously drizzle ranch dressing over each bowl for the perfect creamy counterpoint to the heat.
- Final touches: Sprinkle shredded cheddar cheese and garnish with chopped chives or green onions to add color and a mild oniony bite. Add celery or cucumber slices on the side for extra crispness if desired.
Tips for Success
- Adjust the heat: Want a milder dish? Use a milder buffalo sauce or reduce the amount. For extra fire,add a pinch of cayenne to the chicken seasoning.
- Make it creamy homemade: For authentic ranch, mix mayonnaise, sour cream, buttermilk, and herbs. This tangy freshness intensifies the creamy ranch delight.
- Meal prep amiable: Cook chicken and grains ahead; assemble bowls when ready. Store the creamy ranch separately to keep the bowls fresh and vibrant.
- Substitutions: Swap brown rice for cauliflower rice or quinoa for gluten-free variations without sacrificing texture or nutrition.
- Cheese options: Pepper jack or mozzarella nicely complement the spicy chicken and ranch dressing.
Serving Suggestions
Present this bowl in deep, wide dishes to showcase its colorful layers. A drizzle of extra ranch and a sprinkle of fresh herbs on top create a feast for the eyes. Pair with a crisp,cold glass of lemonade or sparkling water. For added texture contrast, serve with crunchy celery sticks or sliced bell peppers on the side.This dish is perfect for casual dinners, meal prep, or even an inviting lunch that feels indulgent but balanced.

| Nutrient | per Serving |
|---|---|
| Calories | 520 |
| Protein | 38g |
| Carbohydrates | 42g |
| Fat | 18g |
For a deeper dive into vibrant grain bowls,explore our Ultimate Grain Bowl Recipes. To learn more about the health benefits of chicken as a lean protein, check out this authoritative resource.
Essential Ingredients for an Irresistible Buffalo Chicken Experience
Spicy Buffalo Chicken Bowl with Creamy Ranch Delight starts its journey with a perfect balance of bold flavors and rich textures, bringing together the fiery kick of classic buffalo sauce and the soothing creaminess of ranch. This irresistible combination transforms simple ingredients into a crave-worthy meal, packing a punch of zest that awakens the senses. Inspired by game-day favorites and humble diners alike, this bowl is your go-to solution for an exciting, comforting dinner that’s both quick and satisfying.Whether you’re whipping up a weeknight dinner or hosting friends, the magic lies in the quality and harmony of the essential components that make every bite memorable.
Prep and Cook Time
- Prep Time: 15 minutes
- Cook Time: 20 minutes
- Total time: 35 minutes
Yield
Serves 4 hearty bowls
Difficulty Level
Easy – Perfect for cooks of all skill levels looking to impress with minimal fuss.
- 2 large boneless, skinless chicken breasts – Pounded evenly for quick, uniform cooking
- 1 teaspoon smoked paprika – Adds a gentle smokiness that complements the sauce
- Salt and freshly ground black pepper – To season perfectly
- 2 tablespoons olive oil – For searing with a golden crust
- 1/2 cup hot sauce (preferably Frank’s RedHot) – Classic buffalo heat base
- 3 tablespoons unsalted butter – Melted into the hot sauce for richness
- 1/4 cup plain Greek yogurt – Adds tang and creaminess to the homemade ranch
- 1/4 cup mayonnaise – Creates the smooth, velvety texture of the ranch dressing
- 1 teaspoon garlic powder – Intensifies flavor without overpowering
- 1 teaspoon dried dill – For freshness in ranch
- 1 tablespoon fresh chives, chopped – Adds mild onion notes and color
- 1 cup cooked jasmine rice or cauliflower rice – The hearty base for the bowl
- 1 cup shredded romaine lettuce – Crisp, refreshing crunch
- 1/2 cup diced celery – Classic pairing with buffalo chicken for balance
- 1/4 cup crumbled blue cheese (optional) – For those who love conventional buffalo flavors
- Fresh lemon juice (optional) – To brighten the ranch dressing
Step-by-Step Instructions
- Season the chicken breasts evenly with smoked paprika, salt, and pepper. Set aside while you prepare the sauce.
- In a small saucepan, gently melt the butter over low heat. Stir in the hot sauce until smooth and combined. Keep warm.
- Heat olive oil in a large skillet over medium-high heat. Sear the chicken breasts for 5-6 minutes each side, or until golden brown and cooked through (internal temp 165°F).Remove and let rest for 5 minutes before slicing into thin strips.
- Prepare the creamy ranch by whisking together Greek yogurt,mayonnaise,garlic powder,dried dill,chopped chives,and a squeeze of fresh lemon juice if using.Adjust salt to taste. Chill until ready to serve.
- Build the bowls by layering cooked jasmine rice or cauliflower rice at the bottom, followed by shredded romaine lettuce and diced celery for crunch.
- Top with sliced buffalo chicken, drizzling generously with warm buffalo sauce.
- Finish with dollops of creamy ranch and sprinkle crumbled blue cheese on top if desired for an authentic touch.
- Garnish with extra fresh chives or a celery stalk for visual appeal and added flavor contrast.
Tips for Success
- For perfectly juicy chicken, let the meat rest post-cooking before slicing to retain all those flavorful juices.
- If you prefer mild heat, reduce the amount of hot sauce slightly or add a splash of honey to balance the spice.
- Use homemade ranch dressing to avoid preservatives and tailor the creaminess and herbs to your liking.
- Substitute romaine with kale or spinach for a nutrient boost and different texture.
- Make ahead: Both buffalo sauce and ranch keep well in the fridge for up to 3 days, making this bowl ideal for quick meal prep.
Serving Suggestions
Serve this bowl in a vibrant ceramic bowl or rustic cast iron skillet for a fun, laid-back presentation that invites comfort. Pair with crispy baked sweet potato fries or crunchy carrot sticks on the side for a wholesome, colorful plate. A wedge of fresh lime or lemon alongside adds a zesty brightness that cuts through the richness beautifully. For an extra pop of color and texture, consider sprinkling toasted pepitas or sliced avocado on top.

| Nutrient | Per Serving |
|---|---|
| Calories | 480 kcal |
| protein | 38 g |
| Carbohydrates | 30 g |
| Fat | 22 g |
For more bold flavor inspiration, explore our Zesty Grilled Chicken Sandwich recipe and deepen your poultry repertoire. to understand more about the history behind buffalo sauce and its iconic flavor profile, check out this detailed overview from the Serious Eats kitchen.
Pro Tips for Elevating Your Spicy Bowl to Restaurant quality
The Spicy Buffalo Chicken Bowl with Creamy Ranch Delight is a vibrant celebration of bold flavors and comforting textures, bringing the iconic Buffalo wing experience into a wholesome, visually stunning bowl. This dish captures the perfect balance of fiery heat and cooling creaminess,ideal for those craving a deliciously satisfying meal that feels both indulgent and fresh. Inspired by classic American bar food but elevated through layers of fresh ingredients and masterful seasoning, this bowl transforms everyday ingredients into an exciting culinary adventure suited for any occasion.
Prep and Cook Time
- Preparation: 15 minutes
- Cooking: 20 minutes
- Total Time: 35 minutes
Yield
Serves 4 generous bowls, perfect for family dinners or meal prepping lunches.
Difficulty Level
Easy to Medium – approachable for home cooks yet impressive enough for guests.
Ingredients
- 1 lb boneless, skinless chicken breasts, cut into bite-sized pieces
- 1/2 cup Frank’s RedHot sauce or your favorite buffalo sauce
- 1 tbsp unsalted butter
- 1 tbsp olive oil
- 1 cup cooked brown rice or quinoa
- 1 cup shredded iceberg lettuce
- 1/2 cup diced celery
- 1/2 cup mini carrot sticks
- 1/4 cup chopped green onions
- 1/4 cup blue cheese or ranch dressing (for creamy ranch delight)
- 1 tsp garlic powder
- 1 tsp smoked paprika
- Salt and freshly cracked black pepper, to taste
- Optional garnish: chopped chives, fresh parsley, or toasted sesame seeds
Instructions
- Prepare the chicken: In a medium bowl, toss chicken pieces with garlic powder, smoked paprika, salt, and black pepper to evenly coat.
- Cook the chicken: Heat olive oil in a large nonstick skillet over medium-high heat. Add the chicken and sauté until golden brown and cooked through,about 7-9 minutes. Stir occasionally to avoid sticking.
- Add buffalo sauce: Melt the butter and stir it into the buffalo sauce. Pour the sauce mixture over the cooked chicken. Toss well so each piece is glistening in that iconic spicy glaze.Remove from heat.
- Assemble the bowls: Divide cooked brown rice or quinoa among four bowls. Layer shredded iceberg lettuce on top to add crunch and freshness.
- Top with buffalo chicken: Spoon the saucy chicken evenly over the greens.
- Add veggies: Scatter diced celery, mini carrot sticks, and chopped green onions over each bowl for vibrant texture and flavor contrast.
- Drizzle the creamy ranch delight: Spoon or drizzle blue cheese or ranch dressing over the bowl, adding cool and creamy notes that balance the heat.
- Finish with garnishes: Sprinkle fresh chives, parsley, or toasted sesame seeds for a pop of color and an elegant touch.
Chef’s Notes: Key Tips for Success
- Marinate ahead: For even deeper flavor, marinate chicken in buffalo sauce with spices for 30 minutes prior to cooking.
- use freshly cooked grains: Serving over freshly cooked brown rice or quinoa adds fantastic texture. For meal prep, reheat gently to maintain fluffiness.
- Balance heat with cooling elements: Don’t skip the creamy ranch delight! It’s essential for taming the spicy buffalo flavors and making the bowl approachable for all palates.
- customize veggies: Swap celery and carrots for bell peppers,cucumber ribbons,or even pickled red onions for an extra zing.
- Make it gluten-free: Ensure your buffalo sauce and ranch dressing are gluten-free to keep the bowl inclusive.
Serving Suggestions
Serve your bowl fresh and vibrant. For added visual appeal, use white or colorful ceramic bowls that contrast with the rich orange buffalo glaze. Enhance presentation with an extra drizzle of ranch dressing in a zigzag pattern and finish with a sprinkle of freshly cracked black pepper or smoked paprika on top.
Pair this bowl with a crunchy side – think celery sticks or a crisp kale salad – and a cold beverage like iced tea or a bright lemonade to complement the spice. Perfect for a casual dinner or a game-day snack station, this dish shines with its bold colors and layered tastes.

| Nutrient | per Serving |
|---|---|
| Calories | 420 kcal |
| Protein | 38 g |
| Carbohydrates | 32 g |
| Fat | 12 g |
For more tips on balancing heat and creaminess in dishes, explore our guide to creamy dips and spicy sauces. To dive deeper into the history and impact of buffalo sauce in American cuisine,visit History.com’s Buffalo Wing History.
Q&A
Q&A: Spicy Buffalo Chicken bowl with Creamy ranch Delight
Q1: What inspired the creation of the Spicy Buffalo Chicken Bowl with Creamy Ranch Delight?
A1: The inspiration comes from the beloved combination of fiery Buffalo sauce and cool, tangy ranch dressing. This bowl format reimagines the classic Buffalo chicken wings experience into a hearty, nutritious meal by layering bold flavors, fresh veggies, and a creamy finish, perfect for those craving comfort with a kick.
Q2: What are the key ingredients in this Spicy buffalo Chicken Bowl?
A2: The heart of the dish is tender, juicy chicken tossed in homemade spicy buffalo sauce. It’s served atop a base of fluffy rice or quinoa,complemented by crisp celery,shredded carrots,and crunchy lettuce for freshness. The bowl is finished with a generous drizzle of creamy ranch dressing that balances the heat perfectly.
Q3: How spicy is the Buffalo sauce, and can it be adjusted?
A3: The Buffalo sauce offers a medium heat level-vibrant and peppery without overwhelming the palate. It’s made from a mix of hot sauce, butter, and a touch of garlic. For those who prefer milder flavors,simply reduce the hot sauce or add extra butter to mellow the spice.
Q4: Is the creamy ranch dressing homemade or store-bought?
A4: while store-bought ranch works well for convenience, making ranch dressing at home really elevates the bowl. A blend of mayonnaise, buttermilk, fresh herbs like dill and chives, garlic powder, and a squeeze of lemon juice creates a fresh, tangy dressing that perfectly complements the spicy chicken.
Q5: Can this recipe accommodate dietary preferences or restrictions?
A5: Absolutely! Swapping chicken for grilled tofu or tempeh makes it vegetarian-friendly while still packing plenty of flavor. For a lighter version, opt for Greek yogurt in your ranch dressing to cut down on calories without sacrificing creaminess. The bowl can also be made gluten-free by using gluten-free hot sauce and ensuring the base grains fit the dietary needs.
Q6: What sides or toppings would enhance the Spicy Buffalo Chicken Bowl?
A6: Avocado slices add a rich, buttery contrast to the spice, while pickled red onions lend a tangy crunch. For extra texture and flavor, sprinkle toasted pumpkin seeds or chopped green onions on top.A wedge of lime on the side can add a zesty brightness at the diner’s discretion.
Q7: How long does it take to prepare the entire bowl?
A7: From start to finish, the Spicy Buffalo Chicken Bowl can be ready in about 30-40 minutes. This includes cooking the chicken, preparing the rice or quinoa base, chopping fresh veggies, and whipping up the ranch. It’s a weeknight-friendly recipe that doesn’t compromise on flavor or satisfaction.
Q8: Can this bowl be made ahead of time?
A8: Yes! You can prep the rice/quinoa and bake or grill the chicken a day in advance. Store components separately and assemble just before eating to keep textures fresh-especially the crunchy veggies and creamy ranch. This makes a fantastic meal prep option for busy days.
Q9: What makes this dish a balanced meal?
A9: This bowl strikes a nutritional balance by combining lean protein from the chicken,complex carbs from rice or quinoa,and plenty of fiber and vitamins from fresh vegetables. The creamy ranch adds satisfying fats without excess,making it a fulfilling and wholesome choice that delights all senses.
Q10: Any tips for achieving the perfect Buffalo chicken texture?
A10: To get juicy, tender chicken with a flavorful buffalo glaze, marinate the chicken pieces briefly in a splash of hot sauce and oil before cooking. Sear or grill on medium-high heat to lock in moisture, than toss quickly in warmed Buffalo sauce. Avoid overcooking to keep the chicken succulent and tender.
Wrapping Up
Bringing together the bold zest of spicy Buffalo chicken and the cool, soothing touch of creamy ranch, this bowl is more than just a meal-it’s a flavor-packed experience. whether you’re seeking a quick weeknight dinner or an impressive dish to share, the Spicy Buffalo Chicken Bowl with Creamy Ranch Delight strikes the perfect balance between heat and comfort. So next time you crave something vibrant yet satisfying, remember this recipe is ready to deliver a bowlful of boldness and bliss in every bite.Spice up your kitchen, and let the flavors dance!
]]>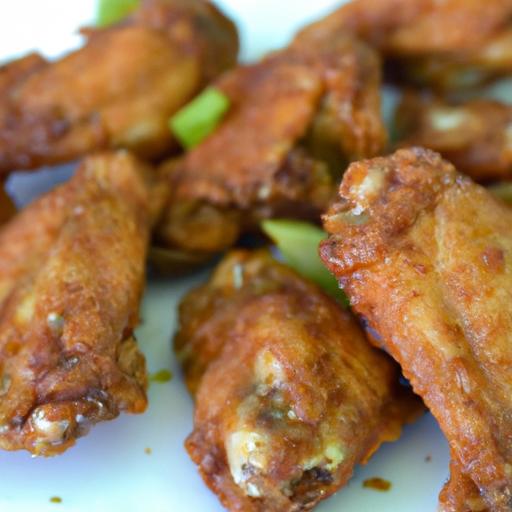
The perfect Balance of Flavor and Texture in Costco Chicken Wings
Costco chicken wings offer an irresistible combination of crispy exterior and juicy tenderness, making them a go-to for gatherings and weeknight treats alike. From their golden crunch to the perfectly seasoned meat inside, these wings capture the essence of comfort food elevated by impeccable texture and balanced flavor. whether you’re craving smoky BBQ tang or spicy heat, mastering the art of Costco chicken wings will transform your kitchen into a buzzing hub of delicious aromas and satisfied smiles.
Prep and Cook Time
Preparation: 15 minutes
Cooking: 30 minutes
Total time: 45 minutes
Yield
Serves 4-6
Difficulty Level
Easy to Medium – approachable even for home cooks looking to impress
Ingredients
- 2 pounds costco chicken wings, separated into flats and drumettes, skin-on and patted dry
- 1 cup all-purpose flour, sifted
- 1 teaspoon kosher salt
- 1 teaspoon smoked paprika
- ½ teaspoon garlic powder
- ½ teaspoon onion powder
- ½ teaspoon black pepper, freshly ground
- 1 teaspoon baking powder (aluminum-free)
- 2 tablespoons vegetable oil (for tossing)
- For the sauce: ½ cup hot sauce (such as Frank’s RedHot)
- 3 tablespoons unsalted butter, melted
- 1 tablespoon honey (optional for balanced sweetness)
- Fresh parsley, finely chopped for garnish
- Celery sticks and ranch or blue cheese dressing, for serving (optional)
Instructions
- Preheat your oven to 425°F (220°C). Line a baking sheet with parchment paper and place a wire rack on top – this setup allows air to circulate, keeping the wings crisp on all sides.
- Prepare the coating: In a large bowl, whisk together the all-purpose flour, kosher salt, smoked paprika, garlic powder, onion powder, black pepper, and baking powder.
- Dry the wings thoroughly with paper towels. Toss the wings in vegetable oil to coat evenly,then gradually dredge them in the flour mixture. Ensure each wing is lightly, but thoroughly, coated. Shake off any excess flour leftover.
- Arrange wings evenly on the wire rack. make sure they aren’t touching-this spacing is key for achieving that signature crunch.
- Bake wings for 25 to 30 minutes, flipping halfway through to encourage golden crispiness on every side. you’re aiming for a deep golden color with crispy skin but juicy meat inside.
- While wings bake, make the sauce: In a small saucepan over low heat, combine the hot sauce, melted butter, and honey. Stir until warm and completely blended,then remove from heat.
- Once the wings are done baking, quickly toss them in the sauce until evenly coated but not soggy.
- Serve immediately with fresh parsley sprinkled on top, accompanied by crunchy celery sticks and dipping sauces of your choice for a complete experience.
Tips for Success
- Patience on drying: Ensuring wings are dry before coating helps the flour- and baking powder-based crust stick better and crisp up.
- Baking powder boost: The baking powder raises the pH on the chicken skin, crisping it perfectly without deep frying.
- Wire rack advantage: Don’t skip this step-it elevates the wings, so hot air crisps evenly.
- Sauce timing: Toss wings in sauce just before serving to keep that prized crunch intact.
- Make ahead: You can bake wings up to 4 hours ahead and reheat in a 400°F oven for 5-7 minutes to restore crispness.
- Flavor swaps: Try swapping hot sauce for a tangy buffalo or smoky chipotle glaze for variety.
Serving suggestions
Present your crispy Costco chicken wings on a large platter lined with parchment paper for rustic charm. Garnish generously with fresh parsley to add a subtle herbal brightness. Serve alongside classic celery sticks and creamy ranch or blue cheese dressing to cool the bite.For a pop of color, include sliced red bell peppers or carrot sticks on the side. These wings also pair beautifully with a cold craft beer or a chilled sparkling lemonade for balanced refreshment.

| Nutrient | Per Serving (4 wings) |
|---|---|
| Calories | 320 kcal |
| Protein | 28 g |
| Carbohydrates | 8 g |
| Fat | 20 g |
For more crispy chicken inspiration, check out our Crispy Baked Chicken Recipes. Additionally, explore the science behind why baking powder crisps skin so beautifully at Serious Eats.
Expert Tips for Achieving Extra Crispy wings at Home
Costco chicken wings have earned a reputation as a crispy culinary gem, delighting both casual snackers and devoted foodies alike. Achieving that coveted golden crunch is a rewarding experience that transforms simple wings into crave-worthy bites. Whether you’re prepping for game day or a cozy night in, mastering the art of extra crispy wings at home will elevate your kitchen game and impress every guest at the table.
Prep and Cook Time
- Preparation: 15 minutes
- Marinating: 1 hour (optional but recommended)
- Cooking: 40 minutes
- Total Time: approximately 1 hour 55 minutes
Yield
Serves 4-6 people, depending on appetite and sides.
Difficulty Level
Medium: Requires attention to technique, but accessible for most home cooks.
Ingredients
- 3 pounds chicken wings, whole or separated, patted dry
- 1 tablespoon baking powder (aluminum-free)
- 1 teaspoon kosher salt
- 1 teaspoon smoked paprika
- ½ teaspoon garlic powder
- ½ teaspoon onion powder
- ½ teaspoon freshly ground black pepper
- Cooking oil spray (preferably avocado or canola oil)
- Optional: hot sauce, honey, or BBQ sauce for tossing
Instructions
- Preheat your oven to 425°F (220°C). Place a wire rack on a large baking sheet for optimal airflow and crispiness.
- Prepare the wings: Pat each wing thoroughly dry using paper towels. Moisture is the enemy of crisp skin.
- Mix the dry coating: In a large bowl, combine baking powder, kosher salt, smoked paprika, garlic powder, onion powder, and black pepper.
- Coat the wings: Toss the chicken wings in the dry mixture until evenly coated. The baking powder works magic by drawing moisture away and creating tiny bubbles on the skin for a crunchy texture.
- Rest the wings: For best results, refrigerate the coated wings uncovered on a wire rack for at least 1 hour. This step dries the skin out further and guarantees extraordinary crispness.
- Arrange on the rack: Place the wings on the preheated wire rack, leaving space between each piece to ensure all sides crisp up evenly.
- Lightly spray oil: Mist the wings with a light coating of cooking oil spray.This helps promote browning and a golden finish.
- Bake for 25 minutes: Allow the wings to cook undisturbed, then flip them carefully with tongs.
- Continue baking another 15 minutes: Cook until the wings are chestnut-golden and the skin crackles when touched.
- Optional toss: Remove from oven and toss wings immediately in your favorite hot sauce or glaze for an irresistible finish.
Tips for Success
- use baking powder, not baking soda. baking powder creates the right pH balance to crisp the skin without adding unpleasant flavor.
- Dry the wings thoroughly. Even the slightest moisture can soften skin during cooking.
- Cook on a wire rack. This allows air to circulate evenly around each wing, ensuring uniform crispness instead of sogginess.
- Do not overcrowd the pan. Crowding traps steam and diminishes crispiness.
- For extra crunch, finish under the broiler for 2-3 minutes. Watch carefully to avoid burning.
- Make-ahead option: Coat wings and refrigerate uncovered up to 12 hours ahead for time-saving prep with fantastic results.
Serving Suggestions
Present your crispy wings on a rustic wooden board or a vibrant platter, garnished with fresh chopped parsley or green onions to add a pop of color. Offer cooling sides like creamy ranch or blue cheese dip alongside zesty celery and carrot sticks. For a twist, sprinkle with toasted sesame seeds or drizzle with a squeeze of fresh lime to brighten flavors. Pair these wings with a cold craft beer or sparkling citrus soda for the ultimate indulgence.

Nutritional Information
| Nutrient | Per Serving (4 wings) |
|---|---|
| Calories | 320 kcal |
| Protein | 27 g |
| Carbohydrates | 2 g |
| Fat | 22 g |
For another flavor-packed poultry idea, check out our Crispy Baked Chicken Thighs Recipe. For the science behind baking powder’s role in crispiness, visit Serious Eats.
Exploring the Secret Ingredients That Elevate Costco’s Chicken Wings
Why Costco Chicken Wings Are a Crispy Culinary Gem has captivated food lovers with their perfectly crunchy exterior and juicy, flavorful interior. What is it that makes these wings so irresistible? The secret lies in a clever balance of seasoning, coating, and cooking techniques that turn simple poultry into a mouthwatering treat. Through years of culinary styling and recipe refinement, I’ve uncovered how to emulate that crave-worthy crispiness in your own kitchen, using a handful of secret ingredients that transform each bite into a crunchy celebration.
Prep and Cook Time
- preparation: 15 minutes
- Marinating: 1 hour (optional, but recommended)
- Cooking: 25 minutes
- Total Time: 1 hour 40 minutes
Yield
Serves 4 – perfect for game day or a gathering of friends.
Difficulty Level
Easy to Medium – great for cooks looking to master crispy, homemade wings without fuss.
Ingredients
- 2 lbs chicken wings, separated into flats and drumettes
- 1 cup all-purpose flour, sifted
- 1/2 cup cornstarch
- 1 tbsp baking powder (aluminum-free for best taste and crispiness)
- 2 tsp smoked paprika for a subtle smoky depth
- 1 tsp garlic powder
- 1 tsp onion powder
- 1 tsp kosher salt
- 1/2 tsp black pepper
- 1 cup buttermilk (for optional marinade)
- Vegetable oil or canola oil for frying (about 4 cups)
- Optional garnish: chopped fresh parsley or cilantro, and lemon wedges
Instructions
- Marinate the Wings (Optional but recommended): Place the chicken wings in a large bowl and pour over 1 cup buttermilk.Toss to coat, cover, and refrigerate for at least 1 hour. Marinating tenderizes the meat and enhances moisture retention.
- Prepare the Coating: In a large mixing bowl,whisk together all-purpose flour,cornstarch,baking powder,smoked paprika,garlic powder,onion powder,salt,and black pepper. The cornstarch and baking powder combo is crucial – it creates that signature blistered, crackly skin reminiscent of Costco’s wings.
- Coat the Wings: Remove wings from the buttermilk marinade, letting excess drip off. Dredge them thoroughly in the dry coating mixture, pressing lightly to adhere evenly on all sides. Set coated wings on a wire rack to rest for 10 minutes; this helps the coating adhere during frying.
- Heat the Oil: In a heavy-bottomed deep skillet or cast-iron pan, heat vegetable oil to 350°F (175°C). Use a thermometer to maintain consistent temperature for even cooking and crispiness.
- Fry in batches: Fry the wings in small batches (about 8 pieces) to avoid overcrowding, which drops oil temperature. Cook each batch for about 8-10 minutes, turning occasionally, until golden brown and internal temperature reaches 165°F (74°C).
- Drain and Rest: Use a slotted spoon to transfer wings to a wire rack set over a baking sheet to drain excess oil. This prevents sogginess that can happen if wings sit in oil.
- Optional Toss: For a flavor twist, toss wings in your favorite sauce-classic buffalo, garlic parmesan, or a tangy Korean glaze.Alternatively, serve plain to let the crispy crust shine.
Tips for Success
- Use baking powder, not baking soda: Baking powder creates air bubbles that puff the skin into crispiness. Many recipes use baking soda, but it can cause a bitter aftertaste and uneven browning.
- Don’t skip the resting step: Allowing coated wings to rest before frying helps develop a stronger crust that resists falling off.
- Maintain oil temperature: Use a reliable thermometer. Too hot-wings burn outside but stay raw inside. Too cool-wings absorb oil and become greasy.
- Make-ahead option: Coat and par-fry wings, then refrigerate or freeze. When ready to serve, re-fry for 2-3 minutes to refresh crispiness.
- Gluten-free adaptation: Substitute all-purpose flour with a 1:1 gluten-free baking flour blend and confirm cornstarch brand is gluten-free.
Serving Suggestions
Present these wings on a rustic wooden board or classic white platter. Garnish with freshly chopped parsley or cilantro to add a splash of color and fresh contrast. A few wedges of bright lemon brighten the palate and complement the rich, crispy texture. pair with cooling sides like creamy ranch or blue cheese dip, crunchy celery sticks, and a cold craft beer for the ultimate crowd-pleasing experience.

| Nutrient | Per Serving (4 wings) |
|---|---|
| calories | 350 kcal |
| Protein | 25g |
| Carbohydrates | 15g |
| Fat | 20g |
Hungry to explore more crispy delights? Check out our Ultimate Crispy Fried Chicken Recipe for a close cousin to these wings.
For science-backed frying tips, visit the Serious Eats frying guide to deepen your crisp culinary knowledge.
Creative Serving Suggestions to Make Your Wings the Star of Any Gathering
Costco chicken wings bring a golden crunch and juicy tenderness that instantly elevate any gathering to a memorable feast.Known for their unbeatable value and consistent quality, these wings transform into an irresistible centerpiece when paired with creative serving ideas. Whether it’s a casual game day or an elegant party, these wings offer a versatile canvas to impress your guests while keeping your prep stress-free and fun.
Prep and Cook Time
- Prep Time: 15 minutes
- Cook Time: 25 minutes
- Total Time: 40 minutes
Yield
Serves 6-8 hungry guests
Difficulty Level
Easy – Perfect for beginners and seasoned cooks alike
Ingredients
- 3 lbs Costco chicken wings, thawed and patted dry
- 2 tablespoons olive oil
- 1 teaspoon smoked paprika
- 1 teaspoon garlic powder
- 1 teaspoon onion powder
- ½ teaspoon ground black pepper
- 1 teaspoon kosher salt
- 1 tablespoon baking powder (not baking soda), for extra crispiness
- Fresh herbs (such as thyme or parsley) for garnish
Instructions
- Preheat your oven to 425°F (220°C). Position a wire rack inside a baking sheet to allow air circulation and crisp the wings evenly.
- Combine dry spices and baking powder in a small bowl: smoked paprika, garlic powder, onion powder, salt, black pepper, and baking powder.This blend seasons the wings while ensuring a crispy skin.
- Pat the Costco chicken wings completely dry using paper towels-moisture is the enemy of crispiness.
- Toss the wings with olive oil in a large mixing bowl to lightly coat.Sprinkle the spice and baking powder mixture over the wings, gently tossing until each wing is evenly coated.
- Arrange the wings in a single layer on the wire rack, leaving space between each piece to maximize airflow and achieve that coveted crunch.
- Bake for 20-25 minutes, flipping halfway through.Watch for a deeply golden brown hue and crisp edges.
- Remove and rest the wings for 5 minutes before serving. This brief rest allows juices to redistribute, keeping each bite juicy.
Tips for Success
- For extra heat, toss wings in a spicy buffalo or harissa sauce after baking, then briefly broil for 1-2 minutes to caramelize the sauce.
- Make ahead: Bake wings fully,cool,and refrigerate. Reheat under the broiler for 5 minutes before serving to regain crispness.
- substitutions: Swap smoked paprika for chipotle powder for a smoky kick or add lemon zest for a bright citrus twist.
- Don’t overcrowd the pan – crowded wings steam instead of crisp, reducing that perfect crunch.
Elevate these golden Costco chicken wings by transforming your platter into a vibrant tapestry of colors and flavors. Serve them atop a large wooden board lined with a handful of fresh sage and thyme sprigs, adding both aroma and visual contrast. For a pop of color, sprinkle finely chopped fresh parsley or cilantro over the wings right before serving. Bright,thinly sliced radishes and crisp celery sticks act as refreshing palate cleansers while adding crunch.
Set up a DIY dipping sauce station, featuring creamy garlic ranch, tangy blue cheese, a smoky chipotle aioli, and a zesty honey mustard. This not only personalizes each bite but invites your guests to mix and match, making the experience interactive and fun.
For a trendy twist, serve your wings over a bed of crunchy Asian slaw made with shredded cabbage, carrots, and a sesame-lime dressing. Garnish with toasted sesame seeds and sliced scallions to add layers of texture and a bright finish.
Consider pairing your wings with miniature slider buns and pickled vegetables to create bite-sized wing sandwiches – a perfect handheld option for casual mingling. Add a drizzle of creamy avocado crema or tangy chimichurri for a refreshing touch that customers won’t expect but will crave again.
presentation matters: opt for rustic ceramic platters or galvanized metal trays lined with kraft parchment.Scatter vibrant edible flowers or wedge lemon slices around the dish to invite guests into a feast that looks as good as it tastes.

| Nutrient | Per Serving (4 wings) |
|---|---|
| Calories | 290 kcal |
| Protein | 23 g |
| Carbohydrates | 2 g |
| Fat | 21 g |
To dive deeper into wing-perfect sauces and dips, explore our Ultimate Guide to Homemade Wing Sauces.For captivating nutritional insights and food safety tips,the FDA’s chicken safety page is a thorough external resource.
Q&A
Q&A: Why Costco Chicken Wings Are a crispy Culinary Gem
Q1: What makes costco chicken wings stand out among other frozen wing options?
A1: Costco chicken wings are crafted with a perfect balance of juicy tenderness and crispy crunch. Their quality starts with fresh,high-grade chicken,and they deliver consistently robust flavor thanks to a careful seasoning blend. The wings maintain an ideal texture even after cooking, creating a deliciously satisfying bite every time.
Q2: How does the crispy texture of costco wings come about?
A2: The secret lies in their preparation and packaging. Costco’s wings frequently enough arrive pre-seasoned and partially cooked or flash-frozen to preserve freshness. When properly baked or air-fried, the skin crisps beautifully without drying out the meat, offering that coveted crackling texture that makes crispy wings irresistible.
Q3: Are Costco chicken wings versatile for different cooking methods?
A3: Absolutely. Whether you prefer baking, air-frying, or grilling, these wings adapt well.Their robust skin crisps up nicely in an oven or air fryer, locking in juicy meat beneath. Plus, they serve as an excellent blank canvas for a variety of sauces and rubs, from tangy barbecue to spicy buffalo.
Q4: What flavor profiles pair well with Costco chicken wings?
A4: Because Costco wings come with a mild seasoning base, they’re perfect for experimenting with flavors. Classic buffalo sauce, smoky barbecue, zesty lemon pepper, or sweet and spicy blends all complement the wings without overpowering them. Their balanced natural flavor ensures every sauce shines.
Q5: Why are Costco chicken wings a great choice for entertaining or family meals?
A5: Besides their great taste and texture, costco wings come in generous family-sized packages ideal for gatherings. They’re speedy to prepare and universally loved, making them a convenient, crowd-pleasing option.Their crispy, juicy appeal makes any occasion feel a little more special.
Q6: Can these wings be customized for health-conscious eaters?
A6: yes! Baking or air-frying Costco wings reduces excess fat compared to deep-frying, making them a lighter option that doesn’t sacrifice flavor or crunch. Pairing them with fresh veggies or lighter dipping sauces can round out a balanced meal without compromising on taste.
Q7: What’s the best tip for achieving maximum crispiness with Costco chicken wings at home?
A7: For the crispiest crust, avoid overcrowding the pan to allow hot air circulation, and consider patting the wings dry before cooking. Using a wire rack during baking lets fat drip off and promotes even browning. These simple steps help unlock the golden, crispy perfection that makes these wings a culinary gem.
To conclude
In the grand tapestry of frozen feasts, Costco chicken wings stand out as a crispy culinary gem that marries convenience with crave-worthy flavor. their golden crunch and savory punch transform a simple snack into an irresistible experience, proving that quality and accessibility can walk wing in wing. So next time you stroll those aisles, remember: behind that unassuming bag lies a crispy masterpiece waiting to elevate your taste buds to winged wonderland. Whether for game day, dinner, or a quick craving fix, costco’s chicken wings are a testament to how simplicity, when done right, becomes nothing short of extraordinary.
]]>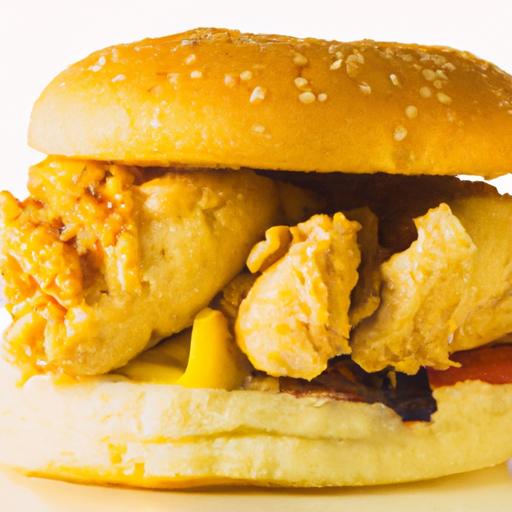
The irresistible Flavor Profile of the Chicken McMuffin Delight
Chicken McMuffin delight unfolds a mouthwatering harmony of crisp, savory, and creamy flavors that capture the essence of a perfect morning treat. This culinary gem combines a tender, golden chicken patty nestled between toasted English muffins with melty cheese, a hint of fresh greens, and a subtle tangy sauce, creating an irresistible blend that awakens your senses from the very first bite.
The beauty of this dish lies in its simplicity and balance. The chicken is seasoned just right, delivering juicy tenderness with a satisfyingly crisp crust that contrasts beautifully with the soft, warm muffins. The molten cheddar cheese layers add a rich, velvety note, while the fresh arugula or baby spinach leaves bring a peppery brightness that elevates the flavor profile.
Originating from classic breakfast sandwiches but revamped with a wholesome homemade touch, this delight caters perfectly to those craving a substantial yet light morning indulgence. The savory, cheesy, and fresh elements come together seamlessly, making every bite a mini celebration of textures and tastes. Whether you’re rushing through a busy weekday or luxuriating in a leisurely weekend brunch, this dish promises comfort and excitement in every mouthful.
Prep and Cook Time
- Readiness: 15 minutes
- Cooking: 12 minutes
- Total Time: 27 minutes
Yield
Serves 2 hearty breakfast sandwiches
Difficulty Level
Easy - beginner-pleasant with straightforward steps and rapid turnaround
Ingredients
- 2 boneless, skinless chicken breasts (pounded to ½ inch thickness)
- 1 cup panko breadcrumbs
- ½ cup all-purpose flour, sifted
- 1 large egg, beaten
- ½ tsp smoked paprika
- ½ tsp garlic powder
- Salt and freshly ground black pepper, to taste
- 2 English muffins, split and toasted
- 2 slices sharp cheddar cheese
- 1 cup fresh arugula or baby spinach
- 2 tbsp unsalted butter
- 2 tbsp mayonnaise
- 1 tsp Dijon mustard
- 1 tsp lemon juice
Instructions
- Prepare the breading stations: In one shallow bowl, place the flour mixed with smoked paprika, garlic powder, salt, and pepper. In the second bowl, pour the beaten egg. In the third bowl, add panko breadcrumbs.
- Coat the chicken: Dip each chicken breast first in the seasoned flour, shaking off excess, then into the egg wash, and finaly in panko breadcrumbs to form an even crust.
- Cook the chicken: Heat 1 tablespoon of butter in a non-stick skillet over medium heat.Add the chicken breasts and sauté until golden brown and cooked through, about 5 minutes per side. Avoid flipping too frequently enough to ensure a crispy crust.
- Toast the muffins: While the chicken cooks, split the English muffins and lightly butter the cut sides. Toast them on a griddle or in a pan until golden and crunchy.
- Make the sauce: In a small bowl, whisk together mayonnaise, Dijon mustard, and lemon juice until smooth and tangy.
- Assemble the sandwiches: Spread the sauce generously on the bottom halves of the toasted English muffins. Place the warm chicken patties on top, immediately layering each with a slice of cheddar cheese to let it gently melt.
- Add the greens: Pile fresh arugula or baby spinach over the cheese, closing each sandwich with the muffin top.
- Serve immediately: Cut sandwiches diagonally for a rustic presentation and enjoy while warm and melty.
Tips for Success
- For an ultra-crispy crust, press the panko breadcrumbs firmly onto the chicken and refrigerate for 10 minutes before cooking.
- Swap arugula for watercress or finely shredded romaine for a different leafy texture and flavor.
- Make the sauce a day ahead to allow flavors to marry; store covered in the refrigerator.
- Use a digital thermometer to ensure the chicken reaches an internal temperature of 165°F (74°C) for safe, juicy results.
- To keep sandwiches warm, wrap them loosely in foil and place in a preheated oven at 200°F for up to 10 minutes before serving.
Serving Suggestions
Present your chicken McMuffin Delight alongside a colorful side salad tossed in a light vinaigrette or some crisp, golden hash browns for a classic brunch appeal. Garnish the plate with a few fresh lemon wedges to brighten the flavors at the table. A sprinkle of freshly cracked black pepper and a light drizzle of hot honey over the sandwich can add an extra dimension for adventurous palates.

| Nutrient | Amount per Serving |
|---|---|
| Calories | 430 kcal |
| Protein | 35 g |
| Carbohydrates | 30 g |
| Fat | 16 g |
For more wholesome breakfast inspirations, check out our Healthy Breakfast ideas. For nutritional insights on chicken and its benefits, visit ChooseMyPlate.gov, a trusted source for dietary guidelines.
Crafting the Perfect Morning Bite with Fresh Ingredients
Chicken McMuffin Delight brings the classic charm of a beloved breakfast sandwich right into your kitchen, crafted carefully with fresh, wholesome ingredients.
Whether you’re in need of a quick weekday morning fix or a leisurely weekend indulgence, this recipe elevates your first bite of the day with juicy, tender chicken, melty cheese, and softly toasted English muffins. Inspired by the iconic breakfast flavors but thoughtfully tailored for home cooks, it offers a perfect balance of textures and tastes. Let’s dive into the process that makes this morning treat truly unforgettable.
Prep and Cook Time
- Preparation: 10 minutes
- Cooking: 15 minutes
- Total Time: 25 minutes
Yield
Makes 2 delicious Chicken McMuffin Delight sandwiches
Difficulty Level
Easy – perfect for breakfast beginners and seasoned pros alike
Ingredients
- 2 boneless, skinless chicken thighs (about 6 oz), pounded thin
- 1 tsp smoked paprika
- ½ tsp garlic powder
- Salt and freshly ground black pepper, to taste
- 1 tbsp olive oil or avocado oil
- 2 large eggs
- 2 whole wheat English muffins, split
- 2 slices sharp cheddar cheese
- 1 tbsp unsalted butter, room temperature
- Fresh baby spinach leaves, a handful per sandwich
- 1 ripe tomato, sliced thinly
- 1 tsp Dijon mustard (optional)
- Fresh chives, finely chopped for garnish (optional)
Instructions
- Prepare the chicken: in a small bowl, combine smoked paprika, garlic powder, salt, and pepper. Rub this seasoning evenly onto both sides of the pounded chicken thighs.
- cook the chicken: Heat olive oil in a non-stick skillet over medium heat. Place the chicken and cook for about 5-6 minutes per side until golden brown and fully cooked through (internal temperature 165°F). Remove and let rest for a few minutes.
- Toast the English muffins: While the chicken rests, slice the English muffins in half and spread the butter generously on each cut side. toast in a preheated skillet or toaster oven until golden and crisp.
- Cook the eggs: In the same skillet, reduce heat to low and crack eggs one at a time. Cook sunny side up or to your liking, seasoning with salt and pepper. For a well-cooked yolk,cover the skillet with a lid for 1-2 minutes.
- Assemble the sandwiches: Spread Dijon mustard on the bottom halves of the toasted muffins.layer fresh spinach leaves, the cooked chicken thighs, cheddar slices (let cheese melt slightly on warm chicken), sliced tomato, then top each with an egg. Close with the muffin tops.
- Garnish and serve: Sprinkle with finely chopped fresh chives if desired. Serve immediately while warm and enjoy the burst of fresh, vibrant flavors.
Tips for Success
- For extra juiciness, marinate the chicken in a tablespoon of olive oil, lemon juice, and herbs for 30 minutes before cooking.
- If pressed for time, use pre-cooked grilled chicken breasts sliced thinly, but freshly cooked chicken thighs offer richer flavor.
- Substitute cheddar with pepper jack or mozzarella for different flavor profiles.
- to make ahead, cook the chicken and toast muffins in advance. Reheat and assemble just before serving for maximum freshness.
- Use a ring mold when cooking eggs to ensure perfectly round shapes fitting the muffin.
Serving Suggestions
This vibrant Chicken McMuffin Delight pairs beautifully with a crisp side salad or fresh fruit for a balanced breakfast. A glass of freshly squeezed orange juice or a hot brewed coffee complements the savory notes perfectly. Garnish with extra baby spinach or microgreens to add an inviting burst of green that enhances both texture and presentation.

| Nutrition | Per Serving |
|---|---|
| Calories | 410 kcal |
| Protein | 30 g |
| Carbohydrates | 35 g |
| Fat | 14 g |
For those eager to explore other delightful breakfast options, check out our Quick and healthy Breakfast Recipes article. For more on the nutritional science behind breakfast meals,visit EatRight.org for expert insights on protein’s role in your morning meal.
Pairing Your Chicken McMuffin Delight with Complementary Sides
Chicken McMuffin Delight is more than just a breakfast sandwich-it’s a canvas for creating a vibrant morning feast. Complementing this savory creation with perfectly paired sides can transform your breakfast into a visually stunning and satisfying experience.Whether you crave crisp textures, refreshing flavors, or indulgent comfort, these carefully curated accompaniments will elevate every bite.
Prep and Cook Time
Preparation: 10 minutes
Cooking: 15 minutes
Total Time: 25 minutes
Yield
serves 2 excited morning diners
Difficulty Level
Easy – perfect for any skill level looking to brighten up breakfast
Ingredients
- 2 freshly picked large eggs
- 4 slices of ripe avocado
- 1 cup cherry tomatoes, halved
- 1 tbsp extra virgin olive oil
- 1/2 tsp smoked paprika
- 1 small bunch of fresh baby spinach
- 1/2 cup thinly sliced cucumber ribbons
- 1/4 cup crumbled feta cheese (optional)
- Salt and freshly cracked black pepper to taste
- Whole grain mustard or light honey mustard for dipping
- Fresh thyme or chives for garnish
- 2 small golden sweet potatoes (optional, for hash)
Instructions
- Roasted Sweet Potato Hash: peel and dice the sweet potatoes into small cubes. toss with 1 tbsp olive oil, smoked paprika, salt, and pepper. Spread evenly on a baking sheet and roast at 400°F (200°C) for 20 minutes or until crispy on the edges. Flip halfway through for even roasting.
- Fresh Spinach & Cucumber Salad: In a bowl, combine fresh baby spinach and cucumber ribbons. Toss gently with a drizzle of olive oil and a pinch of salt. Add halved cherry tomatoes last to preserve their juiciness.
- egg Preparation: Soft boil or poach the eggs to your preferred level of doneness. the runny yolk is luxurious with the crispy hash and fresh salad.
- Assembling the Sides: Plate a generous spoonful of sweet potato hash beside the fresh salad. Artfully layer avocado slices on top of the spinach bed.
- Finishing Touches: Crumble feta cheese over the salad if desired, sprinkle fresh thyme or finely chopped chives across the plate, and offer a small dish of whole grain mustard on the side for an invigorating flavor kick.
- Serve Warm: Bring your Chicken McMuffin Delight to the table alongside these sides,creating a balance of textures and tastes that is sure to awaken your palate.
Chef’s Notes
- Substitution Tip: Swap sweet potatoes with golden beets or carrots for a different earthiness and natural sweetness.
- Make-Ahead: Roast the hash potatoes the night before to save precious morning time-simply reheat in a skillet until crisp.
- Variation: Add a sprinkle of toasted sesame seeds or chili flakes to the salad for added depth and texture.
- Protein Boost: Complement with a side of smoked turkey breast slices or a light homemade herb yogurt dip to enhance the meal’s protein content.
- Keep It Fresh: Use the freshest herbs available to brighten the overall plate aroma and flavor.
Serving Suggestions for Your Chicken McMuffin Delight
Presentation is part of the joy. Serve your Chicken McMuffin Delight on a rustic wooden board or crisp white plates to create brilliant contrast.Arrange sides decoratively: fan out avocado slices like petals, sprinkle paprika over the potatoes for vibrant color, and place the salad in a neat mound beside them.
For garnish, select edible flowers such as nasturtiums or microgreens to add bursts of color and delicate flavor nuances. Pair with a tall glass of cold-pressed orange juice or a refreshing herbal iced tea to complete your perfect morning spread.

| Nutrient | Per Serving |
|---|---|
| Calories | 420 kcal |
| Protein | 26 g |
| Carbohydrates | 38 g |
| Fat | 14 g |
For further inspiration on vibrant, protein-packed breakfasts, check out our Healthy Protein-Packed Breakfast Recipes. To learn more about wholesome sweet potato nutrition, visit the Nutrition Society.
Tips for Customizing Your Chicken McMuffin Delight to Suit your Taste
Chicken McMuffin Delight is a vibrant take on the classic breakfast sandwich, combining the warm comfort of an English muffin with juicy, seasoned chicken and melty cheese – all nestled between fresh, crisp greens and a touch of savory sauce. Inspired by cherished mornings when simplicity meets soul, this dish brings a homemade richness that fast food just can’t replicate. Let your creativity shine as you explore ways to personalize this satisfying morning treat.
Prep and Cook Time
Preparation: 10 minutes | Cooking: 15 minutes | Total: 25 minutes
Yield
Serves 2 hearty sandwiches
Difficulty Level
Easy
Ingredients
- 2 whole wheat English muffins, split
- 2 boneless, skinless chicken breast halves (about 6 oz each)
- 1/2 cup buttermilk
- 3/4 cup all-purpose flour, sifted
- 1 tsp smoked paprika
- 1/2 tsp garlic powder
- 1/4 tsp cayenne pepper (optional for a kick)
- Salt and freshly ground black pepper, to taste
- 2 tbsp olive oil or avocado oil, for frying
- 2 slices sharp Cheddar cheese or your favorite melting cheese
- 2 large eggs
- Fresh baby spinach or arugula, a handful for each sandwich
- 1 ripe tomato, thinly sliced
- 2 tbsp mayonnaise or Greek yogurt mixed with a dash of Dijon mustard
- Optional garnishes: sliced avocado, thin red onion rings, fresh basil leaves
Instructions
- Marinate the chicken: In a shallow dish, soak chicken breasts in buttermilk for at least 10 minutes – this tenderizes and adds depth of flavor.
- Prepare the dredge: Mix flour,smoked paprika,garlic powder,cayenne,salt,and pepper in a wide bowl.
- Coat the chicken: Remove chicken from buttermilk, shake off excess, and dredge evenly in the spiced flour mixture. Press flour onto the meat for a crispy crust.
- Heat the oil: Warm olive oil in a skillet over medium heat. Carefully add chicken breasts and cook 5-6 minutes per side or until golden brown and cooked through. Flip only once to maintain a crispy crust.
- Toast the muffins: Slice English muffins in half and toast until golden and lightly crisp.
- Cook the eggs: In a separate pan, cook eggs sunny side up or over easy. Season lightly with salt and pepper.
- Assemble the sandwich: Spread Dijon-mayo on both muffin halves. Layer fresh spinach or arugula, tomato slices, and cooked chicken. Place the cheese slice on top of the hot chicken to melt slightly. finish with the egg and optional garnishes.
- Serve immediately: Press gently, slice, and enjoy your vibrant, flavorful start to the day!
Personalizing your Chicken McMuffin Delight is a fun way to tailor it perfectly to your morning cravings. For a tangy twist, swap mayonnaise for a zesty chipotle aioli or a honey mustard spread. Craving more veggies? Add thinly sliced cucumbers, roasted red peppers, or even fresh sprouts for extra crunch and color. If you prefer a softer protein edge, substitute chicken breasts for tender grilled chicken thighs, which bring a richer flavor and juicier bite.
To keep it lighter,swap cheese for a slice of creamy avocado or a dollop of whipped ricotta,adding luscious texture without heaviness. for spice lovers, incorporate pickled jalapeños or a drizzle of sriracha sauce for invigorating heat. Experiment with bread too – an everything bagel or multigrain English muffin can elevate the texture and flavor profile beautifully.
Consider prepping your chicken earlier in the evening, marinating it overnight to intensify the savory notes. To ensure the chicken stays juicy, avoid overcrowding the skillet during frying, and rest the meat on a wire rack instead of paper towels to preserve its crisp exterior.
Serving suggestions
Plate your Chicken McMuffin Delight with a side of lightly dressed mixed greens or fresh fruit slices to balance richness and add freshness to your breakfast ritual. Garnish with sprigs of fresh herbs like parsley or basil for a vibrant pop of color. pair with a refreshing glass of freshly squeezed orange juice or a smooth latte to complete your morning indulgence.
| Nutrient | Per Serving |
|---|---|
| Calories | 420 kcal |
| Protein | 38 g |
| Carbohydrates | 30 g |
| Fat | 14 g |
For more creative breakfast ideas, check out our article on Ultimate Breakfast Sandwiches to Start Your Day. To deepen your knowledge on proper cooking temperatures for chicken and food safety, visit the USDA’s guidelines here.
Q&A
Q&A: Chicken McMuffin Delight - your Perfect Morning Treat!
Q1: What makes the Chicken McMuffin delight stand out as a morning meal?
A1: The Chicken McMuffin Delight perfectly balances savory and fresh flavors, combining a tender chicken patty with a toasted English muffin, melted cheese, and a hint of zesty sauce. It’s a satisfying, protein-packed breakfast that fuels your day without being heavy.
Q2: Is the Chicken McMuffin Delight suitable for people looking for a quick, on-the-go breakfast?
A2: Absolutely! its handheld form makes it incredibly convenient for busy mornings. Whether you’re rushing out the door or enjoying a leisurely start, the Chicken McMuffin Delight fits right into your routine with minimal fuss and maximum flavor.Q3: Can the Chicken McMuffin Delight be customized for different tastes?
A3: Definitely! You can add fresh veggies like crisp lettuce or juicy tomato slices for an extra burst of freshness, or swap in your favorite cheese variety to spice things up. Some enjoy a dash of hot sauce or a sprinkle of herbs to personalize their sandwich.
Q4: Is this sandwich a good option for those watching their calorie intake?
A4: The Chicken McMuffin Delight can be a balanced choice when paired with a side of fruit or a light yogurt.The lean chicken provides quality protein without excess fat, making it a mindful yet delicious morning treat.
Q5: How does the Chicken McMuffin Delight compare to traditional breakfast sandwiches?
A5: Unlike many morning sandwiches that rely on heavier meats, the Chicken McMuffin Delight offers a lighter, flavorful choice without sacrificing satisfaction. Its combination of tender chicken and melty cheese on an English muffin gives a refreshing twist to classic breakfast fare.
Q6: What drinks pair well with the Chicken McMuffin Delight?
A6: A hot cup of coffee or a refreshing fruit smoothie complements the savory notes of the sandwich beautifully. For a hydrating kick, a glass of freshly squeezed orange juice brightens the meal with natural sweetness.
Q7: Can vegetarians enjoy a version of the Chicken McMuffin Delight?
A7: While the original features chicken, vegetarian versions can be created using plant-based patties or grilled veggies. This way, everyone can enjoy the delightful morning flavors with a twist that suits their preferences.
Q8: Where can I find the best Chicken McMuffin Delight?
A8: Many cafés and fast-casual eateries now feature chicken breakfast sandwiches inspired by this classic combination. However, making one at home allows you to customize ingredients, experiment with flavors, and enjoy the freshest version of your perfect morning treat!
Future Outlook
As the morning sun rises and the world awakens, the Chicken McMuffin Delight stands ready to transform your start into something truly special. With its harmonious blend of savory chicken, melted cheese, and that perfectly toasted English muffin, this breakfast classic isn’t just a meal-it’s a morning ritual worth savoring. Whether you’re rushing out the door or enjoying a leisurely breakfast, the Chicken McMuffin Delight welcomes you to a delicious day ahead. So next time hunger calls at dawn, remember: your perfect morning treat is just a bite away.
]]>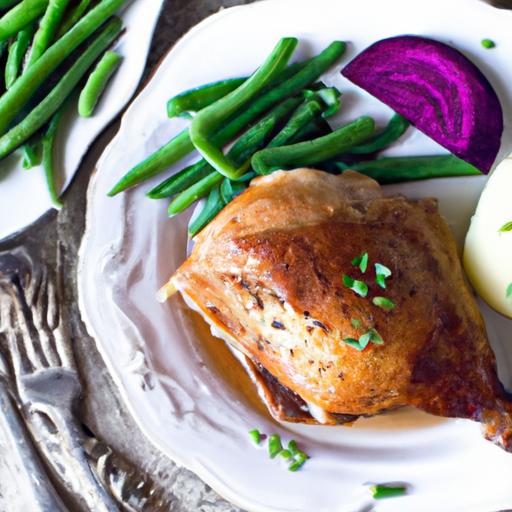
Ingredients that Bring the Bold Flavor to Life
Spicy Buffalo Chicken Dip Recipe: Easy & Crowd-Pleasing Guide
If you’re craving a dish packed with fiery zest and creamy richness, this Spicy buffalo Chicken Dip Recipe is your new go-to for game days and casual get-togethers. Originating from the beloved flavors of Buffalo wings, this dip combines bold, spicy heat with melty cheese and tender chicken, creating a crowd-pleasing appetizer that’s effortless to prepare yet full of personality.
Prep and Cook Time
- Preparation: 10 minutes
- Cooking: 15 minutes
- Total time: 25 minutes
Yield
Serves 8-10 people as an appetizer
Difficulty Level
Easy – perfect for fast entertaining or a flavorful snack fix.
Every single element in this Spicy Buffalo Chicken Dip Recipe works in harmony to create an irresistible burst of flavor. At the heart is shredded cooked chicken, providing savory depth and plenty of protein. The signature heat arrives courtesy of Frank’s RedHot sauce, a classic choice known for its tangy, spicy kick without overwhelming sharpness.
To balance the spice and add creamy decadence,you’ll use cream cheese softened to perfection,and a blend of cheddar and mozzarella cheeses which melt beautifully,bringing gooey,cheesy goodness.A touch of ranch dressing cools the palate and adds herby undertones, while minced garlic and a pinch of ground black pepper round out the savory notes.
- 2 cups cooked shredded chicken breast (rotisserie chicken works great)
- 8 oz cream cheese, softened
- 1/2 cup Frank’s RedHot sauce (adjust based on heat preference)
- 1/2 cup ranch dressing
- 1 cup shredded sharp cheddar cheese
- 1 cup shredded mozzarella cheese
- 1 teaspoon minced garlic
- 1/4 teaspoon ground black pepper
- Optional garnish: chopped fresh chives or celery sticks
Step-by-Step Instructions
- Preheat your oven to 350°F (175°C). Lightly grease a 9-inch baking dish or ovenproof skillet.
- In a medium bowl, combine the softened cream cheese, ranch dressing, and Frank’s RedHot sauce. Stir until smooth and fully blended.
- Add shredded chicken, minced garlic, and black pepper. Mix thoroughly to ensure every bite has a spicy,savory balance.
- Fold in half of the cheddar and mozzarella cheeses,reserving the rest for topping. This layering keeps the inside creamy and the top perfectly golden.
- Transfer the mixture to your prepared dish.Spread evenly using a spatula.
- Sprinkle the remaining cheese over the top to create a deliciously melty crust.
- Bake for 15 minutes or until bubbly and lightly browned on top. Keep an eye during the last 5 minutes to avoid burning the cheese.
- Remove from oven and let it rest for 5 minutes before serving-this helps it set and makes scooping easier.
Tips for Success
- Use a rotisserie chicken for a shortcut that adds extra flavor and juiciness without extra effort.
- Adjust the heat by varying the amount of Frank’s RedHot sauce-start with less if you prefer mild and add more to taste.
- Softening cream cheese beforehand ensures a smooth, creamy dip. Pop it in the microwave for 15 seconds if short on time.
- For an even cheesier texture,try mixing in a bit of pepper jack or Monterey jack cheese.
- Make ahead: Prepare the dip up to step 6, than cover and refrigerate for up to 24 hours. Bake right before serving.
serving Suggestions
This Spicy Buffalo Chicken Dip shines when paired with classic dippers like crispy celery sticks, crunchy carrot slices, or sturdy tortilla chips. For a fun twist, serve alongside toasted baguette slices or warm pita wedges.
Sprinkle finely chopped fresh chives or green onions on top just before serving to add a pop of color and fresh flavor contrast. A small dish of blue cheese dressing on the side can also offer a cooling complement to the heat.

| Nutrient | Amount per Serving |
|---|---|
| Calories | 280 |
| Protein | 22g |
| Carbohydrates | 4g |
| Fat | 18g |
For more appetizing appetizer ideas that steal the spotlight, check out our Easy Dips & Spreads Collection. To learn about the health benefits and uses of hot sauce varieties, visit the FDA’s food safety page.
Step-by-Step Preparation for a Creamy, Spicy Dip
The Spicy Buffalo Chicken dip Recipe is a beloved classic, combining creamy textures with a punch of zesty heat that instantly makes any gathering feel festive. Originating from the iconic Buffalo, New York, this dip has won hearts across the nation as a perfect game-day snack or party starter. Its irresistible blend of shredded chicken, spicy buffalo sauce, and luscious cheeses creates a dip that’s as crowd-pleasing as it is easy to prepare. Let’s dive into crafting this flavor-packed crowd favorite that will have everyone double-dipping by the first bite.
Prep and Cook Time
- Prep: 10 minutes
- Cook: 20 minutes
- total: 30 minutes
Yield
Serves 8-10 people generously.
Difficulty Level
Easy – Ideal for beginners and seasoned home cooks alike.
Ingredients
- 2 cups cooked chicken, shredded (rotisserie chicken works beautifully)
- 8 oz cream cheese, softened
- ½ cup hot buffalo sauce (Frank’s RedHot is a popular choice)
- ½ cup ranch dressing
- 1 cup shredded sharp cheddar cheese
- ½ cup shredded mozzarella cheese
- 2 tablespoons unsalted butter
- 1 teaspoon garlic powder
- 1 teaspoon smoked paprika
- 2 green onions, thinly sliced for garnish
- optional: celery sticks and tortilla chips for serving
Instructions
- Preheat your oven to 350°F (175°C). Meanwhile, in a medium bowl, gently mix together the softened cream cheese, butter, and ranch dressing until smooth and creamy. This will ensure a rich and silky base for your dip.
- Incorporate the buffalo sauce by folding it into the cream cheese mixture. Taste and adjust the heat if desired-feel free to add a little more buffalo sauce for an extra kick.
- add the shredded chicken and half of the cheddar and mozzarella cheeses into the mixture. Season with garlic powder and smoked paprika for that subtle smoky warmth that pairs perfectly with the heat.
- Transfer the dip into an oven-safe baking dish (around 8×8 inches works great). Smooth the top evenly with a spatula for a nice presentation once baked.
- Sprinkle the remaining cheddar and mozzarella cheeses generously on top.This will create a luscious,golden,bubbly crust when baked.
- Bake for 20 minutes, or until the dip is hot and bubbly, and the cheese on top is lightly browned and irresistible.
- Remove from the oven and let it cool for a few minutes before garnishing with fresh green onions. This final touch adds a pop of color and mild oniony brightness.
Tips for Success
- For perfectly shredded chicken,warm the cooked chicken slightly and pull apart using two forks.
- If you prefer a milder dip, reduce the buffalo sauce by a quarter cup and substitute with extra ranch dressing.
- Prepare the dip a day ahead and refrigerate it. Bake it fresh before your event – the flavors meld beautifully overnight.
- Use a non-stick spray or line your baking dish with parchment paper for easy cleanup.
- Want to add more layers? Mix in ½ cup blue cheese crumbles for a tangy twist reminiscent of classic Buffalo wings.
Serving suggestions
This dip shines when warmed and served with crunchy celery sticks, crisp tortilla chips, or toasted baguette slices. Garnish with extra green onions or a sprinkle of smoked paprika for that inviting burst of color. For a festive presentation, serve right from the baking dish accompanied by a small bowl of extra buffalo sauce on the side for dipping.
| Nutritional Info (per ¼ cup) | Amount |
|---|---|
| calories | 145 |
| Protein | 12g |
| Carbohydrates | 2g |
| Fat | 10g |

For a deeper dive into appetizer ideas that pair spectacularly with this dip,check out our Easy Party Appetizers Guide. To understand the health benefits of chicken as a protein source, visit ChooseMyPlate.gov.
Tips for Perfecting Heat Levels to Suit every Palate
Spicy Buffalo Chicken Dip Recipe: Easy & Crowd-Pleasing Guide
Mastering the perfect balance of heat in this classic, crowd-pleasing dish is an art that every home cook can achieve. The Spicy Buffalo Chicken Dip Recipe brings smoky, tangy, and fiery flavors together, creating a luscious, creamy dip that’s equally irresistible for spice lovers and mild-palate friends alike. Originating from the beloved Buffalo wing tradition in upstate New York, this dip captures that zesty spirit in a warm, comforting casserole form.
prep and cook Time
- Prep Time: 15 minutes
- cook Time: 20 minutes
- Total Time: 35 minutes
Yield
Serves 8-10 as an appetizer or party dip
Difficulty Level
Easy – perfect for beginners and busy hosts
Ingredients
- 2 cups cooked shredded chicken (rotisserie chicken works well)
- 8 oz cream cheese, softened
- 1/2 cup Frank’s RedHot sauce (adjust to taste)
- 1/2 cup ranch dressing or blue cheese dressing
- 1 cup shredded sharp cheddar cheese
- 1/2 cup crumbled blue cheese (optional)
- 1 tablespoon unsalted butter
- 1 teaspoon garlic powder
- 1/4 teaspoon smoked paprika for depth
- Chopped green onions or chives for garnish
Instructions
- Preheat your oven to 350°F (175°C). Lightly grease a 9-inch baking dish.
- In a medium bowl, combine softened cream cheese, ranch dressing, and hot sauce. Mix with a spatula until smooth and creamy.
- Fold in shredded chicken, garlic powder, smoked paprika, and ¾ of the cheddar cheese. Stir gently to combine, ensuring every bite has a balance of flavors.
- Transfer the mixture into the prepared baking dish. Spread evenly with the back of a spoon.
- Sprinkle the remaining cheddar and crumbled blue cheese on top. Dot with small pieces of butter for richness.
- Bake uncovered for 20 minutes until bubbly and golden around the edges. Keep an eye to avoid over-browning.
- Remove from oven and let rest for 5 minutes. Garnish with chopped green onions before serving.
Controlling the spice in your Spicy Buffalo Chicken Dip Recipe is key to making it a worldwide favorite. Start by fine-tuning the amount of hot sauce; begin with half the called amount and taste before adding more. For a milder version, swap out half the Frank’s RedHot for a milder buffalo sauce or even add a touch of honey to mellow the heat.
For those who crave the heat, consider stirring in a pinch of cayenne or adding finely diced jalapeños to the mix.If you’re entertaining a crowd with mixed tastes, prepare two smaller dishes side-by-side-one mild and one fiery-to please all guests.
Balancing cream cheese and the cooling ranch or blue cheese dressing tempers the spicy kick beautifully, creating that signature silky texture and flavor harmony.
Visual cues are essential too-luminous red sauce streaks and bubbling cheese signal the perfect heat intensity visually, inviting guests to dig in confidently.
Chef’s Notes
- Make Ahead: Prepare the dip a day in advance and refrigerate; bake fresh before your party for optimal gooey texture.
- Substitutions: use Greek yogurt instead of ranch for a tangier,lighter twist.
Try smoked gouda instead of cheddar for a smoky flair. - Texture Variation: Mix in finely chopped celery or scallions for crunch and freshness.
- Leftover Tip: Spread on warm toasted bread for an indulgent sandwich filling.
Serving Suggestions
Present this luscious dip with crunchy celery sticks, multi-colored bell pepper strips, and crisp baked pita chips for a vibrant color contrast.A sprinkle of extra green onions or crumbled blue cheese on top will elevate the visual appeal dramatically.For an inviting table,pair it alongside a chilled light beer or a crisp sparkling water with lime to refresh the palate between spicy bites.

| Nutrient | Per Serving |
|---|---|
| Calories | 250 kcal |
| Protein | 18 g |
| Carbohydrates | 3 g |
| fat | 18 g |
For more flavorful appetizer ideas, check out our Best Cream Cheese Dips Collection. Discover spicy sauce varieties and their heat ratings at PepperScale’s Heat Levels Guide.
Creative Serving Ideas to Impress Your Crowd
The Spicy Buffalo Chicken Dip Recipe bursts with bold flavors and creamy textures,making it an absolute crowd-pleaser at any gathering. Whether it’s game day, a casual get-together, or a festive celebration, this dish offers a perfect harmony of heat, tang, and cheesy goodness that keeps everyone coming back for more. Originating from the iconic Buffalo wings scene in the U.S., this dip takes the beloved hot sauce-infused flavor and transforms it into a shareable, dip-pleasant format that’s both simple and irresistibly satisfying.
Prep and Cook Time
- Preparation: 10 minutes
- Cooking: 20 minutes
- Total Time: 30 minutes
Yield
this recipe serves 8 to 10 hungry guests as an appetizer or snack.
Difficulty Level
Easy – Perfect for cooks of all skill levels, even beginners!
Ingredients
- 2 cups shredded cooked chicken breast (rotisserie or poached for tenderness)
- 8 oz cream cheese, softened
- 1/2 cup sour cream
- 1/2 cup Ranch dressing or blue cheese dressing (your preference)
- 3/4 cup Buffalo hot sauce (adjust for spiciness)
- 1 cup shredded sharp cheddar cheese
- 1/2 cup crumbled blue cheese (optional, for extra tang)
- 1 tbsp unsalted butter
- 2 cloves garlic, minced
- green onions, thinly sliced (for garnish)
- Celery sticks, carrot sticks, tortilla chips, or crackers for serving
Instructions
- Preheat your oven to 350°F (175°C) and lightly grease a medium oven-safe baking dish.
- melt the butter in a skillet over medium heat. Add the minced garlic and sauté until fragrant, about 1 minute – be careful not to burn.
- In a large mixing bowl, combine softened cream cheese, sour cream, Ranch dressing, and buffalo hot sauce. Stir until smooth and creamy.
- Fold in the shredded chicken and melted butter with garlic, mixing well to coat every bite with rich flavor.
- Mix in half of the shredded cheddar cheese and blue cheese crumbles.
- transfer the mixture into the prepared baking dish and smooth the top evenly.
- Sprinkle the remaining cheddar cheese on top for a golden, bubbly crust.
- Bake uncovered for 20 minutes or until the dip is hot and bubbly, and the cheese on top starts to brown lightly.
- Remove from oven and let cool slightly. Garnish generously with chopped green onions for a fresh pop of color and flavor.
- Serve immediately alongside crunchy celery sticks, crisp carrot strips, tortilla chips, or your favorite dippables.
Chef’s Notes
- Use rotisserie chicken for a quick, ready-to-go protein with great flavor.
- Adjust the heat by adding more or less Buffalo hot sauce depending on your guests’ preferences.
- For a dairy-free version, substitute sour cream for a coconut-based choice and use dairy-free cream cheese.
- This dip can be made a day ahead-just cover and refrigerate, then warm in the oven before serving.
- Feel free to swap Ranch dressing with blue cheese for a tangier twist.
- If you like a smoky depth,add a pinch of smoked paprika or a dash of chipotle powder.
with Buffalo Chicken Dip
The beauty of this Spicy Buffalo Chicken Dip Recipe lies not just in its bold flavors but also in its versatility on the serving table. Consider presenting it in a rustic cast-iron skillet or a colorful ceramic bowl to add visual warmth and encourage communal sharing. Garnish the dip with freshly chopped green onions,a sprinkle of smoked paprika,and an extra handful of crumbled blue cheese to entice guests before thay even take a bite.
For a refined twist,serve alongside a vibrant crudité platter with an assortment of crisp bell pepper strips,cucumber coins,and jicama sticks. Pairing the dip with warm pita wedges or soft pretzel bites offers a hearty option that contrasts beautifully with the spiciness. for lighter bites, arrange mini celery boats topped with a dollop of the dip, cashews, and a drizzle of honey for a surprising sweet-heat combo.
Try layering the dip onto baked potato skins, then broiling briefly to melt the cheese-these savory pocket-sized treats will disappear in seconds and add a gourmet feel to any buffet.Lastly, don’t forget to keep a side of cool ranch or blue cheese dressing nearby for dipping and tempering the heat-your guests will appreciate the balance.

| Nutrient | Per Serving |
|---|---|
| Calories | 280 |
| Protein | 22g |
| Carbohydrates | 5g |
| Fat | 18g |
For those eager to explore more crowd-pleasing dips, check out our Classic 7 Layer Dip Recipe-another guaranteed hit that pairs perfectly with your buffalo chicken feature. To understand the science behind hot sauce’s fiery kick and its health benefits,visit Healthline’s detailed guide.
Q&A
Q&A: Spicy Buffalo Chicken Dip Recipe – Easy & Crowd-Pleasing Guide
Q1: What makes buffalo chicken dip so popular at gatherings?
A1: Buffalo chicken dip combines the irresistible tangy heat of classic buffalo sauce with creamy cheeses and tender shredded chicken. It’s a perfect finger-food that’s both comforting and bold, making it an instant crowd-pleaser for parties, game days, or casual get-togethers.Q2: What are the essential ingredients for a classic buffalo chicken dip?
A2: The core ingredients include shredded cooked chicken, hot sauce (typically a cayenne pepper-based buffalo sauce), cream cheese, ranch or blue cheese dressing, and shredded cheddar or mozzarella cheese. These elements blend to create the signature spicy, creamy, and cheesy flavor profile.
Q3: Can I use rotisserie chicken for this dip?
A3: Absolutely! Using rotisserie chicken is a quick and easy way to get tender, flavorful shredded chicken without extra cooking.It saves time and adds convenience, making your buffalo chicken dip prep a breeze.
Q4: How spicy is buffalo chicken dip typically, and can I adjust the heat level?
A4: the heat mainly comes from the buffalo sauce, which ranges from mild to extra hot depending on the brand. You can easily control the spice by adjusting the amount of hot sauce or adding a touch of honey or sour cream to mellow the heat for more sensitive palates.
Q5: What’s the best way to serve buffalo chicken dip?
A5: Serve it warm with sturdy dippers like tortilla chips, celery sticks, carrot sticks, or sliced bell peppers. The crunchiness complements the creamy, spicy dip perfectly, giving guests a satisfying textural contrast.
Q6: Can I prepare buffalo chicken dip ahead of time?
A6: yes! Prepare the dip a day in advance and store it in the fridge. When ready to serve, just bake it until heated through and bubbly.This makes hosting easier and allows the flavors to meld beautifully.
Q7: Is it possible to make buffalo chicken dip healthier or lighter?
A7: Sure thing! You can swap full-fat cream cheese for a light version or use Greek yogurt in place of some of the cream cheese or dressing. also, serving with fresh veggie sticks instead of chips boosts nutrition without sacrificing flavor.
Q8: How can I make sure the dip doesn’t get watery or separate when baking?
A8: Using full-fat dairy ingredients helps maintain the creamy texture. Also,avoid overmixing any watery components and bake just until the cheese melts and the dip is heated through. Stirring halfway through baking helps maintain consistency.
Q9: Are there any creative twists or add-ins to enhance the classic buffalo chicken dip?
A9: Certainly! Try adding chopped green onions or jalapeños for extra oomph, sprinkle with crispy bacon bits (using turkey or beef bacon if you prefer), or add a layer of crumbled blue cheese on top for a tangy finish. Fresh cilantro or parsley can brighten the flavor too.
Q10: Can buffalo chicken dip be made in a slow cooker?
A10: Yes! Combining all ingredients in a slow cooker and warming on low for 2-3 hours is a hands-off way to keep the dip warm and melty throughout your event.Just stir before serving and keep a spoon handy for ladling out that spicy goodness.
Final Thoughts
Whether you’re gearing up for game day, hosting a casual get-together, or simply craving a flavorful snack, this Spicy Buffalo chicken Dip has you covered.With its perfect balance of heat, creaminess, and that irresistible tang, it’s no wonder this dish is a crowd-pleaser time and time again. Now that you have the easy-to-follow recipe in hand, all that’s left is to gather your favorite dippers, crank up the flavor, and watch this dip disappear lickety-split. So go ahead-bring the bold, bring the spice, and let every bite be a touchdown in your kitchen!
]]>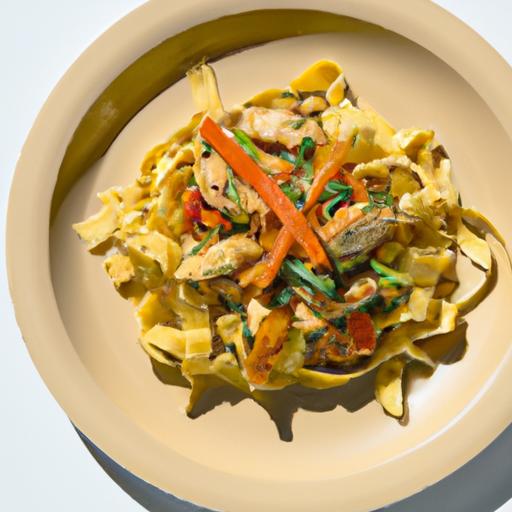
Exploring the Vibrant Ingredients That Elevate Traditional Chicken noodle Salad
Refreshing Chicken noodle Salad invites you to rediscover the joy of light, flavorful meals with a medley of vibrant, fresh ingredients that transform a familiar classic into an irresistible, contemporary dish. This delightful combination balances textures and flavors-a crisp crunch from fresh vegetables, tender strands of perfectly cooked noodles, and succulent bites of juicy chicken-all brightened with zesty citrus and aromatic herbs. Whether served as a refreshing summer lunch or a crowd-pleasing picnic option, this salad bursts with freshness and color, showcasing how simple, thoughtful ingredient choices elevate an everyday meal.
Prep and Cook Time
- Preparation: 20 minutes
- Cooking: 15 minutes
- Total: 35 minutes
Yield
Serves 4 generous portions
Difficulty Level
Easy – Perfect for cooks of all skill levels looking to create a fresh, wholesome salad in under an hour.
Ingredients
- 200g rice vermicelli noodles (or thin rice noodles), cooked and cooled
- 2 large chicken breasts, poached and shredded
- 1 large carrot, julienned
- 1 cup snap peas, trimmed and thinly sliced
- 1 large cucumber, deseeded and finely sliced
- 1 red bell pepper, thinly sliced into strips
- 3 green onions, finely chopped
- ¼ cup fresh cilantro leaves, roughly chopped
- ¼ cup fresh mint leaves, chopped
- 2 tablespoons toasted sesame seeds
- For the dressing:
- 3 tablespoons fresh lime juice
- 1 tablespoon honey or agave syrup
- 2 tablespoons soy sauce (or tamari for gluten-free)
- 1 teaspoon toasted sesame oil
- 1 small garlic clove, minced
- 1 teaspoon freshly grated ginger
- Pinch of chili flakes (optional, for subtle heat)
Instructions
- Prepare the noodles: Cook the rice vermicelli noodles according to package instructions, usually soaking in hot water for 5-7 minutes until tender but firm.Drain well and rinse under cold water to stop cooking. Set aside on a large plate to cool completely.
- Cook the chicken: Poach the chicken breasts gently in simmering water seasoned lightly with salt for 12-15 minutes until cooked through.Remove, cool slightly, then shred into bite-sized pieces using two forks or your hands for a rustic texture.
- Prepare the vegetables: While the chicken poaches and noodles cool, julienne the carrot, slice the cucumber and bell pepper, trim and slice the snap peas, and chop the green onions, cilantro, and mint.Fresh herbs are essential-they add an invigorating lift to the salad’s flavor profile.
- Make the dressing: In a small bowl, whisk together the lime juice, honey, soy sauce, toasted sesame oil, minced garlic, grated ginger, and chili flakes (if using).Adjust sweetness or acidity to taste-this balancing act is key for a refreshing final result.
- Assemble the salad: In a large mixing bowl, combine the cooled noodles, shredded chicken, and prepared vegetables and herbs.Pour the dressing over everything and toss gently but thoroughly to ensure every bite is infused with the vibrant citrus-ginger dressing.
- Garnish and serve: Transfer the salad to a beautiful serving dish. Sprinkle generously with toasted sesame seeds for added nuttiness and subtle crunch, enhancing both texture and visual appeal. Serve immediately for maximum freshness.
Tips for Success
- Cook noodles precisely: Rice vermicelli can quickly become mushy if overcooked. Soak and rinse immediately with cold water to maintain a perfect al dente bite.
- Herbs are the heroes: Don’t skimp on fresh cilantro and mint. Their aromatic, bright notes elevate the dish substantially.
- Make-ahead magic: Prepare the dressing and shred chicken a day ahead to save time and deepen flavors.
- customize crunch: Add roasted peanuts or cashews for a satisfying crunch and extra protein boost.
- Chili variation: For those sensitive to heat,omit chili flakes or substitute with a dash of smoked paprika to keep complexity without spiciness.
Serving Suggestions
This Refreshing Chicken Noodle Salad shines as a light main course on warm days,complemented by an iced green tea or sparkling citrus water.For presentation,serve atop a bed of crisp butter lettuce or baby spinach leaves and garnish with thin lime wedges to invite a final touch of zing at the table. A delicate drizzle of extra sesame oil just before serving adds a glossy finish and subtle depth.
Pair it with simple spring rolls or a chilled cucumber soup for a balanced, elegant meal. Leftovers keep well in an airtight container in the fridge for up to 24 hours-just toss again before serving to redistribute dressing and freshen flavors.

| Nutrient | Per Serving |
|---|---|
| Calories | 320 kcal |
| Protein | 32 g |
| Carbohydrates | 28 g |
| Fat | 8 g |
For more innovative salad ideas packed with bold flavors, explore our Asian-Inspired Salads Collection. To understand the nutritional impact of common salad ingredients, visit EatRight.org for trusted dietary guidelines.
Mastering the Art of Dressing for a Perfectly Balanced Flavor
Refreshing Chicken Noodle Salad is a delightful blend of textures and flavors that awakens the palate while remaining light and satisfying. Achieving harmony in this salad crucially depends on -where tangy,savory,and slightly sweet notes come together to complement the tender chicken and crisp vegetables. Whether you’re preparing a swift lunch or a vibrant picnic dish, the dressing transforms every bite, bringing the entire ensemble to life with just the right touch.
Prep and Cook Time
- Preparation: 20 minutes
- Cooking: 15 minutes
- Total Time: 35 minutes
Yield
Serves 4 generously
difficulty Level
Easy – perfect for cooks at any experience level aiming to create a refreshing yet nuanced dish
Ingredients
- 8 oz rice noodles, cooked according to package instructions, drained and rinsed
- 2 cups cooked chicken breast, shredded or diced (skinless, boneless)
- 1 cup cucumber, julienned
- 1 cup red bell pepper, thinly sliced
- ½ cup shredded carrots
- ¼ cup fresh cilantro, roughly chopped
- ¼ cup fresh mint leaves, torn
- 3 tbsp toasted sesame seeds
- For the Dressing:
- 3 tbsp freshly squeezed lime juice
- 2 tbsp light soy sauce (or tamari for gluten-free)
- 1 tbsp honey (or maple syrup for a vegan twist)
- 1 tbsp rice vinegar
- 1 tsp toasted sesame oil
- 1 small garlic clove, minced
- ½ tsp grated fresh ginger
- ¼ tsp red pepper flakes (optional for a gentle heat)
Instructions
- Prepare the noodles: Cook the rice noodles following package instructions until al dente. Drain and rinse under cold water to stop cooking and prevent sticking. Set aside in a large mixing bowl.
- Mix the vegetables and herbs: Add the julienned cucumber, red bell pepper, shredded carrots, cilantro, and mint to the noodles. Toss gently to distribute flavors evenly.
- Make the dressing: In a small bowl, whisk together lime juice, soy sauce, honey, rice vinegar, sesame oil, minced garlic, grated ginger, and red pepper flakes until fully combined and smooth.
- Combine chicken and dressing: Fold the shredded chicken into the vegetables and noodles.Pour the dressing over the mixture and toss thoroughly but gently, ensuring every strand of noodle and piece of chicken is lightly coated with the vibrant dressing.
- Let it rest: For the best fusion of flavors, cover the bowl and refrigerate for at least 20 minutes before serving. This resting time allows the dressing to soak into the noodles and bring brightness to the chicken.
- Garnish and serve: Just before serving, sprinkle toasted sesame seeds over the salad and give it a final light toss. Add extra fresh herbs if desired for an aromatic flourish.
Tips for Success
- Use freshly squeezed lime juice: It adds vivid brightness more potent than bottled alternatives, lifting the dish naturally.
- Adjust sweetness carefully: Balance the honey amount according to your taste; the dressing should be tangy first, with a mild kiss of sweetness.
- Opt for fresh herbs: Both cilantro and mint boast essential oils that create freshness; substitute with basil for a different fragrant twist.
- Prep ahead: The salad benefits from sitting in the fridge for 30 minutes to absorb flavors; store dressing separately if prepping well in advance.
- Toast sesame seeds: Gently toast on a dry skillet until golden to deepen their nutty aroma and elevate the overall profile.
Serving Suggestions
This refreshing chicken noodle salad shines served chilled as a standalone meal or alongside simple sides. Present it in shallow bowls, garnished with extra herbs and a wedge of lime for an inviting pop of color and acidity. Add thinly sliced avocado or crisp snap peas for extra texture and richness.For a vibrant presentation, serve on a bed of mixed baby greens or alongside crunchy spring rolls for a complete Asian-inspired lunch or light dinner.
| Nutrient | Per Serving |
|---|---|
| Calories | 320 kcal |
| Protein | 28 g |
| Carbs | 32 g |
| Fat | 7 g |
For enhancing your Asian-inspired salads, don’t miss our detailed guide on Ultimate Asiatic Salad Dressings. Additionally, visit Serious Eats for expert advice on mastering dressings and balancing fresh flavors in warm-weather meals.
Incorporating Fresh Herbs and Crunchy Elements for Added Texture
Refreshing Chicken Noodle Salad is an absolute delight when it comes to balancing vibrant flavors and tantalizing textures. Elevating this classic dish requires the thoughtful inclusion of fresh herbs and crunchy elements, which infuse every bite with brightness and satisfying crispness. Incorporating these components not only enlivens the palate but also transforms an ordinary salad into a feast for the senses.
Prep and cook Time
- Preparation: 20 minutes
- Cooking: 15 minutes
- Total: 35 minutes
Yield
Serves 4 generous portions
Difficulty Level
Easy
Ingredients
- 200g rice noodles or thin vermicelli
- 2 cups cooked shredded chicken breast
- 1 cup finely chopped fresh cilantro
- 1/2 cup fresh mint leaves, chopped
- 1/4 cup fresh basil, thinly sliced
- 1 cup shredded carrots
- 1 cup thinly sliced cucumber (seeds removed)
- 1/2 cup roasted peanuts, chopped
- 1/4 cup toasted sesame seeds
- 1/3 cup crispy fried shallots (store-bought or homemade)
- 2 tablespoons finely chopped green onions
- 3 tablespoons freshly squeezed lime juice
- 2 tablespoons soy sauce (low sodium preferred)
- 1 tablespoon honey or maple syrup
- 1 tablespoon toasted sesame oil
- 1 garlic clove, minced
- Salt and freshly ground black pepper, to taste
Instructions
- Prepare the noodles: Soak the rice noodles in warm water for 8-10 minutes or until soft but still slightly firm to the bite. Drain well and set aside, tossing lightly with a drizzle of sesame oil to prevent sticking.
- Mix the dressing: In a small bowl, whisk together the lime juice, soy sauce, honey, sesame oil, and minced garlic until smooth and well combined. Adjust seasoning with a pinch of salt and pepper.
- Combine herbs and vegetables: In a large mixing bowl, gently toss the shredded chicken, chopped cilantro, mint, basil, shredded carrots, cucumber, and green onions. Let the fresh herbs shine as they release their aromatic oils.
- Add noodles and dressing: Fold the softened noodles into the herb and chicken mixture.Pour over the dressing and toss gently but thoroughly to coat every strand and leaf in bright, tangy flavor.
- Incorporate crunch: Just before serving, sprinkle the chopped roasted peanuts, toasted sesame seeds, and crispy fried shallots evenly over the salad to add irresistible texture and nutty depth.
- Final touches: Taste and adjust with extra lime juice or soy sauce if desired. Serve chilled or at room temperature for the best experience.
Tips for Success
- Fresh herbs: Use fresh, vibrant herbs for the best flavor contrast. If fresh basil isn’t available, Thai basil is a perfect choice that adds a sweet-spicy note.
- Crunch variations: If peanuts aren’t an option, try chopped roasted cashews or almonds for crunch.For a topping twist, toasted coconut flakes lend a subtle tropical flavor.
- Make ahead: Prepare the chicken and noodles a day in advance. Store herbs and crunchy toppings separately to keep textures fresh and crisp until serving.
- Vegetarian option: Swap shredded chicken with grilled tofu or tempeh marinated in soy and garlic for a plant-based version that still highlights the fresh herb and crunch elements.
- Balancing moisture: Ensure noodles are well drained and patted dry before mixing to avoid sogginess and keep the salad looking vibrant.
Serving Suggestions
Serve this salad in chilled bowls or on a large platter to showcase the colorful medley of herbs and crunchy toppings. Garnish with whole mint leaves, extra lime wedges, and a scattering of fresh chopped peanuts for an inviting presentation.Pair with crisp iced green tea or a light cucumber infused water to amplify the refreshing qualities. this dish also shines alongside a simple vegetable spring roll or a light miso soup for a well-rounded, crisp meal.

| Nutrient | Per Serving |
|---|---|
| Calories | 350 kcal |
| Protein | 28 g |
| Carbohydrates | 34 g |
| Fat | 12 g |
enhancing Your Refreshing Chicken Noodle Salad Experience
By thoughtfully integrating the bright zing of fresh herbs like cilantro,mint,and basil alongside crunchy elements such as roasted peanuts and crispy fried shallots,your chicken noodle salad becomes a dynamic party of textures and flavors. The crisp freshness offsets the tenderness of the noodles and chicken, creating a perfectly balanced bite every time. This vibrant combination invites creativity and personalization, making it one of the most versatile and delicious salads in your culinary repertoire.
For related inspiration, you might enjoy our Zingy Citrus Quinoa salad, which also highlights fresh herbs and crunchy textures in a bright, wholesome dish.
To learn more about the benefits of fresh herbs, check out this thorough guide by Medical News Today.
Creative Serving Suggestions to Transform Your Chicken Noodle salad Experience
Refreshing Chicken Noodle Salad bursts with vibrant textures and bright flavors that effortlessly elevate your mealtime. this dish beautifully combines tender chicken, springy noodles, and crisp vegetables, creating a refreshing experience that delights both the eyes and palate. Inspired by classic Asian cold salads but reimagined with a unique twist, it’s perfect for warm days or as a lively centerpiece at any gathering.
Prep and Cook Time
Preparation: 20 minutes | Cook Time: 15 minutes | Total: 35 minutes
Yield
Serves 4 generous portions
Difficulty Level
Easy - perfect for busy weeknights or casual entertaining
Ingredients
- 8 oz rice vermicelli noodles, cooked and rinsed under cold water
- 2 cups cooked chicken breast, shredded or chopped
- 1 cup shredded carrots
- 1 cup thinly sliced cucumber
- ½ cup thinly sliced red bell peppers
- ½ cup chopped fresh cilantro
- 3 green onions, sliced on a bias
- ¼ cup chopped roasted peanuts, optional for crunch
- for the dressing:
- 3 tbsp fresh lime juice
- 2 tbsp low-sodium soy sauce
- 1 tbsp honey or maple syrup
- 1 tbsp toasted sesame oil
- 1 garlic clove, minced
- 1 tsp freshly grated ginger
- Pinch of red pepper flakes, to taste
Instructions
- Prepare the noodles: Cook rice vermicelli according to package instructions until just tender. drain and immediately rinse under cold water to stop cooking and keep noodles springy. Set aside.
- Mix the dressing: In a bowl, whisk together lime juice, soy sauce, honey, sesame oil, garlic, ginger, and red pepper flakes until smooth and fragrant.
- Combine salad components: In a large mixing bowl, toss the noodles, chicken breast, shredded carrots, cucumber, red bell peppers, green onions, and cilantro.
- Dress the salad: Pour the dressing over the salad and gently toss to coat all ingredients evenly without mashing the noodles.
- Final touches: Sprinkle with chopped roasted peanuts for a delightful crunch. For best flavor, let the salad chill for 15 minutes in the fridge before serving.
- Serve chilled: Transfer the salad to a wide, shallow bowl or plate to showcase its vibrant colors and textures.
tips for Success
- For an extra layer of flavor, marinate the cooked chicken briefly in a splash of lime juice and soy sauce before adding to the salad.
- Use fresh herbs like mint or Thai basil for a refreshing twist if cilantro isn’t your favorite.
- To avoid soggy noodles, always rinse thoroughly with cold water after cooking and drain well.
- Make this salad up to 2 hours ahead; the flavors deepen, but be sure to add crunchy toppings like peanuts just before serving.
- Substitute chicken with firm tofu or cooked shrimp for different protein options.
Unleash your creativity and elevate your presentation to transform your experience with this refreshing chicken noodle salad. Serve it in crisp, edible romaine lettuce cups for a playful and handheld delight that’s perfect for sharing at summer picnics. Layer the salad in a clear glass bowl or trifle dish to show off the colorful ribbons of carrot, cucumber, bell pepper, and herbs for an irresistible visual appeal.
For a touch of elegance,adorn each plate with a small sprig of cilantro and a thin lime wheel delicately perched on top. Drizzle some toasted sesame seeds lightly over the surface to introduce subtle nuttiness. To amplify texture contrasts, offer an assortment of crunchy accompaniments like crispy wonton strips or sliced radishes on the side.
Pairing this salad with a side of chilled edamame pods or jasmine rice not only balances the meal but also complements the Asian-inspired flavor profile. For outdoor gatherings, fill small mason jars with individual portions, layering the noodles and vegetables first, then topping with dressing just before serving to maintain freshness and crispness.
Lastly, don’t hesitate to experiment with tropical fruits like thinly sliced mango or julienned jicama-these additions add bursts of sweetness and a satisfying crunch, taking your refreshing chicken noodle salad to new heights of deliciousness.
| Nutrient | per Serving |
|---|---|
| Calories | 350 kcal |
| Protein | 28 g |
| Carbohydrates | 38 g |
| Fat | 8 g |
Looking for more inspiration? Discover how to master other refreshing salads like our Thai Mango Salad that brilliantly complements the flavors here. For detailed nutrition and health benefits linked to the ingredients used, visit the Healthline Chicken Nutrition Guide.
Q&A
Q&A: Refreshing Chicken Noodle Salad – A Twist on classic Flavors
Q1: What makes this chicken noodle salad different from the traditional version?
A1: Unlike the classic chicken noodle soup that’s warm and comforting, this salad reimagines those flavors in a cool, crisp dish. The noodles are chilled and tossed with fresh vegetables, tender poached chicken, and a zesty dressing that brightens every bite. It’s a delightful balance of savory and refreshing that’s perfect for warm days or light meals.
Q2: What kind of noodles work best for this salad?
A2: Thin,delicate noodles like vermicelli or soba noodles are ideal because they absorb the dressing well and meld seamlessly with the other textures. Rice noodles are a fantastic gluten-free option,while egg noodles bring a subtle richness.Just be sure to cook them al dente and rinse under cold water to stop the cooking process and cool them down.
Q3: How can I prepare the chicken to keep it juicy and flavorful?
A3: Poaching the chicken gently in a lightly seasoned broth keeps it tender and moist. Alternatively, you can roast or grill the chicken with a simple herb rub and slice it thinly for added texture. The key is to avoid overcooking so the chicken remains succulent and pairs beautifully with the crisp vegetables.Q4: What vegetables are best to add to this salad?
A4: Crisp, colorful vegetables like cucumbers, bell peppers, snap peas, and shredded carrots add crunch and vibrancy. Fresh herbs such as cilantro, mint, or basil introduce aromatic layers that elevate the dish’s freshness. Thinly sliced scallions or red onions contribute a mild bite without overwhelming the palate.Q5: Can you suggest a flavorful dressing for the chicken noodle salad?
A5: A tangy dressing combining lime juice, soy sauce, a touch of honey or maple syrup, minced garlic, and grated ginger complements the salad perfectly. Adding a splash of toasted sesame oil brings a nutty depth. Whisk together and toss the salad just before serving to keep everything bright and crisp.
Q6: How can I make this chicken noodle salad a complete meal?
A6: To turn this salad into a satisfying main, consider adding edamame for protein-packed plant goodness or toasted nuts like cashews or almonds for crunch and healthy fats. Serving it with a side of fresh fruit or a crunchy Asian slaw rounds out a vibrant, nourishing plate.
Q7: what tips ensure the salad stays fresh and delicious if prepared ahead of time?
A7: Keep the dressing separate until just before serving to prevent sogginess. Store the noodles, chicken, and vegetables in airtight containers in the fridge. When you’re ready to enjoy, mix everything together, giving it a gentle toss so every bite bursts with fresh, tangy flavor.
This chicken noodle salad reinvents a classic by combining familiar tastes with a refreshing twist - perfect for anyone seeking a light yet flavorful meal that delights the senses!
Closing remarks
Whether served as a light lunch or a vibrant side dish, this refreshing chicken noodle salad breathes new life into classic flavors with its crisp textures and zesty twists. It’s a versatile recipe that invites creativity-swap in your favorite herbs, add a splash of citrus, or toss in crunchy nuts to make it uniquely yours. By reimagining a beloved comfort food, this salad proves that sometimes the best meals are those that surprise and delight your taste buds in unexpected ways. So next time you crave something familiar yet fresh, give this salad a whirl and enjoy a burst of flavor that’s anything but ordinary.
]]>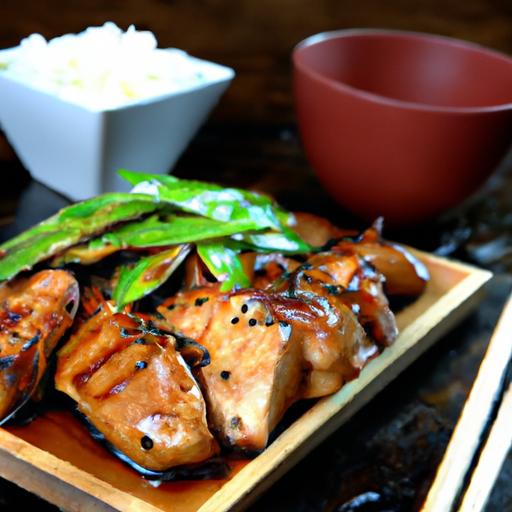
The origins and Cultural Significance of Teriyaki Chicken
Teriyaki chicken carries more than just a perfect balance of sweet and savory flavors-it encapsulates a rich cultural tapestry woven through Japanese culinary history. Originating from traditional Japanese grilling techniques where fish or meat was basted with soy sauce-based glazes, the term “teriyaki” derives from “teri,” meaning shine or luster, and “yaki,” meaning grill or broil. This glaze’s characteristic glossy finish is what makes teriyaki chicken visually irresistible and deeply comforting across the globe.
My first encounter with this dish was during a vibrant street festival in Tokyo, where the aroma of caramelizing soy and mirin teased through the air. That moment was an awakening-the tender chicken, kissed by the sweet soy glaze, bursting with umami and warmth, defined home-cooking and celebration simultaneously.
The Past Roots and Cultural Impact of Teriyaki Chicken
Teriyaki chicken has traveled far beyond its japanese beginnings. In Japan, it began as a simple technique for enhancing fresh fish, elegantly balancing soy sauce’s saltiness with the subtle sweetness of sugar or mirin. As global palates embraced Japanese cuisine, teriyaki adapted, frequently enough incorporating chicken-a universally loved protein that soaks up the sauce’s flavors beautifully. This evolution represents culinary blending, a hallmark of modern gastronomy where tradition meets innovation.
In Japanese culture, teriyaki dishes are more than meals-thay express hospitality and seasonal respect. The glossy sheen is as much about appearance as it is about texture and flavor, appealing to all senses. on special occasions or everyday dinners alike, teriyaki chicken offers a perfect marriage of simplicity and depth, inviting cooks of all levels to savor the art of balance.
Prep and Cook Time
- Preparation: 15 minutes
- Cooking: 20 minutes
- Total: 35 minutes
Yield
Serves 4 generous portions
Difficulty Level
Easy – Perfect for both beginners and seasoned home cooks
Ingredients
- 4 boneless, skin-on chicken thighs, trimmed
- 1/3 cup soy sauce (preferably low sodium)
- 1/4 cup mirin (Japanese sweet rice wine)
- 2 tablespoons sake (Japanese rice wine substitute available)
- 2 tablespoons pure honey or maple syrup
- 2 cloves garlic, finely minced
- 1 teaspoon freshly grated ginger
- 1 tablespoon toasted sesame oil
- 1 teaspoon cornstarch, mixed with 2 teaspoons cold water (slurry)
- 2 teaspoons toasted sesame seeds for garnish
- Fresh sliced scallions for garnish
- Steamed jasmine rice or your favorite side for serving
Instructions
- In a medium bowl, combine soy sauce, mirin, sake, honey, garlic, and ginger. Stir well to blend all ingredients into a smooth marinade.
- Place the chicken thighs in a resealable bag or shallow dish and pour the marinade over. Seal or cover and refrigerate for at least 30 minutes, ideally 2 hours for enhanced flavor absorption.
- Heat sesame oil in a large non-stick skillet over medium heat. Remove chicken from marinade (reserve marinade) and place skin-side down in the skillet.
- Sauté the chicken until the skin is crispy and golden brown, about 7-8 minutes. flip and cook the other side for about 5 minutes, until the chicken is nearly cooked through.
- Pour the reserved marinade into the skillet.Bring to a gentle boil, then reduce heat to low and simmer for 3 minutes, allowing the sauce to begin thickening and envelop the chicken.
- Stir in the cornstarch slurry and continue cooking for an additional minute until the sauce becomes glossy and coats the chicken beautifully.
- Remove from heat. Let the chicken rest for a couple of minutes before serving to lock in the juices.
- Plate the chicken atop warm steamed rice, spooning extra sauce over. Garnish generously with toasted sesame seeds and freshly sliced scallions.
Tips for Success: Elevate Your Teriyaki Chicken
- Marinating Time: For best results, marinate at least 2 hours or overnight. This helps the chicken lock in the iconic teriyaki flavor and tenderizes the meat deeply.
- Skin-On Chicken: Using skin-on thighs adds crisp texture that contrasts with the sweet glaze,making every bite a delight.
- Adjusting Sweetness: Swap honey for pure maple syrup or brown sugar if desired. For a lighter option, mirror the sweetness with coconut sugar.
- Pan Sauce: don’t rush the final step-allowing the sauce to thicken slowly intensifies its shine and taste.
- Make-Ahead: Cooked chicken can be stored in an airtight container for up to 3 days, reheating gently while preserving the sauce’s gloss and flavor.
Serving Suggestions for an Authentic Experience
Serve teriyaki chicken with steamed jasmine rice or fluffy short-grain rice for the best traditional pairing. Include crisp sautéed vegetables like snap peas or bok choy to add freshness and crunch, balancing the sauce’s richness. Garnishes play a vital role: luminous green scallions and the nutty crunch of toasted sesame seeds highlight visual elegance and complementary flavors.
For an added touch of luxury, a side of pickled ginger or freshly grated daikon radish can provide contrasting notes that cut through the sweetness.

| Nutrient | Per Serving |
|---|---|
| Calories | 350 kcal |
| Protein | 32 g |
| Carbohydrates | 12 g |
| Fat | 18 g |
For further insight into the cultural context of Japanese cuisine, Japan Guide’s culinary section offers a rich resource perfect for expanding your culinary horizons.
Mastering the Balance of Sweet and Savory Flavors
Teriyaki chicken unveiled: sweet, savory, and simply irresistible, this dish embodies the perfect harmony of flavors that instantly transport you to the vibrant streets of Japan. The magic lies in how the glossy, caramelized teriyaki glaze balances the rich umami of soy sauce with the gentle sweetness of mirin and brown sugar, accentuating tender, juicy chicken with every bite.whether you’re a seasoned home cook or just beginning your culinary journey, this recipe invites you to master the art of balancing bold and subtle tastes with confidence and flair.
Prep and Cook Time
- Preparation: 15 minutes
- Cooking: 20 minutes
- Total time: 35 minutes
Yield
Serves 4 generous portions
Difficulty Level
Easy – perfect for weeknight dinners or impressing guests without stress
Ingredients
- 4 boneless, skinless chicken thighs (about 1.5 lbs), trimmed
- 1/4 cup soy sauce (low sodium recommended)
- 2 tbsp mirin (Japanese sweet rice wine)
- 2 tbsp brown sugar (packed)
- 1 tbsp freshly grated ginger
- 2 cloves garlic, minced
- 1 tsp toasted sesame oil
- 1 tbsp cornstarch mixed with 2 tbsp water (slurry)
- 1 tbsp vegetable oil (for sautéing)
- sesame seeds, toasted, for garnish
- Sliced green onions, for garnish
Instructions
- Prepare the marinade: In a medium bowl, whisk together soy sauce, mirin, brown sugar, ginger, garlic, and sesame oil until the sugar dissolves completely.
- marinate the chicken: Place the chicken thighs in the bowl with the marinade, ensuring each piece is coated.Cover and refrigerate for at least 30 minutes – for deeper flavor, marinate up to 2 hours.
- Heat the pan: warm vegetable oil in a large skillet over medium-high heat until shimmering but not smoking.
- Sear the chicken: Lift the chicken from the marinade (reserve marinade) and place skin-side down in the pan. Sauté until golden brown, about 5 minutes, stirring occasionally to prevent sticking.
- Flip and cook: Turn the chicken and reduce heat to medium. Pour reserved marinade into the skillet and let it simmer gently. Cook for another 7 to 8 minutes, or until the chicken reaches an internal temperature of 165°F (74°C).
- Thicken the sauce: Stir the cornstarch slurry again, then slowly add it to the skillet while stirring. Let the sauce bubble and thicken for 1-2 minutes, coating the chicken with a shiny glaze.
- Rest and slice: Remove the chicken from heat and allow it to rest for 3 minutes. Slice into bite-sized pieces or serve whole.
- Garnish and serve: Sprinkle with toasted sesame seeds and sliced green onions for a fresh crunch and visual contrast.
Tips for Success
- Use skin-on thighs for an extra layer of texture and flavor if preferred, but adjust cooking time accordingly.
- If you lack mirin, substitute with 1 tbsp honey and 1 tbsp rice vinegar to mimic its subtle sweetness and tang.
- Always reserve the marinade before cooking chicken to avoid cross-contamination and ensure the sauce becomes the star glaze.
- For a lighter version, swap chicken thighs with chicken breast, but be careful not to overcook-they dry out faster.
- To prep ahead, marinate the chicken and keep it refrigerated overnight for intensified flavor, then cook fresh before serving.
- Add a pinch of crushed red pepper flakes into the sauce for a subtle spicy kick that plays beautifully against the sweetness.
Serving Suggestions
This teriyaki chicken shines beautifully over a bed of steamed jasmine rice or sticky sushi rice that soaks up the savory-sweet sauce.For added texture, serve alongside sautéed bok choy or a crisp cucumber salad tossed with rice vinegar and sesame seeds.
Garnishing with fresh green onions and toasted sesame seeds amplifies the dish’s appeal, creating vibrant pops of color and an irresistible aroma. For a complete meal, consider pairing with edamame or lightly pickled vegetables to contrast the rich flavors.

Nutrition Facts
| Nutrient | Per Serving |
|---|---|
| Calories | 320 |
| Protein | 28g |
| Carbohydrates | 12g |
| Fat | 18g |
Looking to explore more Japanese-inspired recipes? Check out our Japanese Cooking Basics guide for essential tips and ideas. For detailed background on the tradition of teriyaki, visit the Japan Guide’s official page.
Essential Ingredients and Tips for Authentic Teriyaki Sauce
teriyaki Chicken is a beloved classic that perfectly balances sweet and savory flavors, evoking cozy family dinners and vibrant street food stalls from Japan’s culinary tapestry. Capturing this harmony starts with crafting an authentic teriyaki sauce-a luscious glaze that seeps into tender chicken, caramelizing into glossy perfection.This transformational sauce brings together a small handful of powerful ingredients,each with its own role,to create that unmistakable umami-rich taste that’s simply unforgettable.
Prep and Cook Time
- Preparation: 10 minutes
- Cooking: 15 minutes
- Total Time: 25 minutes
Yield
Serves 4 generous portions
Difficulty Level
Easy – Perfect for both kitchen beginners and seasoned home cooks
Core Ingredients of a Truly Authentic Teriyaki Sauce
- 1/2 cup low-sodium soy sauce – The salty backbone, opt for naturally brewed soy sauce for depth
- 1/4 cup mirin – A sweet Japanese rice wine that imparts subtle sweetness and gloss
- 2 tablespoons sake (optional) - Adds mild fragrance and complexity (can substitute with water if preferred)
- 2 tablespoons granulated sugar or honey – Sweetener for that balanced glaze; honey adds a floral nuance
- 1 teaspoon freshly grated ginger – Gives a warm, zesty kick and freshness
- 1 clove garlic, minced – Aromatic depth that enhances the sauce’s savory side
- 1 tablespoon cornstarch mixed with 2 tablespoons cold water – To thicken the sauce to a perfect syrupy consistency
Step-by-Step: bringing the Sauce to Life
- Combine soy sauce, mirin, sake, sugar, ginger, and garlic in a small saucepan over medium heat. Gently stir to dissolve the sugar.
- Bring the mixture to a gentle simmer, allowing the flavors to meld for about 5 minutes; this also lightly reduces the liquid improving richness.
- Whisk the cornstarch slurry into the simmering sauce gradually, stirring constantly to avoid lumps.
- Simmer for another 2-3 minutes until the sauce thickens noticeably, coating the back of a spoon with its glossy sheen.
- Remove from heat and allow the sauce to cool slightly. it will thicken more as it cools-ideal for glazing your teriyaki chicken to sticky, irresistible perfection.
Tips for Success with Your Teriyaki Sauce
- Choose quality soy sauce: Naturally brewed versions elevate flavor with complexity over artificially brewed alternatives.
- Mirin substitutes: If mirin is unavailable, use a mix of 1 tablespoon sugar plus 1/4 cup water or 2 tablespoons rice vinegar for a similar effect.
- Control your sweetness: Adjust the sugar or honey gradually-too sweet can overpower, too little will lack balance.
- Aroma matters: Freshly grated ginger and minced garlic create layers of flavor; avoid powdered versions for best results.
- Make ahead and store: This sauce keeps well in the fridge for up to one week in an airtight container-grate for rapid meal prep.
- Thicken naturally: Use the cornstarch slurry carefully-too much thickener can yield an overly gummy texture.
Best Ways to Enjoy Your Teriyaki Chicken
The vibrant sauce shines when brushed generously over grilled or pan-seared chicken thighs, allowing its sweet-savory glaze to caramelize beautifully. Serve it atop a bed of steaming jasmine rice or fluffy quinoa for a comforting base. Freshly steamed broccoli or sautéed snap peas add crisp contrast and vibrant color. Sprinkle with toasted sesame seeds and finely sliced scallions for visual finesse and a burst of crunch. A wedge of fresh lime on the side introduces a bright acidity that cuts through the richness.
| Nutrient | Per Serving |
|---|---|
| Calories | 320 kcal |
| Protein | 28g |
| Carbohydrates | 18g |
| Fat | 12g |

For further inspiration and side dish ideas, check out our Perfect Jasmine Rice Recipe. To deepen your understanding of traditional Japanese cooking techniques,visit the Japanese Food Guide.
Creative Serving Suggestions to Elevate Your Teriyaki Chicken Experience
Teriyaki Chicken has captured hearts worldwide with its irresistible fusion of sweet and savoury flavors, making it a go-to dish that transforms any dinner into a special occasion. Originating from Japan, this beloved classic celebrates the art of glazing tender chicken with a luscious, glossy teriyaki sauce that’s both deeply flavorful and comfortingly familiar. Whether you’re crafting a weeknight meal or impressing guests, these creative serving ideas will elevate your teriyaki chicken experience to new heights – turning every bite into a vibrant celebration of taste and style.
Prep and Cook Time
- Preparation Time: 15 minutes
- Cooking Time: 20 minutes
- Total Time: 35 minutes
Yield
Serves 4 generous portions
Difficulty Level
Easy – Perfect for beginners and seasoned cooks alike
Ingredients
- 4 boneless, skinless chicken thighs, trimmed
- 1/2 cup soy sauce (low sodium preferred)
- 1/4 cup mirin (Japanese sweet rice wine)
- 2 tablespoons honey or pure maple syrup
- 2 tablespoons brown sugar, packed
- 2 cloves garlic, minced
- 1 teaspoon fresh ginger, grated
- 1 tablespoon toasted sesame oil
- 1 teaspoon cornstarch mixed with 1 tablespoon water (optional, for thickening)
- sesame seeds and sliced scallions for garnish
Instructions
- Marinate the chicken: In a medium bowl, combine soy sauce, mirin, honey, brown sugar, garlic, ginger, and sesame oil. Add chicken thighs and marinate in the fridge for at least 30 minutes,ideally 2 hours for deeper flavor.
- Cook the chicken: Heat a non-stick skillet over medium heat. Remove chicken from marinade (reserve the sauce) and cook until browned and cooked through, about 6-7 minutes per side. Transfer to a plate and keep warm.
- Prepare the sauce: Pour the reserved marinade into the same skillet and bring to a gentle boil.If you prefer a thicker glaze, stir in the cornstarch slurry and cook until the sauce thickens, about 2 minutes.
- Glaze the chicken: Return the cooked chicken to the skillet, coat evenly in the glossy sauce, and heat for 1-2 minutes to infuse the flavors.
- Plate beautifully: Slice the chicken into strips or leave whole. Drizzle with extra glaze, sprinkle sesame seeds and sliced scallions on top.
Chef’s Notes
- Variation: Swap chicken thighs for skinless chicken breasts for a leaner option, adjusting cooking time accordingly to avoid dryness.
- Make-ahead tip: Marinate the chicken overnight for an even richer teriyaki flavor that will wow taste buds the next day.
- Texture upgrade: For extra crunch, top the dish with crispy fried shallots or crushed roasted peanuts just before serving.
- Stovetop Tip: Avoid overcrowding your pan to ensure the chicken crisps beautifully rather than steams.
Transforming your teriyaki chicken into a vibrant culinary masterpiece is all about creative presentation and complementary sides that highlight its luscious sweetness and savory charm. Start by serving the chicken atop a bed of fragrant steamed jasmine rice or forbidden black rice for an elegant color contrast that invites curiosity and appetite alike.
for a playful twist on texture, pair your dish with crunchy pickled vegetables such as quick-pickled daikon radish or thin cucumber ribbons tossed in rice vinegar and sesame seeds. They offer a refreshing counterpoint to the rich teriyaki glaze.
Don’t underestimate the power of fresh herbs and vibrant garnishes – a sprinkle of finely sliced fresh thai basil or cilantro adds an herbal lift and frees the palate between bites. A wedge of lime on the side introduces a bright zesty note for guests who love a tangy explosion.
Bring depth with a side of charred broccolini or sautéed snap peas drizzled with toasted sesame oil and a sprinkle of chili flakes to awaken the senses. These green accompaniments not onyl balance the sweet but visually elevate your plate with color and sophistication.
For a shareable, casual meal vibe, arrange the teriyaki chicken alongside steamed bao buns filled with crisp cucumber slices, hoisin sauce, and fresh scallions-each bite a handheld delight that embodies the dish’s versatility.
Pro tip: Serve your teriyaki chicken on rustic wooden platters or shiny white stoneware to contrast the glossy sauce. Sprinkle additional toasted sesame seeds and finely julienned nori seaweed on top to subtly tie back to its Japanese roots-your guests will be equally impressed by the taste and the stunning presentation.
For inspiration on side dishes that pair beautifully, check out our Japanese Side Dishes Collection, or dive deeper into authentic teriyaki techniques at Serious Eats.

| Nutrient | Per Serving |
|---|---|
| Calories | 320 kcal |
| Protein | 30 g |
| carbohydrates | 18 g |
| Fat | 12 g |
Q&A
Q&A: Teriyaki Chicken Unveiled: Sweet, Savory, and Simply Irresistible
Q1: What exactly is teriyaki chicken?
A: Teriyaki chicken is a beloved Japanese dish where tender chicken pieces are glazed with a luscious, glossy sauce made from soy sauce, mirin, sugar, and sake (or a non-alcoholic substitute). The result is a perfect harmony of sweet and savory flavors that cling lovingly to the meat,creating an irresistible bite every time.
Q2: Where does the name “teriyaki” come from?
A: The word “teriyaki” combines two Japanese terms: “teri,” which means glaze or shine, referring to the glossy finish the sauce provides, and ”yaki,” which means grilled or broiled. Together, they describe the cooking process that leaves the chicken caramelized and shimmering.
Q3: What cuts of chicken work best for teriyaki chicken?
A: While teriyaki chicken is delicious with various cuts, thigh meat is often preferred for its juiciness and rich flavor, which absorb the sauce beautifully. However,chicken breasts or even drumsticks can be used if you prefer leaner or different textures.
Q4: How can I achieve the perfect balance of sweet and savory in the teriyaki sauce?
A: The magic lies in balancing the sweet elements-like sugar or honey-with salty soy sauce and a hint of acidity from mirin or rice vinegar. Slowly simmering the sauce thickens it while intensifying flavors, creating that signature sweet-savory glaze that clings perfectly to the chicken.
Q5: Can teriyaki chicken be made without sake or mirin?
A: Absolutely! If traditional mirin or sake isn’t on hand, you can substitute with a combination of rice vinegar and sugar to mimic the sweetness and acidity, or even use apple juice with a sprinkle of sugar. The key is to maintain that delicate sweet-sour balance.
Q6: What cooking methods are best for teriyaki chicken?
A: Grilling and pan-searing are the moast common techniques, each offering slight variations in texture and flavor. Grilling adds a smoky char, while pan-searing keeps things juicy with a beautifully caramelized exterior. Both methods invite the teriyaki sauce to deepen its glossy embrace.Q7: What are some creative ways to serve teriyaki chicken?
A: Beyond the classic bowl of steamed rice and vegetables, teriyaki chicken shines in wraps, salads, and even as a topping for noodles or grain bowls. Garnishing with toasted sesame seeds,sliced scallions,or pickled ginger adds delightful layers of texture and flavor.
Q8: How long should teriyaki chicken be marinated?
A: For maximum flavor infusion,marinate the chicken for at least 30 minutes to an hour. Overnight marination in the refrigerator can deepen the sweetness and savoriness, allowing every bite to burst with balanced, rich flavor.
Q9: Can teriyaki chicken be prepared ahead for meal prep?
A: Definitely! Teriyaki chicken keeps wonderfully in the fridge for 3 to 4 days and reheats beautifully while retaining moisture and flavor. It’s a fantastic option for quick lunches or dinners that feel indulgent yet wholesome.Q10: What makes teriyaki chicken simply irresistible?
A: it’s that magical interplay of sweet caramelization, umami-rich soy sauce, tender chicken, and a glossy, sticky finish that dances on the palate. This combination creates a comforting yet exciting dish that appeals to food lovers worldwide-proof that simplicity, when done right, is utterly captivating.
The Way Forward
Whether you’re a seasoned cook or just beginning your culinary journey, teriyaki chicken offers a perfect harmony of sweet and savory flavors that never fails to captivate the senses. Its glossy glaze and tender texture tell a story of tradition meeting simplicity, inviting you to explore the rich heritage behind each bite. So next time you crave a dish that’s both comforting and exciting, remember that teriyaki chicken is more than just a meal-it’s a delicious experience waiting to be unraveled. Dive in, savor every moment, and let this irresistible classic inspire your kitchen adventures.
]]>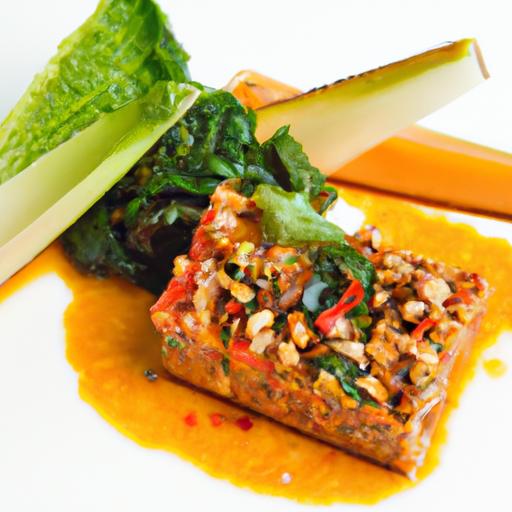
The Secret Sauce That Brings the Bang to Your Chicken
Skillet Bang Bang Chicken Thighs deliver an explosion of bold, spicy, and creamy flavors all jam-packed into one pan, making it a perfect weeknight crowd-pleaser. This dish marries crispy, golden chicken thighs with a luscious sauce that has just the right balance of heat and sweetness. Inspired by the flavors of classic Asian fusion sauces, the magic lies in the harmonious blend of sriracha, mayo, and a touch of honey, transforming simple chicken into an addictive culinary experience. Whether you’re craving a fuss-free dinner or want to impress hungry guests,this recipe brings fiery satisfaction in mere minutes.
Prep and cook Time
- Prep Time: 10 minutes
- Cook Time: 20 minutes
- total Time: 30 minutes
Yield
Serves 4 hearty portions
Difficulty Level
Easy – perfect for beginner cooks and anyone craving bold flavors without the fuss
Ingredients
- 6 bone-in, skin-on chicken thighs (about 2 pounds)
- 1 teaspoon kosher salt
- ½ teaspoon freshly ground black pepper
- 2 tablespoons vegetable oil
- ¼ cup mayonnaise (use full-fat for creaminess)
- 3 tablespoons sriracha sauce (adjust to taste for heat)
- 1 tablespoon honey
- 1 teaspoon soy sauce (or tamari for gluten-free)
- 1 teaspoon rice vinegar
- 2 cloves garlic, finely minced
- 2 green onions, thinly sliced (for garnish)
- 1 teaspoon toasted sesame seeds (optional garnish)
Instructions
- Season the chicken thighs generously with kosher salt and black pepper on both sides.
- Heat the vegetable oil in a large skillet over medium-high heat until shimmering.
- place the chicken skin-side down in the skillet. Sauté until the skin is deep golden brown and crisp, about 7-8 minutes. Resist the urge to move the chicken around, allowing a crisp crust to develop.
- Flip the chicken and lower the heat to medium. Cover the skillet and cook for an additional 8-10 minutes or until the internal temperature reaches 165°F (74°C). Remove the chicken and set aside on a plate to rest.
- In a medium bowl, whisk together mayonnaise, sriracha, honey, soy sauce, rice vinegar, and minced garlic until fully combined. This is the elusive sauce that brings the bang.
- Return the skillet to medium heat and pour the sauce mixture in.Stir constantly for 1-2 minutes until the sauce slightly thickens and becomes glossy, scraping up any browned bits left from the chicken-those bits pack serious flavor.
- Return the chicken thighs to the skillet, coating them thoroughly with the sauce. Allow them to warm through and absorb the sauce’s fiery creaminess for 1-2 minutes.
- Plate the chicken thighs and spoon any extra sauce from the skillet over the top.
- Garnish with thinly sliced green onions and sprinkle toasted sesame seeds for a nutty crunch and visual appeal.
Tips for Success
- Pat the chicken dry before seasoning to ensure maximum crispiness on the skin.
- Use a heavy cast-iron skillet or nonstick pan for even heat and a perfect sear.
- Feel free to reduce the honey if you prefer a spicier kick or swap the sriracha for a milder chili sauce.
- Make the sauce ahead and refrigerate if short on time, then warm gently before tossing with the cooked chicken.
- For extra depth, add a splash of freshly squeezed lime juice to brighten the sauce before serving.
Serving Suggestions
This dish shines when paired with simple, fresh sides. consider steaming fragrant jasmine rice or serving over fluffy cauliflower rice to soak up every bit of the sauce. A crisp cucumber salad or blanched green beans tossed in a hint of sesame oil adds a refreshing counterpoint.
For plating,stack the butter-golden chicken thighs on a warmed platter,drizzle the sauce generously,and scatter vibrant green onions and sesame seeds on top. The contrast between the glossy bang bang sauce and crispy skin is a feast for both the eyes and palate.

| Nutrient | Per Serving |
|---|---|
| Calories | 430 kcal |
| Protein | 32 g |
| Carbohydrates | 7 g |
| Fat | 30 g |
For more flavorful chicken dinner ideas, check out our Crispy Lemon Garlic Chicken recipe. For additional understanding of spicy condiment pairings, explore this Food Network guide on sriracha sauce.
Mastering the Perfect sear for Juicy Tender Thighs
Skillet Bang Bang Chicken Thighs deliver an extraordinary burst of bold flavor in minutes, thanks to a simple yet transformative searing technique that locks in moisture and flavor. Whether you’re new to cooking chicken thighs or looking to elevate your skillet skills, mastering the perfect sear is the secret to juicy, tender meat with that irresistible golden crust.
Prep and Cook Time
- Prep Time: 10 minutes
- Cook Time: 15 minutes
- Total Time: 25 minutes
Yield
Serves 4 generously
Difficulty Level
Easy – Perfect for weeknight dinners and beginners
Ingredients
- 4 bone-in, skin-on chicken thighs, trimmed and patted dry
- 1 teaspoon kosher salt
- 1/2 teaspoon freshly ground black pepper
- 2 tablespoons avocado oil (or any high smoke point oil)
- 3 cloves garlic, minced
- 1 tablespoon fresh ginger, grated
- 2 tablespoons soy sauce (or tamari for gluten-free)
- 1 tablespoon honey or maple syrup for touching sweetness
- 1 teaspoon sriracha (adjust for heat preference)
- 1 teaspoon rice vinegar
- 2 scallions, thinly sliced for garnish
- Sesame seeds for finishing touch (optional)
Instructions
- Season the thighs: Generously sprinkle both sides of the chicken thighs with kosher salt and black pepper. Press gently so the seasoning adheres to the skin.
- Heat your skillet: Place a heavy-bottomed cast iron or stainless steel skillet over medium-high heat. Add the avocado oil and allow it to shimmer but not smoke.
- Sear the thighs skin-side down: Carefully lay each thigh skin-side down in the hot skillet. Press down slightly to ensure even contact with the pan. Do not move the thighs for 6-7 minutes-this is how you achieve that signature golden, crisp crust that locks in juices.
- Flip and brown the other side: Once the skin is deep golden brown and releases easily from the pan, flip the thighs over. cook for another 4-5 minutes until the other side starts to brown.
- Add aromatics: Lower the heat slightly and add minced garlic and grated ginger around the chicken,sautéing gently until fragrant-about 30 seconds. Stir carefully to avoid burning.
- Create the bang bang sauce: Mix soy sauce, honey, sriracha, and rice vinegar in a small bowl.Pour this sauce evenly over the chicken thighs.
- Simmer to glaze: flip the thighs again,coat thoroughly in the sauce,and let everything simmer for 2-3 minutes while the glaze thickens and clings to the chicken.
- Rest the chicken: Remove the thighs from the skillet and let them rest for 5 minutes. This helps redistribute the juices and ensures every bite is tender and flavorful.
- Serve: Plate your Skillet Bang Bang Chicken Thighs with a sprinkle of thinly sliced scallions and sesame seeds for a pop of colour and texture.
Tips for Success
- pat your chicken dry – moisture on the skin creates steam, preventing that essential crisp sear.
- Do not overcrowd the skillet – cook in batches if needed to maintain consistent heat and proper browning.
- Use a thermometer – aim for an internal temperature of 165°F (74°C) for perfectly cooked thighs.
- Adjust heat carefully– too high and the garlic and ginger can burn; reduce slightly once aromatics are added.
- Make it ahead: The sauce can be prepared in advance and stored refrigerated for up to a week; reheat gently and spoon over freshly seared thighs.
Serving Suggestions
For a vibrant, balanced meal, serve the thoughtfully seared chicken thighs over a bed of steamed jasmine rice or coconut rice, which beautifully absorbs the bold bang bang sauce. A crisp cucumber salad or quick-pickled vegetables add refreshing contrast and texture. Garnish with extra scallions and a dusting of toasted sesame seeds for visual appeal and crunch that rounds out the dish.

| Nutrient | Per Serving |
|---|---|
| Calories | 340 kcal |
| Protein | 28 g |
| Carbohydrates | 8 g |
| Fat | 20 g |
for more inspiration on chicken thigh recipes, explore our Best Chicken Thigh Recipes collection. Learn about the benefits of using a skillet for searing from Serious Eats.
Quick Sides to Complement the Bold Bang Bang Flavor
Skillet Bang Bang chicken Thighs deliver a vibrant punch of flavor that begs for equally quick and satisfying sides. These bold, spicy, and creamy chicken thighs create the perfect centerpiece for a meal that’s both effortless and memorable. when paired with the right accompaniments, you’ll elevate the meal from weeknight dinner to something truly special without spending extra time in the kitchen.
Prep and Cook Time
- Prep Time: 10 minutes
- Cook Time: 20 minutes
- Total Time: 30 minutes
Yield
Serves 4 people generously.
Difficulty Level
Easy – perfect for busy weeknights and culinary beginners alike!
Ingredients
- 2 cups cooked jasmine rice – fluffy and fragrant
- 1 large cucumber, thinly sliced
- 1 cup shredded carrots – for a pop of sweetness and color
- 1 cup snap peas, trimmed – quick to sauté
- 2 tablespoons toasted sesame seeds – for crunch and nuttiness
- 2 scallions, sliced thin on a bias
- 1 tablespoon soy sauce or tamari for a gluten-free option
- 1 teaspoon rice vinegar – bright and tangy
- 2 teaspoons toasted sesame oil – aromatic finishing touch
- Salt and freshly cracked black pepper to taste
Instructions
- Prepare steamed jasmine rice. If leftover rice isn’t on hand, cook fresh jasmine rice following package instructions for fluffy texture.
- Make the refreshing cucumber salad: In a medium bowl, combine sliced cucumber and shredded carrots. Drizzle with rice vinegar and a pinch of salt. Toss well and let sit for 5 minutes to mellow flavors.
- Sauté snap peas: Heat a small skillet over medium heat and add a splash of sesame oil. Toss in snap peas and stir-fry for 3-4 minutes until crisp-tender and bright green.Season lightly with salt and pepper.
- Assemble the plated sides: Place a mound of jasmine rice on each plate. Arrange a generous spoonful of cucumber salad and a handful of sautéed snap peas alongside the rice.
- Garnish: Sprinkle toasted sesame seeds and sliced scallions over the rice and vegetables for a delightful crunch and burst of color.
- Final touches: Lightly drizzle soy sauce or tamari and a few drops of toasted sesame oil over each serving for an umami-rich finish.
Tips for Success
- rice texture is key: Use day-old rice or spread freshly cooked rice on a baking sheet to cool for a few minutes; this prevents clumping and creates light, separate grains.
- Customize your crunch: Swap snap peas for blanched broccolini or roasted asparagus for a seasonal twist.
- Fresh vs. pickled: If you prefer a tangier side, quick-pickle the cucumbers with a bit more vinegar and a dash of sugar, enhancing contrast to the rich Bang Bang Chicken Thighs.
- Make ahead: Prep the cucumber salad and rice up to a day in advance to save time on busy nights.
- Keep it colorful: Brighten the plate with additional shredded red cabbage or thinly sliced radishes for visual appeal and added crunch.
Serving Suggestions
Present these sides alongside your Skillet Bang Bang Chicken Thighs on large dinner plates for a vibrant, harmonious meal. Garnish with extra sesame seeds and fresh cilantro leaves if desired. For an extra dimension, serve with lime wedges to provide a fresh citrus squeeze. A cold glass of iced green tea or sparkling water with cucumber slices complements these bold flavors elegantly.

| Nutrient | Per Serving (Sides only) |
|---|---|
| Calories | 180 kcal |
| Protein | 5 g |
| Carbohydrates | 35 g |
| Fat | 4 g |
Looking to expand your meal with equally vibrant dishes? Check out our Crispy Sesame Tofu for a plant-based option bursting with crunch and flavor. For more inspiration on simplifying bold dishes, visit Food Network’s official site.
Tips for Customizing Heat Levels to Match Your Taste
Mastering the perfect spice balance is key when cooking Skillet Bang Bang Chicken Thighs, transforming this dish into a personalized flavor bomb that suits every palate. Whether you crave a subtle warmth or a fiery kick, adjusting the heat brings thrilling versatility that makes this recipe accessible and exciting for all home cooks.
Begin by considering the chili components in the sauce-typically a combination of chili paste and hot sauce forms the backbone of the bold, creamy heat in this signature dish. To tame the heat without compromising flavor, reduce the chili paste by half or swap in a milder chili garlic sauce. For those who lean towards a brûlée of spice, boost the intensity by adding crushed red pepper flakes or an extra teaspoon of your favorite hot sauce.
Another brilliant way to adjust heat dynamically is through layering. Use fresh chili slices-like thinly sliced jalapeños or mild fresno peppers-to impart nuanced heat and vibrant color, sprinkled atop right before serving. removing the seeds from these fresh peppers lowers the fiery punch for a gentler bite. Try toasting whole dried chilies briefly before blending them into the sauce, as the toasting adds smoky depth without excessive heat intensity.
To balance heat while amplifying creaminess, incorporate a splash of coconut milk or extra mayonnaise as you whisk the sauce. This approach creates a cooling counterpoint, perfect for those sensitive to spiciness but eager to indulge in the full flavor spectrum. additionally, adding a squeeze of fresh lime juice brightens the dish and cuts through the richness, subtly softening the heat’s edge and enhancing overall complexity.
For the truly adventurous, experiment with heat from unexpected sources. A pinch of smoked paprika adds warmth that builds slowly on the tongue, while a dash of freshly ground black pepper introduces mild piquancy that awakens the palate without overwhelming. You can also blend in a tiny amount of sweet chili sauce or honey to build flavors in layers, making the heat feel more rounded and approachable.
When preparing Skillet Bang Bang Chicken thighs, always remember that heat is subjective-and a culinary playground that invites experimentation. Start conservatively with spice levels, especially if you’re serving guests, and invite them to customize the heat further with hot sauce or chili flakes at the table. This strategy not only personalizes the experience but turns every meal into an interactive celebration of bold flavor.
Lastly, whenever adjusting the chili elements, take small taste tests during cooking. The sauce thickens and intensifies as it cooks and coats the chicken, so a gentle hand early on ensures you don’t overshoot your heat target. In just a few minutes,you’ll have a skillet-smoky,cream-kissed dish that’s perfectly tuned-just the way you like it.

Q&A
Q&A: skillet Bang Bang Chicken Thighs – Bold Flavor in Minutes
Q1: What exactly are Skillet Bang Bang Chicken Thighs?
A1: Skillet Bang Bang Chicken Thighs are a quick, flavor-packed dish where juicy chicken thighs get a crispy sear before being tossed in a vibrant, creamy sauce that delivers a perfect punch of heat and tang. it’s a weeknight wonder that blends bold spices and a luscious sauce, creating a dinner that feels indulgent but comes together in no time.
Q2: Why choose chicken thighs over chicken breasts for this recipe?
A2: Chicken thighs bring rich, juicy flavor and stay tender even under high heat, making them perfect for skillet cooking. Their natural fat content helps create that golden, crispy crust, which contrasts beautifully with the zesty, creamy sauce in the Bang Bang style.
Q3: What ingredients give this dish its signature “bang bang” flavor?
A3: The magic lies in a spicy, slightly sweet combination of chili sauce, garlic, a touch of sweetness like honey or maple syrup, and a creamy base – often mayo or Greek yogurt. This blend creates layers of fiery heat balanced by tangy creaminess that coats the chicken effortlessly.
Q4: How do I get the perfect crust on the chicken without overcooking it?
A4: Start with a hot skillet and a lightly oiled surface.Pat the chicken thighs dry before seasoning and searing skin-side down (if using skin-on) for several minutes without moving them. This method locks in moisture and develops a crisp, golden crust. Flip and cook just until done, then remove to rest before adding the sauce.Q5: Can this recipe be adapted for a gluten-free diet?
A5: Absolutely! Simply use gluten-free chili sauce and check all condiments for gluten-free labels. the rest of the ingredients-chicken,spices,and creamy sauce-are naturally gluten-free,making this dish an easy option for sensitive eaters.Q6: What are some easy side dishes that complement Skillet Bang Bang Chicken Thighs?
A6: Think fresh and simple! Steamed jasmine rice or cauliflower rice soaks up the sauce perfectly. A crisp green salad with a light vinaigrette balances the richness, while roasted or sautéed greens like bok choy or kale add earthiness and texture.
Q7: Can I make this dish ahead of time or store leftovers?
A7: You can prep the sauce ahead and keep it chilled, then cook the chicken fresh when ready. Leftover chicken stores well in the refrigerator for up to 3 days. Reheat gently in a skillet over low heat to preserve moisture and re-coat with fresh sauce if needed.
Q8: How can I adjust the spice level if I’m sensitive to heat?
A8: Dial down the chili sauce or substitute with a milder hot sauce option,and boost the creamy element to mellow the spice. Adding a squeeze of lime or a sprinkle of fresh herbs like cilantro can also enhance flavor without adding heat.
Q9: Is this recipe suitable for meal prepping?
A9: Definitely! Cooked chicken thighs hold up well in the fridge and reheat beautifully. Pair with pre-cooked grains and some chopped fresh veggies or a quick salad for balanced, ready-to-go meals during busy weeks.
Q10: What makes this dish stand out compared to other quick chicken recipes?
A10: It’s the fusion of textures and flavors-the crispy, caramelized chicken paired with a velvety, spicy sauce that hits all the right notes: smoky, tangy, sweet, and fiery. Plus, it’s done in a single skillet with minimal fuss, making bold flavor accessible any day of the week.
Final Thoughts
In just minutes, skillet Bang Bang Chicken Thighs transform ordinary dinner into a flavor-packed adventure. With their crispy, caramelized edges and a bold, spicy kick, they prove that bold flavors don’t require hours in the kitchen-just the right ingredients and a hot skillet. Next time you’re craving something that’s fast, fiery, and utterly satisfying, remember this recipe and let your taste buds do the talking. Bold flavor is only a skillet away.
]]>