Choosing the Ideal Cut and Preparing Your Chicken for Ultimate Crispiness
Crispy Perfection begins with selecting the right cut of chicken and mastering its preparation. Weather you choose bone-in thighs, breasts, or drumsticks, the choice you make will profoundly affect texture, moisture, and that unforgettable golden crunch we all crave. For cast iron skillet chicken, bone-in, skin-on cuts are the champions-thighs rank highest for flavor and moisture thanks to their slightly higher fat content, while breasts offer a lean, tender choice if prepared carefully to avoid dryness.
Start by patting your chicken pieces thoroughly with paper towels. Removing excess moisture is essential to ensure the skin crisps to perfection instead of steaming in the pan. Seasonal changes can vary the natural moisture of poultry, so this step is never to be skipped!
Prep and Cook Time
- Prep Time: 15 minutes
- Cook Time: 25-30 minutes
- Total Time: 40-45 minutes
Yield
Serves 4 hungry guests
Difficulty Level
Medium – rewarding for home cooks looking to elevate their skillet technique
Ingredients
- 4 bone-in, skin-on chicken thighs (about 6-7 ounces each)
- 1 cup all-purpose flour, sifted
- 1 teaspoon kosher salt, divided
- 1/2 teaspoon freshly ground black pepper, divided
- 1 teaspoon smoked paprika
- 1/2 teaspoon garlic powder
- 1/2 teaspoon onion powder
- 1/4 teaspoon cayenne pepper (optional for subtle heat)
- 2 tablespoons vegetable oil or avocado oil
- 1 tablespoon unsalted butter
- Fresh thyme or rosemary sprigs for garnish
Instructions
- Prepare the chicken: Rinse and thoroughly pat dry the chicken thighs with paper towels. Season evenly with 1/2 teaspoon salt and 1/4 teaspoon black pepper, ensuring the seasoning penetrates under the skin.
- Mix the dredge: In a shallow bowl, combine the all-purpose flour, smoked paprika, garlic powder, onion powder, cayenne pepper, and remaining salt and black pepper. Whisk until evenly blended.
- Dredge the chicken: Lightly coat each chicken thigh in the seasoned flour mixture. Shake off excess flour-too much creates a thick crust that can dull crispiness.
- Preheat the skillet: Place your cast iron skillet over medium heat and add the vegetable oil. Wait until the oil shimmers but does not smoke-about 3-4 minutes-to guarantee instant sizzle upon adding chicken.
- Cook skin-side down: Gently place the thighs skin-side down. This initial sear is crucial for crisp skin and should be undisturbed for 12-15 minutes.Adjust heat as needed to maintain a gentle sizzle without burning.
- Flip and finish: Turn the chicken over, add butter to the skillet, and baste the thighs with the melted butter for additional flavor and moisture. Cook an additional 10-12 minutes until the internal temperature reaches 165°F (74°C).
- Rest for ultimate tenderness: Remove chicken from the skillet and let rest on a wire rack or paper towels for 5 minutes. This step stabilizes juices and keeps skin crispy.
Tips for Success
- Choosing bone-in, skin-on chicken thighs ensures maximum flavor and moisture retention during skillet cooking.
- Don’t skip drying your chicken-it’s the secret to avoiding soggy skin.
- Use a cast iron skillet for even heat distribution and superior crust formation.
- For extra crispiness, allow the chicken to rest uncovered in the refrigerator for 30 minutes before cooking to dry out the skin further.
- If your chicken browns too quickly, lower the heat slightly to avoid burning and ensure thorough cooking.
- Try adding fresh herbs like thyme or rosemary to the butter during basting for an aromatic boost.
Serving suggestions
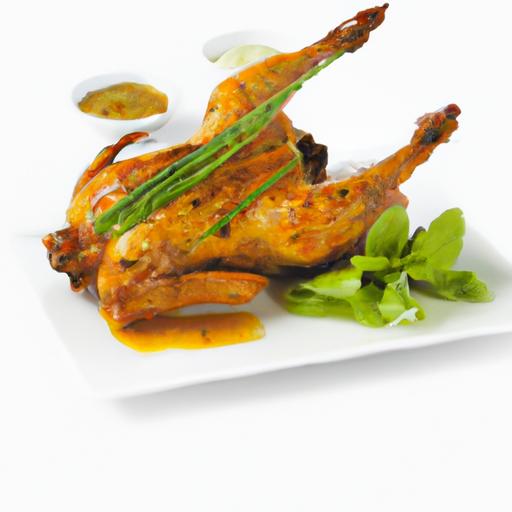
Serve your crispy skillet chicken garnished with freshly chopped parsley and a wedge of lemon for brightness. Pair it with a side of creamy mashed potatoes, sautéed seasonal greens, or a vibrant kale salad tossed in a lemon vinaigrette. A drizzle of pan jus or a dollop of homemade garlic aioli can elevate the dish to restaurant quality at home.

| nutrient | Per Serving |
|---|---|
| Calories | 380 kcal |
| Protein | 32 g |
| Carbohydrates | 8 g |
| Fat | 24 g |
For more techniques on achieving restaurant-quality chicken dishes,check out our Ultimate Roast Chicken Techniques. To understand the science behind crisping chicken skin perfectly, see this authoritative guide from Serious Eats.
Seasoning Secrets to Elevate flavor and Texture in Every Bite
Crispy Perfection: Mastering Cast Iron Skillet Chicken begins with unlocking the secrets of seasoning that transform simple chicken into a masterpiece bursting with flavor and boasting a golden, irresistible crust. The magic lies not just in the choice of spices but in how those spices interact with heat and texture during cooking. This section draws from time-honored techniques and contemporary twists, aiming to empower you to elevate each bite into an experience.
Prep and Cook Time
- Preparation: 15 minutes
- Cooking: 25-30 minutes
- Total Time: 40-45 minutes
Yield
- Serves 4 generously
Difficulty Level
- Medium – Perfect for home cooks ready to sharpen their skillet skills
Ingredients
- 4 boneless, skin-on chicken thighs (room temperature)
- 1 cup all-purpose flour, sifted
- 1 teaspoon smoked paprika – adds deep, smoky warmth
- 1/2 teaspoon garlic powder – subtle aromatic lift
- 1/2 teaspoon onion powder
- 1 teaspoon kosher salt – key to unlocking juiciness
- 1/2 teaspoon freshly ground black pepper
- 1/4 teaspoon cayenne pepper – optional, for a gentle spicy kick
- 2 tablespoons vegetable oil or other high smoke point oil
- 1 tablespoon unsalted butter – enriches crust color and flavor
Instructions
- Season the chicken generously on both sides with kosher salt and black pepper, allowing the salt to penetrate for at least 10 minutes before dredging for a juicy result.
- In a shallow dish, combine the sifted flour, smoked paprika, garlic powder, onion powder, and cayenne pepper. This spice blend creates layers of flavor nestled right in the crust.
- Pat chicken thighs dry with paper towels to ensure maximum crispiness,then coat each piece thoroughly in the flour mixture,shaking off any excess.
- Heat the cast iron skillet over medium-high heat until hot but not smoking. Add the vegetable oil and swirl to coat the surface evenly.
- Place the chicken skin-side down in the skillet. Press each piece gently to make full contact and promote even browning.
- Sauté until the skin achieves a deep golden-brown crust, about 6-8 minutes.Avoid moving the chicken prematurely to build that irresistible crisp.
- flip the chicken and add the butter to the skillet. Tilt the pan slightly and spoon the melted butter over the chicken repeatedly (“basting”) for 2-3 minutes to infuse richness.
- Lower the heat to medium-low, cover lightly with a lid or foil, and cook an additional 10-12 minutes until the internal temperature reaches 165°F (74°C) and juices run clear.
- Remove chicken from skillet and let rest for 5 minutes before slicing. Resting locks in juiciness and completes the flavor progress.
Tips for Success
- Dry chicken thoroughly: Moisture is the enemy of crispiness. Pat skin wholly dry before seasoning and dredging.
- Use a cast iron skillet: Its heat retention guarantees even browning and can withstand the high temperature needed for “crispy perfection.”
- Be patient: Resist the urge to flip too soon; the first crust needs uninterrupted time to develop.
- Experiment with seasoning blends: Incorporate dried herbs like thyme or rosemary into your flour mixture for aromatic accents.
- For a gluten-free version, substitute with a rice flour blend or cornstarch while maintaining the same quantity.
- Make-ahead tip: Season and dredge the chicken a few hours in advance and refrigerate uncovered – this dries the skin further for incredible crispiness.
Serving Suggestions
Present your skillet masterpiece atop creamy mashed potatoes or roasted seasonal vegetables for a comforting plate. Garnish with freshly chopped parsley and a lemon wedge on the side to brighten every bite with a splash of acidity. A crisp green salad dressed in a mustard vinaigrette pairs beautifully with the richness (see our roasted vegetables guide).

| Nutrient | Per Serving |
|---|---|
| Calories | 370 kcal |
| Protein | 30 g |
| Carbohydrates | 12 g |
| Fat | 22 g |
For deeper insight into seasoning science and seasoning layering techniques, Serious Eats offers an excellent resource.
Mastering Heat Control: Achieving the Perfect Sear Without Overcooking
Crispy Perfection: Mastering Cast Iron Skillet Chicken begins with understanding the art of heat control-a decisive factor in achieving that enviable golden crust without compromising juiciness. Cooking chicken in a cast iron skillet unlocks a world of deep, caramelized flavor, but it demands finesse: too much heat leads to burning, while too little leaves you with a pallid, soggy finish. Let this guide transform your skillet into a precision tool for making restaurant-quality seared chicken at home.
Prep and Cook Time
- Preparation: 10 minutes
- Cook Time: 25 minutes
- Total time: 35 minutes
Yield
- 4 servings
Difficulty Level
- Medium
Ingredients
- 4 boneless, skin-on chicken thighs, patted dry
- 1 tablespoon olive oil
- 1 teaspoon kosher salt
- ½ teaspoon freshly ground black pepper
- 1 teaspoon smoked paprika
- 1 teaspoon garlic powder
- Fresh thyme sprigs (optional, for aroma)
- 2 tablespoons unsalted butter
- 1 lemon, zested and halved
Instructions
- Season the chicken generously with salt, pepper, smoked paprika, and garlic powder. Ensure the skin side is dry; this is key to a crispy crust.
- Preheat your cast iron skillet over medium heat for 5 minutes. It should be hot enough that a drop of water sizzles and evaporates almost immediately.
- Add olive oil and swirl to coat the base. Place the chicken thighs skin-side down gently into the pan, ensuring they don’t touch, for even heat distribution.
- Resist the urge to move the chicken. Let it sear undisturbed for 7-8 minutes until the skin is deeply golden and releases easily from the pan.
- Flip the chicken and add butter, fresh thyme, and lemon halves cut-side down. Tilt the pan slightly and spoon melted butter over the chicken repeatedly to enhance flavor and moisture.
- Reduce the heat to medium-low and cook for an additional 10-12 minutes, basting every 2-3 minutes, until the internal temperature reaches 165°F (74°C).
- Remove the chicken and let it rest for 5 minutes to lock in juices before serving.
tips for Success
- Patience is key: A perfect sear demands time-don’t move or flip prematurely or you’ll risk tearing the skin and losing crispness.
- Use a thermometer: Even heat and the right temperature avoid overcooking. Aim for 165°F internally for safe, juicy chicken.
- Dry skin beforehand: Moisture is the enemy of crispiness. Toweling the chicken skin dry ensures maximum Maillard reaction.
- Butter basting: Incorporate aromatics like thyme and lemon during basting to infuse each bite with a fresh complexity.
- Cast iron care: Avoid overcrowding the skillet to maintain consistent heat; this technique relies on excellent pan temperature management.
- Make ahead: Chicken can be seasoned and refrigerated for up to 2 hours before cooking to deepen flavor without compromising texture.
Serving Suggestions
Present your crispy cast iron skillet chicken atop a bed of creamy mashed potatoes or alongside roasted seasonal vegetables to add contrasting textures. Garnish with a sprinkle of fresh parsley, a few lemon wedges, and a drizzle of the pan juices. For an inviting finish, pair with a crisp green salad lightly tossed in a citrus vinaigrette. The visual appeal of the golden-brown crust combined with vibrant garnishes will wow any dinner guest.
Nutritional Data
| Nutrient | Per Serving |
|---|---|
| Calories | 320 kcal |
| Protein | 28 g |
| Carbohydrates | 1 g |
| Fat | 22 g |
For more techniques on stovetop protein cooking,explore our Searing Steak in a Cast Iron Skillet guide. To deepen your understanding of heat control and Maillard reactions, this detailed resource by Serious Eats is invaluable.
Finishing Techniques to Lock in Juices and Boost Golden Crunchiness
Crispy perfection is the ultimate goal when coaxing juicy, golden-brown chicken from your cast iron skillet. This method transforms ordinary chicken into a culinary masterpiece-each bite bursting with flavor and adorned with an irresistible crunch. the secret to success lies not just in the right seasoning or skillet, but in the finishing techniques that lock in moisture while creating that coveted, crackling crust.
Prep and cook Time
- Preparation: 15 minutes
- Cooking: 25 minutes
- Total: 40 minutes
Yield
Serves 4 hungry appetites
Difficulty Level
Medium – Perfect for confident home cooks aiming to elevate their skillet skills
Ingredients
- 4 boneless, skin-on chicken thighs, patted dry
- 1 teaspoon kosher salt
- ½ teaspoon freshly ground black pepper
- 1 teaspoon smoked paprika
- ½ teaspoon garlic powder
- 1 tablespoon olive oil
- 2 tablespoons unsalted butter
- 3 garlic cloves, smashed
- 2 sprigs fresh thyme
- Fresh lemon wedges, for serving
Instructions
- Season your chicken: Generously sprinkle the salt, pepper, smoked paprika, and garlic powder on both sides of the chicken thighs. Ensuring the chicken is completely dry before seasoning helps achieve maximum crispiness.
- Heat the skillet: Place your cast iron skillet over medium-high heat and add the olive oil. Wait until shimmering but not smoking-this is your hot zone for golden crust formation.
- Sear the skin side: Carefully lay the chicken thighs skin-side down. Do not overcrowd the pan. Let them cook undisturbed for about 6-8 minutes,or until the skin is deeply golden and releases easily from the pan.
- Flip and add aromatics: Turn the chicken thighs over. Immediately add butter, smashed garlic, and thyme sprigs to the pan. As the butter melts, tilt the skillet slightly and spoon the butter over the thighs repeatedly to lock in juices and impart rich flavor.
- Finish cooking: reduce heat to medium-low and continue basting for another 7-10 minutes, or until an internal temperature of 165°F (74°C) is reached.This slow finish ensures tender meat beneath that crunchy exterior.
- Rest before serving: Transfer the chicken to a warm plate and let it rest 5 minutes, allowing juices to redistribute-a key step for juicy results.
Tips for Success
- Patience pays off. Avoid flipping too early; the skin must naturally release when ready to avoid tearing and sticking.
- Use a thermometer. Investing in an instant-read ensures perfectly cooked meat every time.
- Butter basting is magic. It not only prevents drying but also adds a tempting gloss and nutty aroma.
- Try substituting thyme with rosemary or sage for a different herbal note.
- For extra crunch, consider pressing the chicken skin down with a spatula in the first 2 minutes of searing.
- Make-ahead tip: Marinate your thighs overnight with the seasoning blend for deeper flavor penetration.
Serving Suggestions
Serve these crispy skillet chicken thighs with creamy mashed potatoes or a bright, zesty salad to cut through the richness. Garnish with fresh lemon wedges for an added pop of acidity and sprinkle chopped parsley for a fresh, vibrant finish. Don’t forget a drizzle of the pan’s buttery garlic-thyme-infused juices-spooned generously over the chicken for an eye-catching presentation.

| Nutrient | per Serving |
|---|---|
| Calories | 320 kcal |
| Protein | 28 g |
| Carbohydrates | 1 g |
| Fat | 22 g |
For a deeper dive into pan-searing techniques, check out our guide to perfectly searing steak in cast iron. To learn more about food safety and cooking temperatures, visit the US food Safety guidelines.
Q&A
Q&A: Crispy Perfection – Mastering Cast iron Skillet Chicken
Q1: Why use a cast iron skillet for cooking chicken?
A1: Cast iron skillets are the unsung heroes of the kitchen when it comes to achieving irresistibly crispy chicken. Their ability to retain and evenly distribute heat creates the perfect sear, locking in juices while forming that coveted golden crust. Plus, cast iron adds a depth of flavor through seasoning that improves every time you cook.
Q2: How do I prep the chicken to get that perfect crispiness?
A2: The key is dryness and seasoning. Pat your chicken completely dry with paper towels-moisture is the enemy of crispiness. Then, season generously with salt, pepper, and your choice of spices or herbs. A light coat of oil ensures even browning without sticking, so don’t skip that step!
Q3: Should I use skin-on or skinless chicken?
A3: Skin-on chicken is your best friend for crispy perfection. The skin acts like a natural barrier that crisps up beautifully in the skillet while sealing in succulent juices. Skinless chicken can work, but expect a different texture-often tender inside but without that buttery crunch.
Q4: What heat level is best for cooking chicken in cast iron?
A4: Start with medium-high heat to get the skillet nice and hot-this jumpstarts the searing process. After placing the chicken in the pan, lower the heat to medium or medium-low to cook through without burning the outside.It’s a balancing act between hot for crust and moderate for tenderness.
Q5: How long should I cook chicken thighs versus breasts in a cast iron skillet?
A5: Chicken thighs, thanks to their higher fat content, tend to be forgiving and reach crispy, juicy heaven in about 6-8 minutes per side. chicken breasts are leaner and cook faster-about 5-7 minutes per side, depending on thickness. Always check for an internal temperature of 165°F (74°C) to ensure safety.Q6: What’s the secret to flipping the chicken without losing that crust?
A6: Patience and confidence. Let the chicken cook undisturbed for the first several minutes; it will naturally release from the pan once the crust forms. use a thin, sturdy spatula to gently lift and flip. Avoid poking or pressing down, as that squeezes out juices and risks sogginess.
Q7: Can I finish the chicken in the oven, or should I cook it entirely on the stovetop?
A7: Finishing in the oven is a fantastic way to ensure even cooking without sacrificing crispiness.After searing the chicken on the stovetop, transfer the skillet to a preheated oven (around 400°F/200°C) to finish cooking gently. This method is especially helpful for thicker cuts.
Q8: What oils are best for crisping chicken in a cast iron skillet?
A8: Use oils with a high smoke point to avoid burning and off flavors. Avocado oil, grapeseed oil, and refined sunflower oil are excellent choices. they handle the heat well and help build that beautifully golden crust without smoking up your kitchen.
Q9: How can I add extra flavor without compromising the crust?
A9: Layer flavor with herbs like rosemary, thyme, or sage thrown into the hot oil after searing begins. Basting the chicken occasionally with the aromatic oil adds depth. You can also add minced garlic or citrus zest toward the end for a bright finish-just be careful not to burn these delicate ingredients.
Q10: Is it better to rest the chicken after cooking? Why?
A10: Absolutely. Resting allows the juices to redistribute, making each bite juicy and tender.Cover the skillet loosely with foil and let the chicken rest for 5-7 minutes before serving. This step helps lock in moisture and prevents that dry,tough texture.
Mastering crispy cast iron chicken is a dance of heat, timing, and technique-but with these insights, you’re well on your way to plate-worthy perfection, every time!
To Conclude
as the aroma of golden, crispy chicken wafts through your kitchen, you’ll realize that mastering the cast iron skillet isn’t just about technique-it’s about embracing a culinary ritual that rewards patience and care.With each sizzle and sear, you’re not just cooking; you’re crafting a masterpiece of texture and flavor that transforms a simple meal into an unforgettable experience. So dust off that skillet, sharpen your instincts, and let every crispy bite be a testament to your newfound kitchen prowess. After all, in the world of cast iron skillet chicken, perfection isn’t just achieved-it’s savored.
]]>