discovering the Flavor Harmony of Black Beans and Sweet Corn
Bright & Zesty: The Ultimate Black Bean Corn Salad Guide
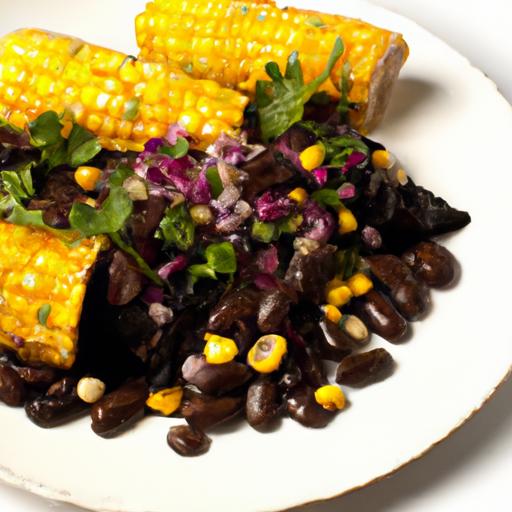
Bright & Zesty: The Ultimate Black Bean Corn salad Guide celebrates the unbeatable flavor harmony of black beans and sweet corn, a duo that perfectly blends earthy richness with floral sweetness. This vibrant salad draws inspiration from the colorful culinary traditions of Latin America, where fresh, wholesome ingredients come together to create dishes bursting with life and texture. Whether you’re seeking a refreshing side dish or a nutrient-rich main course, this salad is designed to brighten your table while keeping your prep simple and your taste buds intrigued.
Prep and Cook Time
- Planning: 15 minutes
- Cook time: 7 minutes (optional grilling for depth)
- Total time: 22 minutes
Yield
serves 4 as a hearty side or light main dish
Difficulty Level
Easy – Perfect for beginners and casual cooks looking to impress with minimal effort
Ingredients
- 1 ½ cups cooked black beans (rinsed and drained if canned)
- 1 ¼ cups sweet corn kernels (fresh, or thawed from frozen; grilled for extra smokiness)
- 1 medium red bell pepper, finely diced
- ½ cup red onion, finely chopped
- 1 small jalapeño, seeded and minced (optional, for mild heat)
- ½ cup fresh cilantro, chopped
- Juice of 2 limes (about 3 tablespoons)
- 2 tablespoons extra virgin olive oil
- 1 teaspoon ground cumin
- Salt and freshly ground black pepper, to taste
- 1 teaspoon honey or agave (balances acidity)
- 1 avocado, diced for garnish (optional but highly recommended)
Instructions
- Prepare the corn: If using fresh, grill or sauté corn kernels until lightly charred, about 5-7 minutes, stirring occasionally to prevent sticking. This step elevates the natural sweetness and adds a smoky undertone. Let cool slightly.
- Mix the base: in a large bowl, combine the cooked black beans, sweet corn, diced red bell pepper, red onion, jalapeño, and chopped cilantro. Toss gently to blend.
- Whisk the dressing: In a small bowl, whisk together lime juice, olive oil, ground cumin, honey, salt, and pepper until fully emulsified.
- combine: Pour the dressing over the bean and corn mixture. Toss until every bite is coated in the bright, zesty dressing. Adjust seasoning to taste.
- Chill and marinate: Cover and refrigerate for at least 30 minutes to allow flavors to meld. This resting period intensifies the zesty vibrancy and softens the bite of onions and pepper.
- Garnish and serve: Just before serving, gently fold in diced avocado for creaminess and additional color contrast. Finish with an extra sprinkle of fresh cilantro if desired.
Tips for Success
- Bean choice: Use fresh cooked black beans for creamier texture; canned beans are a great time saver-just rinse well to remove excess sodium.
- Grilling corn: Adds a smoky depth,but raw sweet corn works beautifully in a pinch and keeps the salad crisp and juicy.
- Adjust spice: omit jalapeño for mildness or swap for serrano for a more intense kick.
- Make ahead: Prepare the salad a few hours in advance, keeping avocado garnish separate to prevent browning.
- Zest boost: Add fresh lime zest into the dressing for even more citrus brilliance.
Serving Suggestions
Serve this salad chilled in a wide, shallow bowl to showcase its rainbow palette of colors. For a festive touch, dress the edges with extra chopped cilantro and scattered pomegranate seeds or toasted pumpkin seeds for crunch.Pair with warm corn tortillas or alongside grilled vegetables for a complete, fulfilling meal. This salad also shines atop leafy greens or as a vibrant side for your favorite plant-based protein, making it incredibly versatile and visually stunning.

| Nutrient | Per Serving |
|---|---|
| Calories | 220 kcal |
| Protein | 9 g |
| Carbohydrates | 35 g |
| Fat | 6 g |
For more zestful ideas and vibrant salad inspirations, explore our Fresh and Fruity Salad Recipes collection. To deepen your understanding of the health benefits of black beans and corn, Healthline offers a comprehensive guide.
Essential Ingredients for a Vibrant and Nourishing Salad
Bright & Zesty Black Bean Corn Salad is a celebration of fresh, vibrant flavors that instantly brighten any table.Inspired by the vibrant markets of the American Southwest, this colorful dish perfectly balances the creamy richness of black beans with the natural sweetness of fresh corn, zesty lime, and crisp veggies. It’s not only a feast for the eyes but also a powerhouse of nutrients, bringing together wholesome ingredients that nourish both body and soul.
prep and Cook Time
Prep: 15 minutes • Cook: 10 minutes • Total Time: 25 minutes
yield
Makes approximately 4 generous servings - perfect as a side dish or a light, satisfying main.
Difficulty Level
Easy – ideal for beginners and seasoned cooks alike, this salad requires simple chopping and mixing, no elaborate cooking techniques.
Ingredients
- 1 1/2 cups cooked black beans (drained and rinsed if canned)
- 1 1/2 cups fresh corn kernels (about 2 ears) or frozen/thawed
- 1 medium red bell pepper, finely diced
- 1/2 small red onion, finely chopped
- 1 cup cherry tomatoes, halved
- 1 large avocado, diced
- 1/4 cup fresh cilantro, chopped
- 2 tablespoons fresh lime juice (about 1 lime)
- 2 tablespoons extra virgin olive oil
- 1 teaspoon ground cumin
- 1/2 teaspoon smoked paprika
- Salt and freshly ground black pepper to taste
- Optional: 1 small jalapeño, seeded and minced, for a spicy kick
Instructions
- Prepare the ingredients: Rinse and drain black beans thoroughly. Cut corn kernels off the cob, or thaw if using frozen. dice red bell pepper, red onion, cherry tomatoes, and avocado. Chop cilantro and mince jalapeño if using.
- Lightly toast the corn: Heat a non-stick skillet over medium heat. Add corn kernels and sauté for about 5 minutes, stirring occasionally until they exhibit slight caramelization for added sweetness and depth.
- Mix the base: In a large mixing bowl, combine black beans, toasted corn, red bell pepper, red onion, cherry tomatoes, and cilantro. If you like heat, gently fold in jalapeño now.
- Make the dressing: in a small bowl,whisk together lime juice,olive oil,cumin,smoked paprika,salt,and black pepper until well emulsified.
- Toss the salad: Pour the dressing over the vegetable and bean mixture, folding gently to coat everything evenly but not mashing the avocado.
- Add avocado just before serving: Gently fold in diced avocado to preserve its creamy texture and fresh flavor.
- Final seasoning check: Taste and adjust salt, pepper, or lime juice as desired for a balanced bright and zesty finish.
Tips for Success
- Use fresh lime juice for the brightest, most vibrant flavor-bottled lime juice lacks the same zing.
- Toast the corn until golden but not burnt; this adds a smoky sweetness that takes the salad from simple to sensational.
- For extra crunch, add chopped jicama or green apple as an innovative twist.
- Prep ahead: Mix all components except avocado and dressing up to 12 hours in advance. Add avocado just before serving to prevent browning.
- Substitute fresh ingredients: If fresh corn isn’t available, thaw frozen corn slowly to retain its juiciness without excess water.
Serving Suggestions
This Bright & zesty Black Bean Corn salad shines when served chilled or at room temperature. Garnish with a few sprigs of fresh cilantro and a sprinkle of crumbled cotija or feta cheese for an extra layer of flavor. Serve alongside grilled chicken or fish,or use it as a vibrant topping for tortilla chips at your next gathering. For a colorful and satisfying meal, spoon it over a bed of mixed greens or quinoa.

Nutritional Information
| Nutrient | Per Serving |
|---|---|
| Calories | 210 |
| protein | 8g |
| Carbohydrates | 32g |
| Fat | 7g |
For more nourishing and flavorful salad ideas, explore our Fresh and Fruity Summer Salads collection. Also, learn about the health benefits of black beans at the Healthline Black bean Benefits resource.
Step by Step Guide to Crafting the Perfect Zesty Dressing
Bright & Zesty: The Ultimate Black Bean Corn Salad Guide invites you to awaken your palate with a vibrant, homemade dressing that elevates the heart of this dish. Crafting the perfect zesty dressing is an art that blends citrus brightness, a touch of heat, and just the right balance of sweetness and acidity. Whether you’re whipping up a speedy weeknight meal or prepping a dish for your next gathering, this dressing will add a fresh, tangy zing that ties all the colorful ingredients together beautifully.
Prep and Cook Time
- Preparation: 10 minutes
- Cooking: 0 minutes
- Total: 10 minutes
Yield
Serves 6 as a side or 4 as a light main course
Difficulty Level
Easy – No cooking required and simple whisking techniques make this perfect for cooks of all levels.
Ingredients
- 1/4 cup fresh lime juice (about 2 limes,freshly squeezed)
- 2 tablespoons extra virgin olive oil
- 1 tablespoon honey (or pure maple syrup for a vegan option)
- 1 teaspoon ground cumin
- 1 garlic clove,finely minced
- 1/2 teaspoon smoked paprika
- 1/4 teaspoon cayenne pepper (adjust to taste for heat)
- Salt and freshly ground black pepper,to taste
Instructions
- Start with fresh lime juice,as it delivers the tangy backbone of this dressing.Pour it into a medium mixing bowl.
- Add the honey to the lime juice and whisk gently until fully dissolved,ensuring a smooth sweetness that balances the citrus.
- Slowly drizzle in the extra virgin olive oil while whisking continuously to emulsify the dressing, creating a luscious, velvety texture.
- Incorporate the spices: mix in ground cumin, smoked paprika, and cayenne pepper. These carry the dressing’s warmth and the signature zesty kick.
- Fold in the finely minced garlic, which infuses a subtle pungency. Taste frequently to avoid overpowering the brightness.
- Season with salt and freshly ground black pepper to elevate the flavors. Start with a pinch of each and adjust gradually.
- Whisk vigorously one last time to ensure all ingredients harmonize into a silky dressing.
- Optional step: For an even zestier hit, add a teaspoon of finely chopped fresh cilantro or jalapeño for extra crunch and fire.
Tips for Success
- Use fresh lime juice instead of bottled for the brightest flavor and natural acidity.
- Emulsify slowly by drizzling olive oil into the lime and honey mixture to avoid separation.
- Adjust sweetness and heat to your preference; balance the cayenne pepper carefully if sensitive to spice.
- Prepare the dressing ahead: Let it rest for 15-20 minutes in the fridge to allow flavors to meld beautifully before tossing with your salad.
- Store leftovers in a sealed container up to 3 days-shake well before each use.
Serving Suggestions
This dressing shines when draped over a vibrant black bean and corn medley, turning humble ingredients into a celebration of texture and tang. For an eye-catching presentation, drizzle generously before tossing, then garnish your salad with freshly chopped cilantro, diced avocado, and a wedge of lime on the side for an extra pop of freshness. Pair with warm, toasted corn tortillas or crisp romaine leaves to serve as a handheld delight. For a protein boost, add grilled chicken or shrimp on the side, letting the zesty notes carry through each bite.

| Nutrient | Per Serving |
|---|---|
| Calories | 65 kcal |
| Protein | 0.1 g |
| Carbohydrates | 4 g |
| Fat | 5 g |
For further inspiration on assembling vibrant dishes with a zesty edge, check out our Fresh Mexican Style Black Bean Salad. Meanwhile, you can learn more about the health benefits of black beans and corn at Healthline, an authoritative source for nutrition science.
Creative Twists to Elevate Your Black Bean corn salad Experience
Bright & Zesty Black Bean Corn Salad bursts with vibrant colors, bold flavors, and refreshing textures that capture the spirit of sunny, carefree days. This lively salad, inspired by Southwestern and Latin American influences, blends hearty black beans and sweet corn with zesty citrus and fresh herbs, making every bite a celebration. Whether you’re preparing for a family picnic,a quick weeknight meal,or a potluck,this salad can easily be transformed into a festive centerpiece that delights the senses.
Prep and Cook Time
- Prep time: 15 minutes
- Cook Time: 5 minutes (for optional sautéing or roasting corn)
- Total time: 20 minutes
Yield
Serves 4-6 as a vibrant side dish or 2-3 as a light main course.
Difficulty Level
Easy – perfect for cooks at any experience level looking to brighten up mealtime.
Ingredients
- 1 1/2 cups cooked black beans (preferably drained and rinsed if canned)
- 1 1/4 cups fresh or frozen corn kernels (thawed if frozen)
- 1/2 cup diced red bell pepper
- 1/3 cup finely chopped red onion
- 1 jalapeño, seeded and minced (optional for a spicy kick)
- 1/2 cup chopped fresh cilantro
- 1 ripe avocado, diced
- Juice of 2 limes
- 2 tablespoons extra virgin olive oil
- 1 teaspoon ground cumin
- 1/2 teaspoon smoked paprika
- Salt and freshly ground black pepper to taste
Instructions
- Prepare the corn: If using fresh corn, quickly sauté kernels in a hot skillet with a teaspoon of olive oil for 3-4 minutes until lightly golden, enhancing their sweetness. Alternatively, char on a grill for extra smokiness. Set aside to cool.
- Mix the base: In a large bowl, combine black beans, sautéed corn, diced red bell pepper, red onion, jalapeño (if using), and chopped cilantro.
- Create the dressing: Whisk together fresh lime juice, olive oil, ground cumin, smoked paprika, salt, and pepper in a small bowl.
- Toss and combine: Pour the dressing over the salad mixture. Gently toss to coat all ingredients evenly, ensuring the dressing penetrates the beans and veggies for a harmonious flavor.
- Add avocado last: Carefully fold in the diced avocado to avoid mashing, providing buttery creaminess that perfectly balances the zesty brightness.
- Chill: Refrigerate for at least 15 minutes to allow flavors to meld before serving. This step is key for an elevated taste experience.
- Final seasoning check: Taste and adjust salt, pepper, or lime juice if needed just before plating.
Tips for Success
- bean Choice: While black beans are classic, try swapping half for cooked chickpeas or kidney beans for texture contrast.
- Make-Ahead Magic: Prepare salad (except avocado) up to 24 hours ahead; keep refrigerated and add avocado just before serving to maintain freshness.
- Spice Level: For milder flavor, omit jalapeño or substitute with diced cucumber for crunch without heat.
- Fresh Herbs: Experiment with chopped parsley or fresh mint for surprising aromatic layers.
- Roasted Corn Tip: Roasting corn not only deepens sweetness but adds a rustic char flavor. Use a cast iron skillet or outdoor grill for best results.
- Vegan Dressing: This olive oil and lime-based dressing keeps the salad bright and light-avoid creamy dressings to preserve its vibrant feel.
Serving Suggestions
Plate your Bright & Zesty Black Bean corn Salad in a wide, shallow bowl to showcase its vivid colors. Garnish with additional cilantro sprigs, a sprinkle of crumbled cotija cheese (omit for vegan guests), and extra lime wedges for squeezing. Pair with grilled vegetables or serve atop a bed of lightly dressed baby greens for a fulfilling, nutrient-rich meal. The salad also makes a fabulous filling for warm corn tortillas, topped with sliced avocado and a dollop of fresh salsa for an instant fiesta.

| Nutrient | Per Serving |
|---|---|
| Calories | 210 |
| Protein | 8g |
| Carbohydrates | 34g |
| Fat | 6g |
Layering Flavors with Your Bright & zesty Black Bean Corn Salad
Dive deeper into the versatility of this dish by infusing smoky chipotle powder or freshly minced garlic into your dressing. For a Mediterranean twist, swap cilantro for flat-leaf parsley and add sliced Kalamata olives and diced cucumber. To enrich the salad’s bite and texture, sprinkle toasted pepitas or chopped nuts on top just before serving.
For an expanded culinary adventure, explore our related recipe: Southwestern Quinoa Salad, which shares bright flavor principles and wholesome ingredients, perfect for meal prep inspiration.
Trust the University of California’s Healthy Kitchen resources to further guide you with nutrition and preparation tips for black bean dishes.
Q&A
Q&A: Bright & Zesty – The Ultimate Black Bean Corn salad Guide
Q1: What makes a black bean corn salad “bright and zesty”?
A1: The magic lies in the vibrant combination of fresh ingredients and bold flavors. Brightness typically comes from citrus elements like lime juice or zest, while zestiness is delivered by ingredients such as jalapeños, fresh herbs, and a touch of cumin. Together, they awaken your palate and create a lively, refreshing salad experience.
Q2: Can I prepare this salad ahead of time,or is it best enjoyed fresh?
A2: This salad actually benefits from a little time in the fridge. Allowing it to chill for 30 minutes to an hour lets the flavors meld beautifully. However,because it includes fresh vegetables and herbs,it’s best enjoyed within 24 hours to keep the textures crisp and the flavors vibrant.
Q3: What are some creative ways to customize the black bean corn salad?
A3: The sky’s the limit! Add diced avocado for creaminess, swap in roasted corn for a smoky twist, or toss in a handful of chopped mango for a sweet contrast. Fresh herbs like cilantro or parsley can be varied to suit your taste, and a sprinkle of chili powder or smoked paprika can up the heat and depth.
Q4: Is this salad suitable for meal prep and on-the-go lunches?
A4: Absolutely! It’s a protein-packed, nutrient-rich option that travels well in a sealed container.Pair it with a side of quinoa, whole-grain tortilla chips, or stuff it into a wrap for a satisfying, portable meal loaded with fiber and vibrant flavors.
Q5: What dressing pairs best with this black bean corn salad?
A5: A simple citrus vinaigrette is classic – think lime juice, olive oil, a hint of honey or agave, and a pinch of salt and pepper. The acidity balances the earthiness of the black beans and sweetness of the corn perfectly, enhancing the salad’s overall brightness without overpowering the natural flavors.Q6: Are there any tips for balancing flavors when making this salad?
A6: Yes! Start with small amounts of acid (like lime juice) and chili heat, then taste and adjust. Balancing sweet (corn), savory (black beans), spicy (jalapeño or chili flakes), and fresh (herbs) is key. If the salad tastes flat, a splash of vinegar or more citrus will elevate it instantly.
Q7: Can this salad be made vegan and gluten-free?
A7: Without a doubt! All core ingredients – black beans, corn, vegetables, herbs, and a citrus-based dressing - are naturally vegan and gluten-free. Just steer clear of any added dressings or seasonings that might contain gluten or animal-derived ingredients, and you’re good to go!
Q8: How can I incorporate this salad into a larger meal?
A8: This salad shines as a vibrant side dish, a filling component in grain bowls, or a topping for grilled vegetables or plant-based proteins like tofu or tempeh. it’s also fantastic spooned over a bed of lettuce for a light, nutritious lunch or snack.
Q9: What’s the best way to store leftovers?
A9: Store leftovers in an airtight container in the refrigerator. To keep the salad fresh, avoid adding avocado until just before serving (if using). Stir the salad gently before eating to redistribute any dressing that may have settled.
Q10: Why is this black bean corn salad considered a superfood-amiable dish?
A10: It combines nutrient-dense ingredients packed with fiber,protein,vitamins,and antioxidants. Black beans offer plant protein and essential minerals, corn adds vibrant antioxidants and fiber, and the fresh veggies provide vitamins and hydration – all wrapped up in a low-calorie, wholesome package perfect for any health-conscious diet.
To Conclude
As you venture into the vibrant world of black bean corn salad, remember that this dish is more than just a medley of ingredients-it’s a celebration of bold flavors and wholesome goodness.Whether you’re tossing it together for a quick lunch, spicing up a family barbecue, or seeking a nutritious sidekick for your meals, this bright and zesty salad promises versatility and satisfaction in every bite. So grab your freshest produce, embrace the zing of citrus, and let your creativity shine-because with black bean corn salad, the ultimate flavor fiesta is always within reach.Happy salad-making!
]]>
Crafting the Perfect balance of Earthy Beets and Tangy Goat Cheese
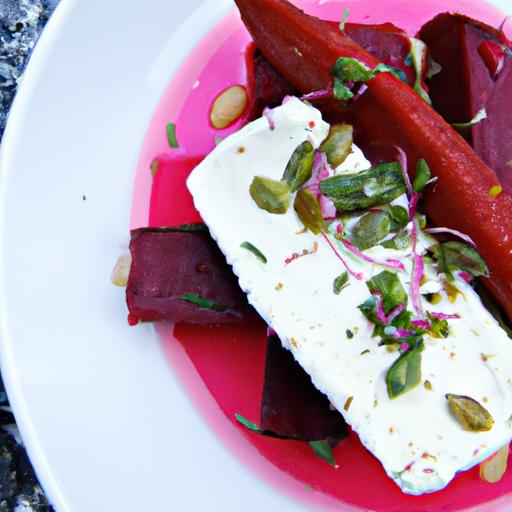
Bright Bites: Beet & Goat Cheese Arugula Salad Recipe guide brings together the natural sweetness of roasted beets with the creamy, tangy allure of goat cheese, creating a harmony that delights every bite. This salad is not only a feast for the taste buds but also a vibrant plate of nutrition and color, inspired by Mediterranean flavors and a love of fresh, wholesome ingredients.
From my early days experimenting in the kitchen, I’ve found that the contrast between the earthy depth of beets and the bright sharpness of goat cheese turns a simple salad into a memorable culinary experiance. Combining peppery arugula and a zesty citrus vinaigrette elevates this dish to something truly special-perfect for both casual lunches and elegant dinners.
Prep and Cook Time
- Preparation: 15 minutes
- Cooking: 40 minutes (roasting beets)
- Total Time: 55 minutes
yield
Serves 4 as a light main course or 6 as a refreshing side salad.
Difficulty Level
Easy – Perfect for both beginner and seasoned cooks looking to impress with minimal effort.
Ingredients
- 4 medium beets,tops trimmed and scrubbed
- 4 cups fresh arugula,washed and dried
- 4 oz creamy goat cheese,crumbled
- 1/4 cup toasted walnuts,roughly chopped
- 2 tablespoons extra virgin olive oil
- Juice of 1 large lemon (about 3 tablespoons)
- 1 teaspoon honey or pure maple syrup
- Salt and freshly ground black pepper,to taste
- Optional: 1 tablespoon finely chopped fresh thyme or basil
Instructions
- roast the Beets: Preheat your oven to 400°F (200°C). Wrap each beet tightly in aluminum foil and place them on a baking sheet. Roast for 40 minutes or until tender when pierced with a fork. Remove from the oven and allow to cool slightly.
- Prep the Beets: Once cool enough to handle,gently rub off the skins using paper towels or your fingers. Slice the beets into 1/2-inch thick wedges or cubes depending on your presentation preference.
- Make the Dressing: In a small bowl, whisk together the lemon juice, honey, olive oil, salt, and pepper until emulsified. Adjust to taste-this dressing should offer a lively tang with a hint of sweetness, complementing the beet’s earthiness perfectly.
- Assemble the Salad: In a large bowl, toss the fresh arugula with half the dressing to lightly coat the leaves. Arrange the sliced beets on top, scatter the crumbled goat cheese and walnuts evenly over the salad.
- Final Touch: Drizzle the remaining lemon vinaigrette over the entire salad. Garnish with fresh thyme or basil if using. Serve immediately for the freshest texture, or refrigerate toppings separately and combine before serving to keep ingredients vibrant.
Tips for Success
- Choose beets of uniform size for even roasting.
- To speed up peeling, roast beets in advance and refrigerate, peeling just before assembly.
- If fresh thyme isn’t available, a sprinkle of dried herbs or microgreens adds beautiful aroma and color.
- For a nuttier profile, substitute walnuts with toasted pecans or almonds.
- Balance the tang by adjusting honey; a drizzle more or less will tailor the dressing to your taste.
- Try our citrus vinaigrette guide for more dressing inspiration.
Serving Suggestions
This salad shines when served on a rustic wooden platter or a crisp white plate to showcase its vivid colors. Pair it with crusty artisan bread or accompany it with a warm grain bowl for a fulfilling meal. A light sprinkle of cracked pink peppercorns or edible flowers can elevate the presentation for entertaining guests. For best flavor contrast, serve with freshly cracked black pepper and a small drizzle of high-quality olive oil just before eating.
| Nutritional Info (per serving) | Calories | Protein | Carbs | Fat |
|---|---|---|---|---|
| Beet & Goat Cheese Arugula Salad | 220 kcal | 7 g | 14 g | 16 g |

For authoritative nutritional advice and the benefits of beets, visit the Academy of Nutrition and Dietetics.
Selecting Fresh Ingredients for Vibrant Flavors and Textures
Bright Bites: Beet & Goat Cheese arugula Salad Recipe Guide invites you into a world where freshness and vivid colors elevate every forkful. This salad thrives on the delicate balance of textures and flavors, making ingredient selection the crucial first step toward crafting a dish that bursts with life and vibrancy. by choosing the freshest beets, peppery arugula, and creamy goat cheese, you set the stage for a memorable culinary experience that delights both the eye and palate.
Prep and Cook Time
Preparation: 15 minutes | Cook Time: 35 minutes | Total: 50 minutes
Yield
Serves 4 as a light entrée or 6 as a refreshing side
difficulty Level
Easy – perfect for home cooks seeking fast elegance
Ingredients
- 3 medium fresh beets, trimmed and scrubbed
- 5 cups fresh baby arugula, washed and dried
- 4 oz fresh goat cheese, crumbled
- 1/4 cup toasted walnuts, roughly chopped
- 2 tablespoons extra virgin olive oil
- 1 tablespoon balsamic vinegar, aged for depth
- 1 teaspoon honey, raw or organic preferred
- 1 teaspoon Dijon mustard
- Salt and freshly ground black pepper, to taste
- Fresh lemon juice, from half a lemon
Instructions
- Roast the beets: Preheat your oven to 400°F (200°C). Wrap each beet individually in foil and roast on a baking sheet for 35-40 minutes, or until easily pierced with a fork. Let cool, then peel by gently rubbing the skins off with your fingers or a paper towel.
- Slice the beets: Cut the peeled beets into 1/4-inch thick rounds or bite-sized wedges, depending on your presentation preference.
- Prepare the dressing: In a small bowl, whisk together extra virgin olive oil, balsamic vinegar, honey, Dijon mustard, and a squeeze of fresh lemon juice. season with salt and pepper to taste. Whisk until emulsified and glossy.
- Toss the greens: Combine the arugula with half the dressing in a large mixing bowl. Gently toss to coat without bruising the leaves.
- Assemble the salad: Layer the dressed arugula on your serving platter or individual plates. Arrange the beet slices atop like radiant jewels. Sprinkle with crumbled goat cheese and toasted walnuts.
- Finish with dressing: Drizzle the remaining dressing over the assembled salad for a final burst of flavor. Add an extra grind of black pepper if desired.
tips for Success
- Choosing Beets: Opt for small to medium-sized beets with smooth, firm skin and vibrant color. They should feel heavy for their size, indicating juiciness and freshness.
- Arugula Selection: Look for crisp, bright green leaves without wilting or browning edges. Young baby arugula offers a milder flavor and tender texture.
- Goat Cheese Options: Use a creamy, fresh chèvre rather than aged varieties to maintain the salad’s lightness and tang.
- Make Ahead: Roasted beets can be prepared up to two days in advance and refrigerated in an airtight container. Dress the arugula just before serving to prevent sogginess.
- Nut-Free Variation: Swap walnuts for toasted pepitas or omit altogether for nut-free guests.
serving Suggestions
Present this salad on a large white or wooden platter to highlight its vivid reds and greens. Garnish with a few fresh arugula sprigs and a delicate dusting of cracked black pepper. Pair it with warm, crusty whole-grain bread or a side of quinoa for a complete meal. This Bright Bites favorite shines alongside herb-grilled chicken or lemon-roasted vegetables for an elegant dinner plate.

| Nutrient | Per Serving |
|---|---|
| Calories | 210 kcal |
| Protein | 6 g |
| Carbohydrates | 18 g |
| Fat | 14 g |
Additional Reading
For more inspiration on vibrant greens and fresh salads, check our Healthy Arugula Salad Recipes. To deepen your knowledge on selecting the best produce, visit the National Farmers market Association for expert tips.
Step-by-Step Guide to Assembling Your Bright Bites Salad
Bright Bites: Beet & Goat Cheese Arugula Salad Recipe Guide invites you to celebrate vibrant colors and bold flavors in every forkful. Fresh, peppery arugula mingles effortlessly with sweet, earthy roasted beets and creamy goat cheese, creating a harmony of textures and tastes that feels both indulgent and rejuvenating. This salad, inspired by Mediterranean freshness and farm-to-table simplicity, is perfect for a light lunch or elegant starter. Whether you’re entertaining friends or nourishing yourself after a busy day, assembling this Bright Bites salad is a joyful experience that awakens your senses and brightens your plate.
Prep and Cook Time
- Preparation: 15 minutes
- Roasting Beets: 45 minutes
- Total Time: 1 hour
Yield
Serves 4 as a starter or light main course
Difficulty Level
Easy - perfect for cooks of all skill levels
Ingredients
- 3 medium beets, washed and trimmed
- 5 cups fresh arugula, rinsed and dried
- 4 oz goat cheese, crumbled
- 1/4 cup toasted walnuts, roughly chopped
- 2 tbsp extra virgin olive oil
- 1 tbsp balsamic vinegar
- 1 tsp honey (optional, for a touch of sweetness)
- Salt and freshly ground black pepper, to taste
- 1 small shallot, finely diced
Instructions
- Preheat your oven to 400°F (200°C). Wrap each beet individually in aluminum foil to lock in moisture during roasting.
- Roast the beets on a baking sheet for about 40-45 minutes,or until a sharp knife slides in easily. Remove from the oven and let cool slightly.
- While the beets roast, prepare the dressing: Whisk together the olive oil, balsamic vinegar, honey, shallot, salt, and pepper in a small bowl until emulsified. This dressing balances the earthy sweetness of the beets and peppery arugula beautifully.
- Once cooled, peel the beets. The skins should slip off effortlessly using your hands or a paper towel. Slice into thin rounds or wedges for dramatic presentation.
- In a large salad bowl, gently toss the arugula with half the dressing, ensuring the leaves are lightly coated but not soggy.
- Arrange the beet slices atop the dressed arugula, scattering crumbled goat cheese and toasted walnuts evenly over the salad.
- Drizzle the remaining dressing over the entire salad, finishing with a sprinkle of freshly cracked black pepper for a subtle kick.
- Serve immediately to enjoy the fresh textures and vibrant colors at their peak.
Chef’s Notes & Tips for Success
- Roasting beets: for a shortcut, use pre-cooked vacuum-packed beets available at many grocery stores without compromising flavor.
- Goat cheese variation: For a milder flavor, substitute with feta or creamy ricotta salata.
- Nuts alternatives: toasted pecans or sliced almonds add delightful crunch and variation.
- Make-ahead tip: Roast and peel beets up to 2 days in advance,store covered in the fridge,then assemble fresh before serving.
- Dressing adjustment: Adjust honey and balsamic vinegar quantities to your taste preference; a splash of lemon juice can also add brightness.
Serving Suggestions
Plate this bright Bites: Beet & Goat Cheese Arugula Salad with a sprinkle of fresh herbs like thyme or chives for an aromatic lift. Pair it alongside crusty artisan bread or serve atop grilled polenta rounds for a rustic yet refined touch.For a heartier option, add grilled chicken breast or toasted chickpeas.The contrasting textures and vibrant colors will brighten any table!
| Nutrient | Per Serving |
|---|---|
| Calories | 220 |
| Protein | 6g |
| Carbohydrates | 18g |
| Fat | 14g |
Looking to explore more vibrant salads? Check out our Fresh Citrus kale Salad for another colorful and nutritious delight. For an in-depth look into benefits and varieties of beets, visit the British Nutrition foundation.
Tips for Customizing and Elevating Your Arugula Salad Experience
bright Bites: Beet & Goat Cheese Arugula Salad Recipe Guide
Bright Bites: Beet & Goat Cheese Arugula Salad Recipe Guide is a refreshing party of earthy beets, peppery arugula, and creamy goat cheese, blending textures and flavors in an irresistible way. This salad captures a perfect harmony between vibrant, fresh ingredients and subtle zing from a citrus vinaigrette, making it a standout in any meal or light lunch.
Prep and Cook Time
- Preparation: 15 minutes
- Cooking (beets): 45 minutes (can be done ahead)
- Total Time: 1 hour
Yield
Serves 4 as a side salad or 2 as a light main course.
Difficulty Level
Easy – Perfect for home cooks looking to elevate simple, fresh ingredients with minimal fuss.
Ingredients
- 3 medium beets, roasted, peeled, and sliced
- 4 cups fresh arugula, washed and dried
- 4 oz goat cheese, crumbled
- 1/4 cup toasted walnuts, roughly chopped
- 2 tbsp extra virgin olive oil
- 1 tbsp fresh lemon juice
- 1 tsp honey
- 1 tsp Dijon mustard
- Salt and freshly ground black pepper, to taste
- Optional garnish: thinly sliced radish or edible flowers
Instructions
- Roast the beets: Preheat the oven to 400°F (200°C). wrap each beet individually in foil and roast on a baking sheet for 40-45 minutes until tender when pierced with a fork.Let cool, then peel and slice them thinly.
- While the beets cool, prepare the dressing by whisking together the olive oil, lemon juice, honey, Dijon mustard, salt, and pepper in a small bowl until well emulsified.
- In a large bowl, combine the arugula and sliced beets. Pour the dressing over the salad and toss gently to coat all the leaves without bruising.
- Sprinkle the crumbled goat cheese and toasted walnuts evenly over the salad for added richness and crunch.
- Garnish with thin radish slices or edible flowers for a vibrant, garden-fresh look that instantly elevates the presentation.
- Serve immediately for the best contrast between freshness and creaminess.
Bright Bites: Beet & Goat Cheese Arugula Salad Recipe Guide is flexible, giving you endless ways to tailor each bite to your taste. Start by experimenting with different beet preparations-try roasting,steaming,or even pickling for a tangier depth. Swap out walnuts for pecans, pistachios, or pumpkin seeds to introduce new textures and flavors that complement the peppery arugula.
If you prefer a sweeter touch, add juicy segments of orange or pomegranate seeds-both add bursts of color and refreshing acidity that balance the creamy goat cheese beautifully. For a heartier meal, toss in some cooked quinoa or farro, offering a nutty base and extra protein.
Consider upgrading your dressing by incorporating fresh herbs like thyme or basil, or a splash of balsamic vinegar for a richer, more complex profile. To keep the salad crisp, dress it right before serving, and if prepping ahead, store beets and greens separately.
visually,layering contrasting colors adds a gourmet appeal-drizzle a thin balsamic reduction or scatter microgreens on top for that “wow” factor. For a more indulgent finish, lightly toast the goat cheese under the broiler on crostini and serve on the side, lending a warm, tangy contrast.
As you explore these additions, you’ll find each variation unlocks a new chapter of flavor and texture, keeping your Bright Bites: Beet & goat Cheese Arugula Salad Recipe Guide as exciting and fresh as your culinary imagination.
Chef’s Notes
- make-ahead tip: Roast your beets up to two days in advance and refrigerate. assemble the salad just before serving to maintain crispness.
- Substitutions: Use feta or ricotta salata instead of goat cheese for a different tang.
- Veggie swap: Add thinly sliced fennel or cucumber for extra crunch and freshness.
- Nut allergies: Omit nuts or try toasted sunflower seeds or crispy chickpeas for texture.
- Balance your salad: If arugula’s peppery bite is too intense, mix it with mild baby spinach or butter lettuce.
Serving Suggestions
This salad shines when presented on a large shallow platter, allowing the colors-deep ruby beets, vibrant green arugula, and the snowy white goat cheese-to pop vividly. Garnish with freshly cracked pepper and a light drizzle of dressing just before serving.
For gatherings, pair the salad with crusty artisan bread or serve alongside grilled chicken or seared salmon to create a complete, elegant meal. Brighten the plate further with a sprinkle of edible flowers or fresh herbs, making each bite as beautiful as it is delicious.
| Nutrient | Per Serving |
|---|---|
| Calories | 280 kcal |
| Protein | 8 g |
| Carbohydrates | 20 g |
| Fat | 18 g |

For those interested in more vibrant greens recipes, check out our Zesty kale Salad with Lemon Tahini.to deepen your understanding of arugula’s nutritional benefits, visit Healthline’s comprehensive guide.
Q&A
bright bites: Beet & Goat Cheese Arugula Salad Recipe guide
Q&A edition
Q1: What makes the combination of beets, goat cheese, and arugula so special in this salad?
A1: It’s all about balance and contrast. Earthy, sweet roasted beets provide a vibrant base, while tangy goat cheese adds a creamy richness.Peppery arugula brings a fresh bite, tying it all together with a delightful mix of textures and flavors. Each ingredient shines individually but shines brighter together!
Q2: Should I use raw or roasted beets for this salad?
A2: Roasted beets are the star here. Roasting enhances their natural sweetness and softens them just enough to blend perfectly with the creamy goat cheese and crisp arugula. Plus, roasting adds a subtle caramelized depth that raw beets just can’t match.
Q3: Can I prepare this salad ahead of time? How do I keep it fresh?
A3: Absolutely! Roasted beets can be prepared and chilled a day in advance. Store them in an airtight container. Keep the arugula and goat cheese separate until you’re ready to serve to maintain freshness and prevent wilting. Dress the salad just before eating for that perfect “bright bite” crispness.
Q4: What dressing best complements the flavors in this salad?
A4: A simple balsamic vinaigrette works wonders-its sweet tang pairs beautifully with beets and goat cheese. Use good quality olive oil, balsamic vinegar, a touch of honey or maple syrup, and a pinch of Dijon mustard to create a harmonious balance. Lemon vinaigrette is another lovely alternative for a brighter, citrusy kick.
Q5: I want to add a bit of crunch. What ingredients would you suggest?
A5: Toasted walnuts or pecans are excellent choices,adding a toasty crunch without overpowering the salad’s delicate flavors. For an unexpected twist, try pepitas (pumpkin seeds) or lightly toasted sunflower seeds-they bring both crunch and a nutty nuance.
Q6: Can this salad be made vegan or dairy-free?
A6: Yes! Swap the goat cheese for a creamy plant-based alternative like cashew cheese or almond-based soft cheese. Nutritional yeast can also add a cheesy flavor punch if you prefer a sprinkle rather than a spread.The roasted beets and arugula remain the flavorful heart of the dish.
Q7: How can I elevate this salad for a special occasion?
A7: Try adding thinly sliced blood oranges or ruby red grapefruit segments for a jewel-toned citrus burst. A sprinkle of edible flowers or microgreens not only beautifies the plate but brings subtle herbal notes. Finish with flaky sea salt and freshly cracked black pepper to enhance every element.
Q8: are there any nutritional benefits to this beet, goat cheese, and arugula trio?
A8: Definitely! Beets are rich in antioxidants and fiber, supporting heart health and digestion. Goat cheese offers a good source of protein and calcium, generally easier to digest than cow’s milk cheese. Arugula is a leafy green powerhouse, packed with vitamins A, C, and K, plus minerals like calcium and potassium.
Q9: What kitchen tools should I have on hand to make this salad efficiently?
A9: A sharp chef’s knife for precise beet slicing, a roasting pan or sheet for perfectly caramelizing beets, a salad spinner to keep arugula crisp, and a small whisk or jar for emulsifying your vinaigrette. A vegetable peeler can also help with thinly shaving beets or garnishes.
Q10: Can I customize this salad with seasonal ingredients?
A10: Absolutely, that’s the beauty of it! Swap beets with roasted golden beets or heirloom varieties in fall; add sliced radishes or snap peas in spring; toss in pomegranate seeds during winter for a jewel-like burst. Keep the core of creamy cheese and spicy greens,and change up the supporting cast to match seasonal freshness.
Ready to create your own bright bite delight? This beet & goat cheese arugula salad isn’t just a recipe-it’s a celebration of color, flavor, and nourishment on every forkful!
The Conclusion
As the vibrant hues of roasted beets dance alongside the creamy tang of goat cheese atop a bed of peppery arugula, this Bright Bites Beet & Goat Cheese Arugula Salad invites you to savor both flavor and nutrition in every forkful. Whether you’re seeking a refreshing starter or a light yet satisfying meal, this salad strikes the perfect balance of earthiness and zest. Now that you have the recipe guide in hand, it’s time to bring these wonderfully bright bites to your table-transforming simple ingredients into a culinary celebration that’s as beautiful as it is indeed delicious. Happy tossing!
]]>
The Vibrant Harmony of Beets and Citrus Flavors
Bright & Bold: Roasted Beet and Orange Salad Recipe Guide
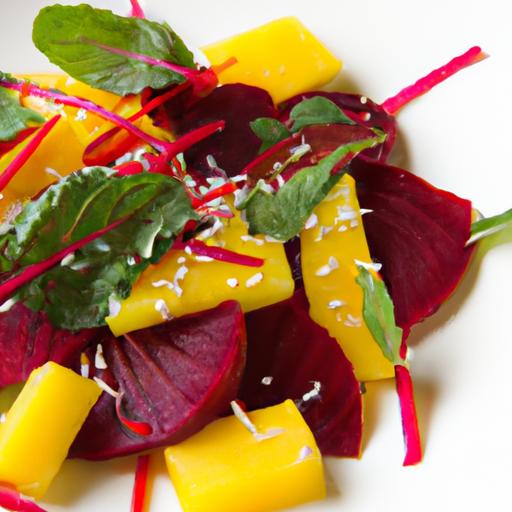
Bright & bold: Roasted Beet and Orange salad Recipe Guide invites you on a culinary journey where earthy, tender roasted beets meet zesty, sun-kissed citrus in a dish bursting with color and flavor. this salad is a celebration of contrasts and harmony,perfect for spring and summer menus or a stunning side to brighten any meal. Inspired by mediterranean influences and elevated with contemporary flair, it’s a fresh, vibrant option that never fails to impress guests or elevate weeknight dinners.
Prep and Cook Time
- Preparation: 15 minutes
- Cooking: 45 minutes
- Total Time: 1 hour
Yield
Serves 4 as a side dish
Difficulty Level
Easy - Perfect for cooks of all skill levels
Ingredients
- 4 medium fresh beets, washed and trimmed
- 2 large navel oranges, peeled and segmented
- 1/4 cup extra-virgin olive oil, divided
- 2 tablespoons fresh lemon juice
- 1 teaspoon honey or maple syrup
- 1/4 cup toasted walnuts, roughly chopped
- 3 ounces mixed baby greens or arugula
- 1/4 cup crumbled feta cheese (optional)
- 1 small shallot, thinly sliced
- Salt and freshly ground black pepper, to taste
- Fresh mint leaves, for garnish
Instructions
- Preheat your oven to 400°F (200°C). Wrap each beet individually in aluminum foil, drizzle with a teaspoon of olive oil, and place on a baking sheet.Roast for 40-45 minutes or until tender when pierced with a fork.
- Once cool enough to handle, unwrap and gently rub the skins off the beets with your fingers or a paper towel. Slice into thin rounds or wedges for vibrant presentation.
- Peel the oranges carefully with a sharp knife,removing all pith,then segment them over a bowl to catch the juices-which will be used in the dressing.
- In a small bowl, whisk together 3 tablespoons olive oil, fresh lemon juice, honey, a pinch of salt, and pepper. Add reserved orange juice to brighten the vinaigrette.
- In a large salad bowl, combine the sliced beets, orange segments, baby greens, and shallots. Drizzle the dressing over and toss gently to avoid bruising the delicate ingredients.
- Sprinkle the toasted walnuts and crumbled feta on top, adding a lovely contrast in texture and creaminess.
- Garnish with fresh mint leaves for a refreshing finish that elevates both aroma and flavor before serving.
Tips for Success
- Roasting beets: wrapping in foil keeps them moist and tender, but you can also boil or steam if pressed for time. Roasting amplifies their natural sweetness.
- Peeling beets: Use disposable gloves to avoid staining your hands or peel under cold running water to erase stubborn color.
- Variation: Substitute walnuts with toasted pecans or pistachios for a different nutty crunch. For a vegan version, omit the feta or use a plant-based cheese option.
- make-ahead: Prepare roasted beets one day in advance; store in an airtight container in the refrigerator. Assemble salad just before serving to maintain freshness.
- Balancing flavors: If the salad feels too earthy or heavy, a splash more lemon juice or a sprinkle of flaky sea salt can brighten every bite.
Serving Suggestions
for a stunning table centerpiece,serve this salad on a large white platter to showcase the vivid magenta beets against the bright orange citrus.Accompany it with crusty artisanal bread or crispy flatbreads to scoop every flavorful bite. This salad pairs exceptionally well with grilled fish or roasted chicken for a balanced meal. Adding a sprinkle of pomegranate seeds can also infuse a jewel-toned sparkle and a pop of tart sweetness, perfect for entertaining. Serve chilled or at room temperature to allow the full range of flavors to unfold.

Nutritional Facts
| nutrient | per Serving |
|---|---|
| Calories | 210 kcal |
| Protein | 5 g |
| Carbohydrates | 22 g |
| Fat | 12 g |
For more inspiration on incorporating vibrant seasonal vegetables into your recipes, check out our Seasonal Vegetable pasta Recipe Guide. To learn more about the health benefits of beets and citrus, visit Healthline’s detailed guide.
Selecting the Freshest ingredients for Maximum Brightness
Bright & Bold: Roasted Beet and orange Salad Recipe Guide begins with a celebration of nature’s finest flavors and colors, where every ingredient sings with freshness and vitality. to achieve the maximum brightness that elevates this dish,selecting the freshest beets and perfectly ripe oranges is essential. The interplay of earthy, sweet roasted beets and zesty, juicy oranges creates a salad that’s not only visually stunning but also deeply satisfying.
Prep and Cook Time
- Preparation: 15 minutes
- Roasting: 45 minutes
- Total Time: 60 minutes
Yield
Serves 4 as a refreshing appetizer or side dish.
Difficulty Level
Easy – perfect for home cooks looking to impress with simple but vibrant ingredients.
Ingredients
- 4 medium fresh beets, washed and trimmed (choose firm, smooth-skinned beets without blemishes)
- 3 large oranges (Navel or Valencia for maximum sweetness and juiciness)
- 1/2 cup crumbled feta cheese (optional, for a creamy contrast)
- 1/4 cup toasted walnuts, roughly chopped
- 3 cups baby arugula or mixed greens
- 2 tablespoons olive oil, extra virgin
- 1 tablespoon fresh lemon juice
- 1 teaspoon honey or maple syrup
- Salt and freshly ground black pepper, to taste
- Fresh mint leaves, for garnish
Instructions
- Preheat your oven to 400°F (200°C). Wrap each beet tightly in aluminum foil to lock in moisture during roasting.
- Roast the beets for about 40-45 minutes. They’re ready when a fork slides in easily.Roasting enhances their natural sweetness and deepens their color.
- Cool the beets slightly, then peel by rubbing the skins off with your fingers or a paper towel. slice into bite-sized wedges or rounds.
- While the beets roast,peel the oranges. Remove all white pith (which can be bitter) and cut the segments by slicing between the membranes to release bright, juicy sections.
- Prepare the dressing. In a bowl,whisk together olive oil,lemon juice,honey,salt,and pepper until emulsified.
- In a large salad bowl, combine roasted beets, orange segments, arugula, walnuts, and feta (if using).
- Toss gently with the dressing. Balance the flavors carefully so the earthiness of the beets and the oranges’ brightness shine through.
- Plate the salad and garnish with fresh mint leaves. Serve immediately to enjoy the freshest bursts of flavor.
Tips for Success:
Choosing your ingredients with care will make a striking difference in the outcome of this Bright & Bold: Roasted Beet and Orange Salad Recipe Guide. Look for beets that feel firm and heavy for their size; this indicates a dense, juicy interior. Avoid beets with cracks or soft spots, which can mean they’re drying out or aging.For oranges, pick fruit that’s bright-colored, smooth-skinned, and heavy, indicating juicy segments inside.
When peeling oranges, removing the pith is crucial-it prevents bitterness and allows the natural sweetness to come forward. High-quality olive oil enhances the salad’s natural brightness, so opt for an extra virgin variety labeled cold-pressed for the best flavor and health benefits.
Pro tip: Toast your walnuts in a dry pan for 3-4 minutes to amplify their nutty aroma, adding texture and warmth to the salad. If available, fresh mint picked just before serving injects an herbal lift, creating an unforgettable contrast with the beets’ earthiness and the citrus zing.
Serving suggestions
- Serve chilled or at room temperature for a refreshing contrast on warm days.
- Pair with crusty artisan bread or a light quinoa pilaf for a full meal.
- Garnish with edible flowers or microgreens to enhance the visual appeal.
- Drizzle a touch of balsamic glaze for added depth if desired.
| nutrient | Per Serving |
|---|---|
| Calories | 220 |
| Protein | 6g |
| Carbohydrates | 25g |
| Fat | 12g |
For more vibrant salad creations, explore our Citrus and Root Vegetable Salad Recipes. And to delve deeper into the health benefits of beets backed by science,visit Healthline’s comprehensive beet guide.

Step-by-Step Roasting Techniques for Perfectly Tender Beets
Bright & Bold: Roasted Beet and Orange Salad Recipe Guide introduces you to the art of roasting beets perfectly tender and bursting with sweet, earthy flavor. Mastering this technique elevates your salad to a new level, where each bite melts effortlessly on the palate while showcasing vibrant, jewel-toned slices. Roasting beets unlocks their natural sugars, creating a caramelized depth without sacrificing that signature tender bite – a balance every home cook craves.
Prep and Cook Time
- Preparation: 10 minutes
- Roasting: 50-60 minutes
- Total Time: 1 hour 10 minutes
Yield
Serves 4 elegantly as a side or light entrée
Difficulty Level
Easy – with simple tips for flawless roasted beets every time
Ingredients
- 4 medium beets (about 1 to 1.5 pounds), unpeeled
- 2 tablespoons olive oil, extra virgin
- 1/2 teaspoon sea salt
- Freshly cracked black pepper, to taste
- 1 large orange, peeled and sliced thinly
- 2 tablespoons fresh lemon juice
- 1 tablespoon honey (optional, for added sweetness)
- 1/4 cup toasted walnuts, roughly chopped
- 4 ounces crumbled goat cheese (optional)
- Fresh mint leaves and microgreens, for garnish
- Preheat the oven to 400°F (205°C). For even cooking, choose beets of similar size or cut larger ones in half to match.
- Prepare the beets: Rinse thoroughly to remove any dirt but keep the skin on. Trim the beet greens about 1 inch from the crown-don’t peel at this stage; roasting the skin on locks in moisture and nutrients.
- Wrap the beets: Place each beet individually on a large square of aluminum foil. drizzle with 1/2 tablespoon olive oil and sprinkle with salt. Wrap tightly to create a sealed packet, which steams the beets for tender, evenly roasted flesh.
- Roast on a baking sheet: Arrange the foil-wrapped beets on a rimmed baking sheet to catch any moisture. Roast for 50 to 60 minutes depending on size. Test doneness by inserting a sharp knife or skewer-it should slide in smoothly without resistance.
- Cool and peel: Remove beets from the oven and carefully unwrap. As soon as they are cool enough to handle, gently rub the skins off using your fingers or a paper towel. The skin will slip away easily, revealing a velvety, luscious beet ready for slicing.
- Slice and season: Slice the roasted beets into 1/4-inch rounds or wedges, depending on your salad presentation. Toss lightly with remaining olive oil, fresh lemon juice, and a drizzle of honey for that bright, sweet contrast to the earthiness.
- Combine with fresh elements: Layer the beet slices with delicate orange rounds on a serving platter. The warmth and depth of the roasted beets paired with zesty citrus will awaken your senses and create a stunning color contrast.
- Add toppings and finish: Scatter chopped toasted walnuts and crumbled goat cheese over the salad. Garnish with vibrant mint leaves and microgreens for an herbaceous, crunchy finish that complements the roasted beet’s tender texture.
Tips for Success
- Test beet doneness early: Begin checking at 45 minutes if your beets are small. Overcooked beets become mushy; undercooked stay tough.
- Make ahead: Roasted beets can be prepared 1-2 days in advance and stored refrigerated, wrapped tightly to retain moisture.
- Variations: Substitute walnuts with pecans or pistachios for a different nutty profile. swap goat cheese for vegan cheese to keep it dairy-free.
- Alternative roasting method: For a smoky note, roast beets unwrapped on a roasting pan, but monitor closely and expect longer cooking time.
- Peeling shortcut: Use silicone gloves to protect hands from beet stains and help rub off the skins swiftly under running water.
Serving Suggestions
Plate this salad on a large white or bamboo platter to showcase the bright and bold jewel tones of the beets and orange slices. Drizzle a final touch of extra virgin olive oil and a pinch of flaky sea salt right before serving to enhance flavors further. Serve chilled or at room temperature alongside grilled chicken or as a vibrant starter to a seasonal meal. This salad pairs wonderfully with whole grain breads or a chilled glass of sparkling water with a citrus twist.
| Nutrient | Per Serving |
|---|---|
| Calories | 180 kcal |
| Protein | 4 g |
| Carbohydrates | 22 g |
| Fat | 9 g |
For more inspiration on roasted vegetable salads, discover exciting combinations that marry texture and flavor. To understand the nutritional benefits of beets, visit the International Nutrition Foundation.
Crafting the Ideal Dressing to Elevate Your Salad Experience
Bright & Bold: Roasted Beet and Orange Salad recipe Guide invites you to master the art of creating a dressing that perfectly complements the earthy sweetness of roasted beets and the zesty brightness of fresh orange segments. The right dressing is not just an accompaniment-it’s the flavor alchemy that elevates this vibrant salad from simple to sublime. Imagine a silky, citrus-kissed vinaigrette that ties together the natural sugars and slight bitterness with a tangy pop, finishing with a subtle hint of herbaceous depth.
prep and Cook Time
- Preparation: 15 minutes
- Roasting: 50 minutes
- Total Time: 1 hour 5 minutes
Yield
Serves 4 as a refreshing starter or side dish
Difficulty Level
Easy to Medium – approachable for home cooks looking to impress
Ingredients for the Dressing
- 3 tablespoons extra virgin olive oil
- 2 tablespoons fresh orange juice (about 1 medium orange)
- 1 tablespoon white balsamic vinegar
- 1 teaspoon honey, preferably wildflower or clover
- 1 small shallot, finely minced
- 1 teaspoon Dijon mustard
- 1/4 teaspoon salt
- Freshly cracked black pepper to taste
- 1 teaspoon finely chopped fresh thyme or flat-leaf parsley for a herbal lift
Instructions
- Combine the citrus and vinegar: In a small mixing bowl, whisk together the fresh orange juice and white balsamic vinegar until fully blended. This tart base will brighten the roasted beets beautifully.
- Add mustard and honey: Whisk in the Dijon mustard and honey; these ingredients create a perfectly emulsified dressing that balances tang and sweetness.
- Incorporate shallots: Stir the minced shallot into the dressing.This adds a subtle, savory depth – chop finely for a smooth texture, or leave a little chunkier for more punch.
- Slowly drizzle olive oil: While whisking vigorously,gradually add the olive oil. This technique ensures the dressing emulsifies into a silky, luxurious consistency that clings to every beet and orange slice.
- Season and herbify: Add salt, pepper, and fresh herbs (thyme is traditional, but parsley brings a fresh brightness).Taste and adjust seasoning as needed; this is the moment to balance acidity and sweetness.
- Rest and meld flavors: Let the dressing sit for at least 10 minutes before tossing into the salad. The resting time allows the shallots to mellow slightly and the flavors to marry harmoniously.
Tips for Success
- Use freshly squeezed orange juice for the most vibrant flavor and natural sweetness. Avoid store-bought juices with additives or pulp that can dull the dressing’s texture.
- Whisk vigorously or use a small blender to emulsify the dressing for a smooth finish-this helps the dressing cling to the vegetables rather than pooling on the plate.
- For an extra layer of complexity, add a pinch of smoked paprika or a few drops of high-quality sherry vinegar rather of white balsamic.
- The shallots can be swapped for red onion if desired, but mince very finely and soak briefly in the vinegar to tame the bite.
- Make the dressing up to a day ahead and refrigerate. Bring it back to room temperature and whisk before serving.
Serving Suggestions
For a visually stunning plate, arrange the roasted beets and bright orange segments on a bed of peppery arugula or tender baby spinach. Drizzle generously with your freshly crafted dressing, allowing it to pool slightly at the edges to catch the eye. Top with toasted walnuts or pecans for crunch and garnish with crumbled feta or creamy goat cheese for that bold contrast of flavor and texture. A sprinkle of microgreens or edible flowers can also elevate the presentation, making this salad a centerpiece worthy of any season’s table.
| Nutrient | Amount per Serving |
|---|---|
| Calories | 180 kcal |
| Protein | 3 g |
| Carbohydrates | 14 g |
| Fat | 12 g |

For a deeper dive into vibrant salads that celebrate seasonal produce, explore our complete guide to seasonal salad recipes. To understand the nuanced benefits of citrus in dressings, visit Healthline’s Citrus Fruit Nutrition Guide.
Q&A
Q&A: Bright & bold – Roasted Beet and Orange Salad Recipe Guide
Q1: What makes roasted beets and oranges such a fantastic pairing in a salad?
A1: Roasted beets bring an earthy sweetness and tender texture that beautifully complements the bright, zesty punch of fresh oranges. Together, they create a vibrant contrast of flavors that dance on your palate-deep, caramelized notes meet juicy, citrusy brightness for a truly refreshing salad experience.
Q2: How do I roast beets perfectly for this salad?
A2: For perfectly roasted beets, start by rinsing and trimming the greens, then rub them lightly with olive oil and wrap them in foil.Roast in a preheated oven at 400°F (200°C) for about 45 to 60 minutes, until they’re fork-tender. Let them cool before peeling-the skins will slip off easily, revealing their gorgeous ruby hue.
Q3: can I use other citrus fruits instead of oranges?
A3: Absolutely! While oranges bring a classic, sweet brightness, you can experiment with blood oranges for a more dramatic color and slightly tart flavor, or even grapefruits and mandarins to add unique twists. Just ensure your citrus choice balances well with the earthiness of the beets.Q4: What kind of dressing works best for a roasted beet and orange salad?
A4: A simple vinaigrette with olive oil, fresh lemon juice, a touch of honey or maple syrup, and a pinch of salt and pepper is classic and effective. The acidity cuts through the richness of the beets while enhancing the citrus notes,creating a luscious,well-rounded flavor profile.
Q5: Are there ways to add texture and crunch to this salad?
A5: Yes! Toasted nuts like walnuts,pecans,or almonds add a satisfying crunch and a toasty depth,while seeds such as pumpkin or sunflower can provide a lighter crispness. You might also toss in some crumbled feta or goat cheese for tang and creaminess, but these are optional depending on your preference.
Q6: Can this salad be made ahead of time?
A6: Definitely.Roast your beets a day in advance and keep them refrigerated. Segment your oranges fresh before serving to maintain their juiciness, and whisk up the dressing ahead of time. Assemble just before eating to preserve the vibrant flavors and textures.Q7: What dietary benefits does this roasted beet and orange salad offer?
A7: This vibrant combo is packed with antioxidants, vitamin C, fiber, and essential minerals. Beets are known for their anti-inflammatory properties and natural nitrates,which support heart health,while oranges provide immune-boosting vitamins. Together, they offer a nutritious punch that’s as good for your body as it is delightful to your taste buds.
Q8: How can I serve this salad to make it a main dish?
A8: Elevate your roasted beet and orange salad into a filling meal by layering it over a bed of hearty greens like kale or arugula, adding quinoa or farro for protein and texture, and sprinkling with roasted chickpeas or cooked lentils. This makes for a satisfying, bright, and bold dish that’s perfect for lunch or dinner.
Q9: Is this salad suitable for all seasons?
A9: Absolutely! While beets and citrus shine in cooler months, their natural colors and flavors brighten any table year-round. You can swap out citrus varieties as they come into season or add fresh herbs like mint or basil in warmer months for a refreshing twist.
Q10: Any tips for plating and presentation?
A10: play with the colors! Arrange vibrant beet slices and orange segments artistically on white or neutral-toned plates to let their hues pop. Garnish with fresh herbs or a sprinkle of seeds for texture and visual interest. A drizzle of dressing right before serving adds a glossy,inviting finish.
in Summary
As vibrant in color as it is in flavor, this roasted beet and orange salad invites you to celebrate the simple joys of fresh, wholesome ingredients coming together in harmony. Whether you’re seeking a refreshing side dish or a standout salad to brighten your table,this recipe guide offers a perfect balance of earthiness and citrus zing. So next time you want to add a pop of color and a burst of taste to your meal, remember that sometimes the boldest dishes start with the humblest roots-and a splash of sunshine from the orchard. Happy cooking!
]]>
Ingredients That Bring Zesty Freshness to Your One-Pan Salmon
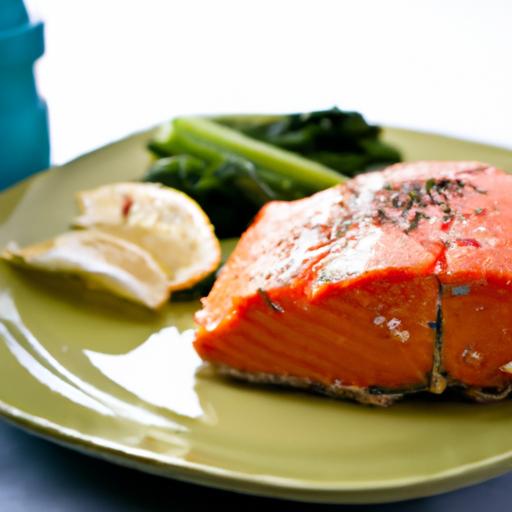
Bright and Bold: Easy One-Pan Lemon Herb Salmon Feast is a festivity of zesty freshness and effortless cooking. This vibrant recipe brings together the perfect harmony of citrus, fresh herbs, and hearty salmon in one skillet, creating a dish that bursts with flavor and color. Inspired by Mediterranean coastal cooking, its simplicity makes this meal approachable for weeknights yet notable enough for guests. The marinade’s tangy lemon and fragrant herbs enhance the rich,flaky salmon,while the one-pan method keeps prep minimal and cleanup fast-ideal for savoring fresh,bright flavors without fuss.
prep and Cook Time
- Readiness: 10 minutes
- Cooking: 20 minutes
- Total Time: 30 minutes
Yield
Serves 4 generous portions, perfect for a family dinner or sharing with friends.
Difficulty Level
easy – Perfect for home cooks of all levels looking to impress with minimal effort.
Ingredients
- 4 salmon fillets (6 ounces each), skin-on for crispiness
- 2 tablespoons extra virgin olive oil, divided
- 1 lemon, zested and juiced
- 3 garlic cloves, minced
- 1 tablespoon fresh dill, finely chopped
- 1 tablespoon fresh parsley, chopped
- 1 teaspoon fresh thyme leaves
- 1/2 teaspoon sea salt, or to taste
- 1/4 teaspoon freshly cracked black pepper
- 1 cup cherry tomatoes, halved
- 1 cup baby spinach, packed
- 1 small shallot, thinly sliced
- Optional: 1/2 teaspoon red pepper flakes for a subtle kick
Instructions
- Prepare the lemon Herb Marinade: In a small bowl, whisk together 1 tablespoon of olive oil, lemon zest, lemon juice, minced garlic, chopped dill, parsley, thyme, salt, and black pepper. Set aside to meld flavors.
- Marinate the Salmon: Place salmon fillets in a shallow dish,skin-side down,and pour the marinade over them. Let rest for 10 minutes to soak in the zesty, herbaceous notes.
- Heat the Pan: Warm the remaining 1 tablespoon of olive oil in a large non-stick skillet over medium-high heat. Once shimmering, add the salmon fillets skin-side down. Sear for about 4-5 minutes until the skin is golden and crisp.
- Flip and add Veggies: Carefully turn the salmon over. Add the sliced shallot, halved cherry tomatoes, and baby spinach around the fillets. Stir the vegetables gently to coat in olive oil and juices, sautéing until spinach wilts and tomatoes soften, about 3-4 minutes.
- Finish Cooking: Reduce heat to medium-low and cook for an additional 4-5 minutes or until the salmon flakes easily with a fork. If desired, sprinkle red pepper flakes for a gentle heat.
- Plate and Garnish: Transfer salmon to plates along with the vibrant sautéed veggies. Spoon any pan juices over the top and garnish with extra fresh parsley and thin lemon slices for a photogenic, bright finish.
tips for Success
- Choose fresh, wild-caught salmon when possible for optimal flavor and texture.
- Do not overcrowd the pan when cooking-the salmon needs space to sear properly and develop a crispy skin.
- Marinate briefly-10 to 15 minutes is enough.Over-marinating can break down the salmon’s texture.
- To keep the salmon moist, avoid overcooking.Salmon is perfectly done at 125°F (52°C) internal temperature.
- Substitute fresh herbs with 1 teaspoon dried herbs if fresh are unavailable, but fresh is highly recommended for brightness.
- Make ahead tip: Prepare the marinade and chop herbs in advance to cut down active cooking time.
Serving Suggestions
Pair this salmon feast with a light quinoa salad or garlic roasted potatoes to soak up the zesty pan juices. A crisp green salad with cucumber and radishes provides a cool contrast that complements the warm, tender salmon. garnish with lemon wedges and a sprinkle of flaky sea salt for extra dimension. For a finishing touch, drizzle a little extra virgin olive oil or a dollop of homemade tzatziki to elevate each bite.

| Nutrient | Per Serving |
|---|---|
| calories | 320 kcal |
| Protein | 34 g |
| Carbohydrates | 6 g |
| Fat | 18 g |
Discover other fresh and wholesome seafood recipes in our Easy Seafood Dinners Collection. For tips on choosing quality fish and maintaining freshness, visit the FDA’s Guide to Safe Seafood.
Mastering the Perfect Lemon Herb Marinade for Maximum Flavor
Bright and Bold: Easy One-Pan Lemon Herb Salmon feast is all about unlocking vibrant freshness in every bite, and it starts with mastering the perfect lemon herb marinade. This marinade transforms simple salmon fillets into a sensory experience bursting with zesty citrus,fragrant herbs,and just the right touch of garlic and olive oil.Drawing inspiration from Mediterranean coastal kitchens, where meals are effortless yet packed with bold flavors, this blend elevates your fish without overpowering its natural silky texture.
Before your salmon even hits the pan, soaking it in this marinade ensures that each forkful sings with brightness and herbaceous depth.Plus, the acid from the lemon juice gently tenderizes the fish, while the olive oil helps seal in moisture during cooking, resulting in a luscious, juicy finish. Whether you’re cooking for an intimate dinner or a casual weekend supper, this marinade is your ticket to a crowd-pleasing dish that’s as gorgeous on the plate as it is indeed delightful to eat.
Prep and Cook Time
- Preparation: 10 minutes
- Marinating: 20 minutes (recommended)
- Cooking: 15 minutes
- total Time: 45 minutes
Yield
Serves 4 generous portions
Difficulty Level
Easy – Perfect for both beginners and seasoned home cooks
Ingredients
- 4 salmon fillets (6 oz each, skin-on for best results)
- 1/4 cup fresh lemon juice (about 2 lemons)
- 1/4 cup extra virgin olive oil
- 3 garlic cloves, finely minced
- 1 tablespoon fresh dill, finely chopped
- 1 tablespoon fresh parsley, finely chopped
- 1 teaspoon fresh thyme leaves
- 1/2 teaspoon sea salt
- 1/4 teaspoon freshly cracked black pepper
- 1 teaspoon lemon zest (zest of one lemon, finely grated)
Instructions
- Prepare the marinade: In a medium bowl, whisk together the lemon juice, olive oil, minced garlic, lemon zest, dill, parsley, thyme, salt, and pepper until fully combined.
- Marinate the salmon: Place the fillets in a shallow dish or resealable bag. Pour the marinade over, ensuring each fillet is well coated. Cover and refrigerate for at least 20 minutes, but not more than 1 hour to avoid overly ‘cooking’ the fish with the acid.
- Preheat your oven: Set to 400°F (200°C). Line a large oven-safe skillet or baking tray with parchment paper or foil for easy cleanup.
- Arrange the salmon: Remove from marinade (reserve the leftover marinade) and place fillets skin-side down in a single layer.
- Start with stovetop searing (optional for crisp skin): Heat a tablespoon of olive oil in a skillet over medium-high heat. Sear skin side down for 3-4 minutes until crisp and golden. Then place skillet in oven. (If using baking tray, simply skip the searing.)
- Bake the salmon: Transfer the skillet or tray to the oven. Bake for 8-10 minutes,brushing occasionally with reserved marinade. The salmon should flake easily but still look moist.
- Rest before serving: Let the fillets rest for 2-3 minutes to allow juices to redistribute for maximum tenderness and flavor.
Tips for Success
- Fresh herbs matter: Using fresh dill, parsley, and thyme infuses brighter, more vibrant notes than dried. If using dried, reduce amounts by half.
- Marinate just enough: Over-marinating in citrus can start to “cook” the fish (turning it chalky). Stick to 20-60 minutes maximum.
- skin-on fillets: Retain skin during cooking for extra moisture and a delicious crispy texture. Use a fish spatula to flip gently or transfer to oven after searing skin-side down to avoid breaking.
- Make it ahead: Prepare the lemon herb marinade up to a day in advance and refrigerate in a sealed container. Marinate salmon just before cooking.
- Oven timing: Baking time depends on thickness. For very thick fillets,increase baking by 2-3 minutes and monitor carefully.
Serving Suggestions
Present this bright and bold salmon with a sprinkle of freshly chopped parsley and thin lemon slices for visual appeal.
- Pair with roasted baby potatoes tossed in garlic and rosemary.
- Serve alongside a crisp cucumber and tomato salad lightly dressed in olive oil and lemon.
- Add a dollop of whipped feta or tzatziki on the side to complement the citrus and herbaceous flavors.
- For a low-carb option, spoon the salmon over fluffy cauliflower rice tossed with fresh herbs.
Don’t forget to drizzle any pan juices over the salmon just before serving to amplify flavor!

| Nutrient | Per Serving |
|---|---|
| Calories | 320 kcal |
| Protein | 34 g |
| Carbohydrates | 2 g |
| Fat | 18 g |
For an in-depth guide on cooking fish perfectly every time, check out our Perfect pan-Seared Fish guide.For additional inspiration on Mediterranean flavors and benefits, visit Medical News Today’s Mediterranean Diet article.
step-by-step Guide to Achieving Crispy Skin and Tender Salmon
the secret to mastering Bright and Bold: Easy One-Pan Lemon Herb Salmon Feast lies in the artful technique that delivers irresistibly crispy skin and perfectly tender salmon flesh. This method transforms your kitchen into a restaurant-grade haven where the salmon’s natural flavors are enhanced by zesty lemon, fresh herbs, and a golden crust, creating an unforgettable sensory experience with every bite.
Prep and Cook Time
- Preparation: 10 minutes
- Cooking: 15 minutes
- Total Time: 25 minutes
yield
- Serves 4
Difficulty Level
- Easy
Ingredients
- 4 salmon fillets, skin-on (about 6 oz each)
- 2 tbsp olive oil
- 1 tbsp unsalted butter
- 1 lemon, thinly sliced
- 2 cloves garlic, minced
- 1 tbsp fresh dill, chopped
- 1 tbsp fresh parsley, chopped
- Salt and freshly ground black pepper, to taste
- Optional: pinch of red pepper flakes for subtle heat
Instructions
- Pat the salmon fillets dry thoroughly with paper towels to ensure the skin crisps beautifully.Season both sides generously with salt and pepper.
- Heat the olive oil in a large non-stick or cast-iron skillet over medium-high heat until shimmering but not smoking.
- Place the salmon fillets skin-side down in the pan, gently pressing them down with a spatula for about 10 seconds to prevent curling.Allow the salmon to cook undisturbed for 5-6 minutes until the skin is crisp and releases easily from the pan.
- Reduce the heat to medium and flip the fillets carefully. add the butter, lemon slices, and garlic around the salmon in the skillet.
- baste the salmon by spooning the melted butter and lemon-garlic mixture over the tops.Cook for another 3-4 minutes until the salmon is just opaque and flakes easily with a fork.
- Remove from heat and sprinkle the fresh dill and parsley on top.Cover lightly for one minute to allow the herbs to infuse into the warm fish.
- Serve promptly garnished with the pan-roasted lemon slices and an extra squeeze of fresh lemon juice for bright, zesty finish.
Tips for Success When Cooking Your One-pan Lemon Herb Salmon Feast
- for the crispiest skin: Always dry your salmon thoroughly and make sure the pan is hot enough before adding the fillets.
- Avoid overcrowding: Cook in batches if your pan isn’t large, to maintain even heat and ensure browning.
- Use a heavy pan: A cast-iron skillet is ideal for steady, even heat that promotes a perfect sear and helps keep the fish tender inside.
- Don’t overcook: Salmon continues to cook slightly off the heat.Remove when it’s just opaque in the center for moist results.
- Make ahead: The lemon-herb butter sauce can be prepared in advance and added at the end for extra flavor depth.
Serving Suggestions
Plate your Bright and Bold: Easy One-Pan Lemon Herb Salmon Feast alongside a bed of fluffy quinoa or roasted baby potatoes tossed in garlic and olive oil. Add seasonal steamed greens like asparagus or baby spinach to complement the freshness. Garnish with extra fresh herbs and edible lemon zest curls for a visually stunning presentation that invites guests to dive right in.

| Nutrient | Per Serving |
|---|---|
| calories | 350 |
| Protein | 34g |
| Carbohydrates | 3g |
| Fat | 22g |
For more inspiring seafood dishes that bring bold flavors to your table, check out our Zesty Citrus Grilled Salmon recipe. For nutritional insights on omega-3 fatty acids found in salmon, visit Healthline’s expert guide.
Creative Sides and Serving Ideas to Complement Your Bright and Bold Feast
Bright and Bold: Easy One-Pan Lemon Herb Salmon Feast invites vibrant freshness and effortless elegance straight to your dinner table. This wholesome, easy-to-make seafood dish bursts with zesty lemon and fragrant herbs, perfectly complemented by simple sides that elevate every bite. Whether you’re impressing guests or crafting a nutritious weeknight meal, the harmonious balance of flavors and textures will delight your palate and make your feast unforgettable.
Prep and Cook time
- preparation: 10 minutes
- Cooking: 20 minutes
- Total time: 30 minutes
yield
Serves 4 elegantly, with generous portions ideal for family dinners or casual entertaining.
Difficulty Level
Easy - perfect for home cooks ready to amaze without complicated steps or extensive prepping.
Ingredients
- 4 salmon fillets (6 oz each), skin on, fresh
- 2 tbsp extra virgin olive oil
- 1 large lemon, zested and juiced
- 3 cloves garlic, minced
- 1 tbsp fresh dill, chopped
- 1 tbsp fresh parsley, chopped
- Salt and freshly ground black pepper, to taste
- 1 cup cherry tomatoes, halved
- 1 medium zucchini, sliced into half-moons
- 1 cup baby potatoes, halved
- Optional garnish: lemon wheels and additional fresh herbs
Instructions
- Preheat your oven to 400°F (200°C). Pat the salmon dry with paper towels; this ensures a crisp skin.
- In a small bowl, combine olive oil, lemon zest, lemon juice, minced garlic, chopped dill, parsley, salt, and pepper.
- Arrange the baby potatoes in a single layer on a large sheet pan; drizzle with half the lemon herb mixture and toss to coat evenly.
- Roast potatoes for 10 minutes; then add cherry tomatoes and zucchini slices around the potatoes, tossing gently to combine.
- Place salmon fillets skin-side down onto the pan among the vegetables. Spoon remaining lemon herb sauce over each fillet evenly.
- Roast everything together for another 12-15 minutes, or until the salmon flakes easily with a fork and vegetables are tender but vibrant.
- Remove from oven and transfer everything carefully to serving plates. garnish with lemon wheels and a sprinkle of fresh herbs for a bright, inviting finish.
Tips for Success
- For perfectly crispy salmon skin, ensure the fillets are dry before adding oil and seasoning.
- If pressed for time, use pre-cooked baby potatoes or quick-cooking veggies like asparagus or green beans.
- Feel free to swap dill and parsley with fresh thyme or basil for a different herbaceous note.
- This dish is excellent for meal prep: store leftovers in airtight containers and reheat gently to preserve texture.
Pairing the salmon with thoughtfully crafted sides transforms the meal into a full sensory experience. consider a vibrant quinoa salad studded with cucumber,cherry tomatoes,and a splash of lemon vinaigrette-its nutty crunch and refreshing zing balance the luscious fish beautifully. Roasted asparagus drizzled with a touch of balsamic glaze adds earthiness and bite, while a creamy avocado and cucumber tzatziki offers a cooling contrast.
Those craving comfort will adore a simple garlic mashed cauliflower, whipped to velvety perfection and subtly infused with fresh herbs. Alternatively, a wild rice pilaf with toasted almonds and dried cranberries weaves texture and subtle sweetness into the ensemble.
For plating, allow the salmon to take center stage on a rustic wooden board or a bright white ceramic plate, nestling vegetables artistically on the side. Drizzle extra lemon herb sauce sparingly over and sprinkle freshly cracked black pepper and microgreens for an elevated, beautiful presentation that brings this bright and bold meal to life.
Don’t forget to serve this feast with fresh crusty bread or lemon-infused olive oil for dipping-perfect for soaking up every luscious drop.

| Nutrient | Per Serving |
|---|---|
| Calories | 420 kcal |
| Protein | 38 g |
| Carbohydrates | 15 g |
| Fat | 22 g |
For those looking to explore more dishes featuring fresh herbs and easy cooks, check out our Herbed Chicken with Roasted Greens.To learn more about selecting fresh, lasting seafood, visit NOAA FishWatch.
Q&A
Q&A: Bright and Bold – Easy One-Pan Lemon herb Salmon Feast
Q1: What makes this lemon herb salmon dish stand out from other salmon recipes?
A1: This recipe shines with its vibrant, zesty flavors and simplicity.The bright lemon and fresh herbs create a lively contrast to the rich, buttery salmon, all cooked effortlessly in one pan. It’s a feast for the eyes and the palate,perfect for a quick weeknight dinner or a weekend treat.
Q2: Why is cooking everything in one pan beneficial?
A2: One-pan cooking not only saves time on prep and cleanup but also allows the flavors to mingle beautifully. The salmon cooks alongside tender vegetables, absorbing the citrusy herb sauce for a harmonious and hearty meal with minimal effort.
Q3: Which herbs work best for this recipe?
A3: classic Mediterranean herbs like dill, parsley, and thyme are superheroes here. Their fresh, aromatic qualities elevate the lemon’s brightness and complement the salmon’s natural richness without overpowering it.
Q4: how do I ensure the salmon stays moist and flaky?
A4: To keep salmon moist, don’t overcook it! Cooking it skin-side down first and then finishing it skin-side up allows even heat distribution. The lemon juice and olive oil coat the fish, sealing in moisture and yielding tender, flaky fillets every time.
Q5: Can I add vegetables to the pan? If so,which ones?
A5: Absolutely! Think vibrant veggies that roast well alongside salmon-baby potatoes,asparagus,cherry tomatoes,or green beans. They soak up the herb-lemon essence and round out the dish with texture and nutrition.
Q6: Is this recipe suitable for meal prepping?
A6: Definitely. The one-pan setup means you can cook a bigger batch ahead and portion it out for lunches or dinners throughout the week. Just keep the salmon and veggies refrigerated and gently reheat to preserve freshness.
Q7: How can I customize the dish without losing its bright and bold character?
A7: Play with different citrus zest like orange or lime for a twist, or switch up herbs-cilantro or basil can bring a fresh spin. Adding a sprinkle of crushed red pepper flakes adds a subtle heat that livens up the plate.
Q8: What sides pair well with this lemon herb salmon feast?
A8: Keep it light and complementary-think fluffy quinoa, wild rice, or a crisp green salad with a simple vinaigrette.The idea is to let the salmon’s bright flavors take center stage while the sides provide balance.
Q9: Is this recipe kid-amiable?
A9: Yes! the flavors are fresh but not spicy, making it approachable for young palates. You can serve the lemon and herbs on the side if preferred, allowing kids to enjoy salmon in a mild, delicious way.
Q10: How long does the entire cooking process typically take?
A10: From prep to pan to plate,expect about 25-30 minutes.The beauty of this recipe is its fast pace-perfect for busy days when you want a gourmet-feeling meal without the fuss.
Closing Remarks
As the last bite of your bright and bold one-pan lemon herb salmon feast melts away, you’re left not just with a satisfied palate but with a newfound gratitude for effortless, vibrant cooking.This dish proves that simplicity and flavor can dance together beautifully on a single pan, turning any weeknight into a celebration of fresh herbs, zesty citrus, and tender, flaky fish. So next time you’re craving a meal that’s both nourishing and bursting with sunshine,remember: brilliance frequently enough begins with just one pan-and a sprinkle of lemony love.
]]>
Ingredients that Make Bright Bites Pop with Flavor
Bright bites come alive with a symphony of fresh, vibrant ingredients that dance on your palate in every forkful of this Black Bean and Corn salad.The marriage of juicy black beans, sweet corn kernels, and zesty citrus elements creates an irresistible flavor profile that is both refreshing and satisfying. This salad draws inspiration from southwestern and Mexican flavors, delivering a nutrient-packed, colorful dish perfect for warm days, potlucks, or as a side that steals the spotlight at any meal.
prep and Cook Time
Total Time: 20 minutes (Prep: 15 minutes | No cook required)
Yield
Serves 4-6 as a side dish or light main
Difficulty level
Easy – perfect for cooks of all skill levels
Ingredients List
- 1 can (15 oz) black beans, rinsed and drained
- 1 cup fresh or frozen corn kernels (if frozen, thawed)
- 1 small red bell pepper, diced
- 1/2 small red onion, finely chopped
- 1/2 cup cherry tomatoes, halved
- 1 large avocado, diced
- 1/4 cup fresh cilantro, chopped
- 1 fresh jalapeño, seeded and minced (optional)
- Juice of 1 lime (about 2 tablespoons)
- 2 tablespoons extra virgin olive oil
- 1 teaspoon ground cumin
- 1/2 teaspoon smoked paprika
- Salt and freshly cracked black pepper, to taste
- Optional garnish: crumbled cotija cheese or feta
Step-by-Step Instructions
- Prepare the base: Start by rinsing and draining the canned black beans thoroughly to remove excess sodium and enhance freshness. Place them in a large mixing bowl.
- Add the corn kernels: If using fresh corn, remove from the cob with a sharp knife. For frozen kernels, be sure they are fully thawed to avoid watering down the salad.
- Dice boldly: Chop the red bell pepper, red onion, and cherry tomatoes into bite-sized pieces-this creates contrast in both color and texture that makes each bite exciting.
- Incorporate creaminess: Gently fold in the diced avocado last to keep it firm and creamy, which provides a velvety counterpoint to the crisp vegetables.
- Mingle the herbs and heat: Toss in chopped cilantro and, if you enjoy a subtle kick, add the minced jalapeño carefully to taste.
- Whisk the dressing: In a small bowl, combine lime juice, olive oil, ground cumin, smoked paprika, salt, and pepper. Whisk untill emulsified and aromatic.
- Bring it all together: Pour the dressing over the salad and gently toss everything to coat evenly without mashing the ingredients. Taste and adjust seasoning if necessary.
- Chill or serve instantly: for best flavor, let the salad rest in the fridge for 10-15 minutes to allow the flavors to marry, or serve right away for a crisp and fresh bite.
Tips for Success
- Bean Variety Swap: For a twist, try adding a mix of pinto beans or chickpeas for texture variety and added protein.
- Make-Ahead Magic: Prepare the salad minus the avocado up to 2 days in advance. Add avocado just before serving to prevent browning.
- Balancing Acidity: If the lime juice feels too sharp, add a teaspoon of honey or agave syrup to the dressing to mellow flavors.
- Keep it Colorful: Swap red bell pepper for orange or yellow for even more vibrancy and added sweetness.
- Avoid sogginess: thoroughly drain canned beans and thaw frozen corn to keep your salad crisp and fresh.
Serving Suggestions
This Black Bean and Corn Salad shines as a side dish to grilled meats, a vibrant topping for tacos or tostadas, or as a hearty filling for lettuce wraps. Garnish with crumbled cotija or feta cheese and sprinkle extra fresh cilantro leaves for visual appeal and added zest. Pair with a refreshing chilled margarita or sparkling water infused with lime to complete the experiance.

| Nutrient | Per serving (½ cup) |
|---|---|
| Calories | 180 |
| Protein | 7g |
| Carbohydrates | 28g |
| Fat | 6g |
For more creative uses of black beans and vibrant salads, check out our Southwestern Black Bean Recipes for inspiration.To learn about the health benefits of black beans, visit the Harvard T.H. Chan School of public Health.
Mastering the Perfect Black Bean and Corn Salad Texture
Black Bean and Corn Salad Texture is the secret behind transforming this humble dish into a vibrant, crave-worthy experience. Achieving the perfect bite means balancing the creamy,tender black beans with the crisp,juicy sweetness of corn while layering in fresh herbs and zesty acidity for brightness. This dish not only delights the palate but also offers a delightful play of textures, so mastering these contrasts will elevate your salad from everyday side to a centerpiece of any meal.
Prep and Cook Time
- Preparation: 15 minutes
- Cooking: 5 minutes (optional for fresh corn)
- total Time: 20 minutes
Yield
Serves 4 as a side or 2-3 as a vibrant light meal.
Difficulty level
Easy – perfect for beginners and busy cooks who crave freshness and flavor.
Ingredients
- 1 can (15 oz) black beans, rinsed and drained
- 1 cup fresh or frozen corn kernels (if fresh, sauté or grill for extra flavor)
- 1 medium red bell pepper, finely diced
- 1/2 cup red onion, finely chopped
- 1/4 cup fresh cilantro, roughly chopped
- 1 jalapeño, seeded and minced (optional, for heat)
- Juice of 2 limes (about 3 tablespoons)
- 2 tablespoons olive oil
- 1 teaspoon ground cumin
- Salt and freshly ground black pepper, to taste
- optional: 1 avocado, diced for creaminess
Instructions
- Prepare the corn: If using fresh corn, remove kernels from the cob. Sauté in a dry skillet over medium heat for 3-5 minutes until lightly golden and slightly charred. This enhances sweetness and adds texture contrast. Allow to cool.
- Mix the base: In a large bowl, combine the rinsed black beans, corn kernels, diced red bell pepper, red onion, and jalapeño if using.
- Add herbs and seasoning: Stir in the fresh cilantro, ground cumin, lime juice, and olive oil. Season with salt and black pepper to your taste.
- Gently fold: Combine ingredients carefully, especially if adding avocado-this keeps the texture intact without turning the salad mushy.
- Rest and marinate: Let the salad sit for 10-15 minutes at room temperature or chill for 30 minutes to meld flavors while maintaining a refreshing crunch.
- Final texture check: Before serving, taste and adjust seasoning. If the salad feels too dry, a splash more lime juice or olive oil can brighten and loosen the mixture.
Tips for Success:
- Choose quality canned beans: Rinse thoroughly to reduce sodium and excess starch.This prevents gummy textures and keeps beans firm.
- Fresh corn vs. canned: Fresh or frozen corn that’s briefly seared adds a pop of sweetness and texture. Avoid canned corn; it tends to be softer and can weigh down the salad.
- Dicing matters: Uniform, small dice on bell peppers and onion ensures every forkful has a harmonious crunch without overpowering other ingredients.
- Balance acidity and fat: Lime juice brightens the dish while olive oil adds silkiness-too much acid can soften beans prematurely, so add dressing shortly before serving.
- Avoid overmixing: Fold ingredients gently to keep black beans intact and prevent them from splitting, preserving that ideal bite.
- Add avocado last: Avocado brings creamy texture that contrasts beautifully with crisp vegetables but tends to brown quickly, so add it just before serving.
- Make ahead tip: Prepare without avocado and refrigerate for up to 24 hours. Stir in fresh avocado and adjust lime before serving.
Serving Suggestions
This salad shines served chilled or slightly warmed. Try it as a fresh side for grilled chicken or fish, or spoon over crispy tortilla chips for a vibrant appetizer. Garnish with additional cilantro sprigs, a sprinkle of smoked paprika, or crumbled queso fresco for a colorful finish. For a heartier plate,toss with cooked quinoa or pair alongside avocado slices for creaminess and substance.

| Nutrient | Per Serving |
|---|---|
| Calories | 210 kcal |
| Protein | 8 g |
| Carbohydrates | 35 g |
| Fat | 5 g |
For more inspiration on fresh and flavorful salads, check out our guide on Bright Bites: Quinoa Salad Variations. To explore the rich heritage of black beans and corn in culinary history,visit National Geographic’s culinary culture insights.
Creative Twists to Elevate Your Salad Game
Bright Bites: The Ultimate Black Bean and Corn Salad Guide introduces a refreshing, vibrant dish bursting with bold flavors and textures. Originating from the lively cuisines of southwestern America and Mexican border states, this salad combines the hearty earthiness of black beans with the sweet crunch of fresh corn, creating a harmony that’s both satisfying and nutritious. Whether enjoyed as a side or a standalone meal, this recipe invites creativity and personalization, making it an essential for elevating your salad game.
Prep and Cook Time
Preparation: 15 minutes
Cook Time: 10 minutes (for roasting corn, optional)
Total Time: 25 minutes
Yield
serves 4 generously as a side dish or 2-3 as a light main course.
Difficulty Level
Easy
ingredients
- 1 ½ cups cooked black beans, drained and rinsed
- 1 ½ cups fresh or frozen corn kernels (if fresh, grill or roast for enhanced flavor)
- 1 medium red bell pepper, finely diced
- 1 small red onion, finely chopped
- 1 jalapeño, seeded and minced (optional for a spicy kick)
- 1 cup cherry tomatoes, halved
- ½ cup fresh cilantro, roughly chopped
- Juice of 2 limes
- 3 tablespoons extra virgin olive oil
- 1 teaspoon ground cumin
- 1 teaspoon smoked paprika
- Salt and freshly ground black pepper, to taste
- Optional: ¼ cup crumbled feta cheese or diced avocado for creaminess
Instructions
- Prepare the corn: If using fresh corn, grill or roast the kernels on medium-high heat until slightly charred, about 5-7 minutes, stirring occasionally for even caramelization. This adds a smoky depth that complements the black beans beautifully.
- Combine the base ingredients: In a large bowl,mix the black beans,corn,diced red bell pepper,onion,jalapeño (if using),and cherry tomatoes. toss gently to distribute evenly without crushing delicate components.
- Mix the dressing: In a small bowl, whisk together lime juice, olive oil, ground cumin, smoked paprika, salt, and pepper until emulsified. The bright acidity from the lime will brighten every bite.
- Dress the salad: Pour the dressing over the salad mixture and toss gently but thoroughly.Taste and adjust seasonings as necessary-adding more lime or salt will enhance the overall flavor.
- Garnish and finish: Fold in the fresh cilantro and, if desired, top with crumbled feta or diced avocado for extra creaminess and a touch of indulgence.
- Chill and serve: Let the salad rest in the refrigerator for at least 15 minutes before serving to allow flavors to meld. This also makes it perfect for a make-ahead picnic or potluck dish.
Tips for Success
- For maximum flavor, roast your corn: Charred corn kernels add a delightful smoky element that contrasts the salad’s brightness.
- substitute quinoa or couscous: For a heartier salad, add ½ cup of cooked quinoa or couscous to increase protein and texture diversity.
- Balancing heat: Adjust jalapeño quantity or omit completely for a milder salad. Alternatively,a pinch of cayenne can amplify the spicy notes subtly.
- Make it vegan: Skip the feta and use creamy avocado or a drizzle of cashew cream to keep the texture satisfying and dairy-free.
- Storage tip: Store leftovers in an airtight container for up to 3 days. Add avocado fresh on serving to avoid browning.
Serving Suggestions
Serve this colorful black bean and corn salad in vibrant bowls to enhance its visual appeal. Garnish with extra cilantro sprigs and a wedge of lime for that fresh pop. Pair it alongside grilled chicken or fish for a complete meal, or use it as a bright topping for tacos and toasted flatbreads. For parties, offer alongside tortilla chips for a quick, crunchy complement. This salad also shines as a nutritious, energizing lunch when packed in mason jars layered with leafy greens.
| Nutrient | Per Serving |
|---|---|
| Calories | 280 kcal |
| Protein | 11 g |
| Carbohydrates | 35 g |
| Fat | 8 g |
For an extended dive into wholesome, vibrant recipes, check out our Healthy Salads for Every Season guide. To learn more about black beans’ nutritional benefits, visit the Healthline black beans overview.
Serving Suggestions and Storage Tips for Maximum Freshness
Pair this salad with grilled chicken, fish tacos, or use it as a zesty filling for crisp lettuce wraps to transform it into a versatile meal. It also shines beautifully as a taco bar side or even dolloped atop a warm baked sweet potato for a nourishing dinner. The vibrant colors and fresh flavors make this dish perfect for picnics, potlucks, or healthy lunchboxes, inviting everyone to savor the wholesome goodness of each bite.
To keep your salad tasting fresh and vibrant, store it in an airtight container in the refrigerator.Because the ingredients are fresh and delicate, aim to consume within 2-3 days for optimal flavor and texture.Before serving leftovers, give the salad a gentle stir and re-taste to adjust the seasoning-sometimes a quick squeeze of lime or a dash more salt can revive it beautifully.
If prepping in advance, consider storing the dressing separately to prevent the salad from becoming soggy. Adding fresh herbs and avocado just before serving will maintain their bright colors and textures, ensuring every bite bursts with brightness.

Q&A
Q&A: Bright Bites – The Ultimate Black Bean and corn Salad Guide
Q1: What makes black bean and corn salad a must-have in any kitchen?
A1: Black bean and corn salad is a vibrant celebration of color, texture, and flavor. It’s a nutritional powerhouse that combines protein-packed black beans with naturally sweet corn, fresh veggies, and zesty herbs. easy to prepare and endlessly versatile, it’s the perfect side dish, light lunch, or crowd-pleasing potluck star.
Q2: How can I ensure my black bean and corn salad is bursting with freshness?
A2: Freshness is all about quality ingredients and a few thoughtful touches.Use freshly picked or frozen (not canned) corn for that sweet, crisp pop. Rinse canned black beans thoroughly to remove excess sodium and earthy tininess. Add chopped cilantro, lime juice, and finely diced red onion to elevate the brightness. Chilling the salad for at least 30 minutes before serving allows the flavors to meld beautifully.
Q3: What are some creative twists to elevate this classic salad?
A3: Bright Bites loves to mix things up! Try adding diced avocado for creamy richness, a sprinkle of cotija or feta cheese for a salty punch, or roasted poblano peppers for smoky depth. For a spicy kick, toss in jalapeños or a dash of chipotle powder. You can even experiment with herbs beyond cilantro, such as fresh mint or parsley, to create unexpected flavor profiles.
Q4: Can this salad be made ahead of time, or is it best served fresh?
A4: Black bean and corn salad is a stellar make-ahead dish. Actually, it frequently enough tastes better the next day as the flavors have time to meld. Just keep any creamy or delicate ingredients, like avocado, separate until serving to prevent browning. Store the salad in an airtight container in the fridge for up to 3 days.
Q5: How can I turn my black bean and corn salad into a complete meal?
A5: With a few simple additions, this salad can shine as a satisfying entrée.Add grilled chicken,shrimp,or quinoa for extra protein. Serve it over a bed of mixed greens or alongside warm tortillas for a taco-inspired feast.For a vegan option, sprinkle with toasted pumpkin seeds and drizzle with a cilantro-lime vinaigrette to add crunch and flavor.Q6: What nutritional benefits does black bean and corn salad offer?
A6: This salad is a nutrition superstar. Black beans provide fiber, plant-based protein, and iron, which support digestion and energy. Corn contributes antioxidants and B vitamins, while fresh veggies supply essential vitamins and minerals. Combined, they make a balanced dish that’s as nourishing as it is indeed appetizing.
Q7: Any tips for the perfect dressing to complement the salad?
A7: Keep it light and zesty! A simple dressing of fresh lime juice, olive oil, a touch of honey or agave, minced garlic, cumin, salt, and pepper marries all ingredients with a lively tang. Avoid heavy, creamy dressings to let the natural flavors shine, unless you’re going for a creamy twist-then a dollop of Greek yogurt or mayo mixed with lime can work wonders.-
With these insights from “Bright Bites,” your black bean and corn salad will no longer be just a side – it’ll be the star of every table!
To Conclude
As you tuck into your vibrant bowl of Bright Bites, remember that this black bean and corn salad is more than just a medley of ingredients-it’s a celebration of color, texture, and nutrition all in one.Whether you’re seeking a refreshing side dish,a protein-packed meal,or a canvas for your culinary creativity,this guide equips you with everything you need to make every bite bright and satisfying.So go ahead, embrace the crisp sweetness of corn, the hearty richness of black beans, and the zing of fresh herbs-because with Bright Bites, delicious health is always on the menu.
]]>
Bright Ingredients That Define Esquites Flavor
Bright Flavors Unveiled: the Magic of Mexican Esquites Salad comes alive through a dazzling medley of fresh, zesty, and earthy ingredients that define its irresistible character. This vibrant Mexican street food captures the essence of roasted corn, toasted spices, and tangy cream-each bite a celebration of texture and colour that instantly transports you to bustling mercados and sunlit plazas. Whether you crave the crunch of chili powder against the sweetness of corn kernels or the cooling caress of lime and mayo, these bright components are the heart and soul of the dish.
Prep and Cook time
Prep: 10 minutes | Cook: 15 minutes | Total: 25 minutes
Yield
Serves: 4 generous portions
Difficulty Level
Easy
Ingredients
- 4 cups fresh corn kernels (about 5 ears of corn)
- 2 tablespoons unsalted butter
- 1/4 cup mayonnaise (Mexican crema as alternative)
- 1/4 cup crumbled Cotija cheese
- 1 teaspoon smoked paprika
- 1 teaspoon chili powder (adjust to taste)
- 1/2 teaspoon ground cumin
- Juice of 1 large lime (about 2 tablespoons)
- 2 tablespoons chopped fresh cilantro
- 1 small jalapeño, finely diced (optional, for heat)
- Salt and freshly ground black pepper to taste
Instructions
- Roast the Corn: Heat a large skillet over medium-high heat and add the butter. Once melted and sizzling, add the fresh corn kernels. Sauté until golden brown and slightly charred, about 8-10 minutes, stirring occasionally to prevent sticking.
- Season the Kernels: Sprinkle in the smoked paprika, chili powder, and cumin. Toss to evenly coat the corn and toast the spices for 1-2 minutes until fragrant.
- Blend the Creamy Dressing: in a separate bowl, mix mayonnaise, lime juice, salt, and pepper until smooth. This cooling component balances the smoky heat.
- Combine Ingredients: Transfer the warm corn into a serving bowl. Add the creamy dressing, chopped cilantro, and jalapeño if using. Toss gently to coat every kernel with flavor.
- Finish with Cheese: Sprinkle Cotija cheese over the top just before serving. The salty, crumbly texture adds an irresistible punch.
- adjust and Garnish: Taste and adjust seasoning with extra lime,salt,or chili powder as desired.Garnish with a lime wedge and a sprig of cilantro for a fresh visual pop.
Tips for Success
- For an authentic smoky depth, char the corn over an open flame or grill before cutting the kernels.
- Substitute mayonnaise with Mexican crema for a lighter, tangier dressing.
- To reduce heat, omit jalapeño and swap chili powder for smoked sweet paprika only.
- Make ahead: Toast the corn and prepare the dressing up to 4 hours prior. Combine just before serving to keep textures vibrant.
- If Cotija cheese is unavailable, feta cheese makes a suitable alternative, even though it will soften quicker.
- Use fresh lime juice-bottled lime juice lacks the bright zing that defines esquites.
Serving Suggestions
This esquites salad shines as a lively appetizer or a colorful side dish to grilled meats and seafood. Serve in small bowls or rustic mugs for a street-food vibe. Sprinkle extra Cotija cheese,a dusting of chili powder,and lime wedges on the side to let guests customize their bowls. For an extra flair, offer crunchy tortilla chips or tostadas to scoop up every last kernel. the vibrant yellow corn contrasted with the creamy white cheese and green cilantro creates a visual feast that’s as joyful as the flavors.

| Nutrient | Per Serving |
|---|---|
| Calories | 210 kcal |
| Protein | 5 g |
| Carbohydrates | 18 g |
| Fat | 14 g |
For a deeper dive into traditional Mexican street foods and their vibrant components, check out our Mexican street Food Guide. Interested in learning more about authentic Mexican cheeses like Cotija? Visit Cheese Month Club’s article on cotija Cheese for expert insights.
The Art of Balancing Creamy,Tangy,and Spicy Elements
Bright Flavors Unveiled: The Magic of Mexican Esquites Salad begins with a harmonious dance between creamy,tangy,and spicy notes that celebrate the heart of mexican street food. This vibrant salad brings together roasted corn kernels with zesty lime juice and a kick of chili powder, creating a flavor profile that is as exciting as it is comforting.Inspired by my first taste from a street vendor in Mexico City, this recipe captures the essence of esquites-simple ingredients elevated to unforgettable heights through balance and texture.
Prep and Cook Time
Preparation: 10 minutes
Cooking: 12 minutes
Total Time: 22 minutes
Yield
Serves 4 as a side dish or light snack
Difficulty Level
Easy – Perfect for both kitchen novices and seasoned cooks
Ingredients
- 4 cups fresh corn kernels (about 4 ears),roasted or grilled
- 1/4 cup mayonnaise (use Mexican crema for a richer flavor)
- 1/4 cup crumbled queso fresco or cotija cheese
- 2 tablespoons freshly squeezed lime juice
- 1 teaspoon chili powder (adjust to taste)
- 1 tablespoon unsalted butter
- 1 small jalapeño,finely diced (optional for extra heat)
- 1/4 cup chopped fresh cilantro
- 1/2 teaspoon smoked paprika
- Salt and freshly ground black pepper,to taste
- extra lime wedges for serving
Instructions
- Warm a large skillet over medium heat and add unsalted butter. Once melted, add the fresh corn kernels and sauté until golden and slightly charred, about 7-8 minutes, stirring occasionally for even roasting.
- Reduce heat to low, then stir in the mayonnaise, lime juice, chili powder, and smoked paprika. Mix well until the corn is thoroughly coated, releasing that signature creamy tang.
- Add finely diced jalapeño if you desire an extra layer of spice, and cook for another 2 minutes, allowing the flavors to meld beautifully.
- Remove from heat, then gently fold in the crumbled queso fresco and chopped fresh cilantro. Season with salt and pepper to your preference. These ingredients lend a delicate saltiness and fresh herbal lift.
- Transfer the esquites salad to a serving bowl and garnish with extra queso fresco, a sprinkle of chili powder, and lime wedges on the side for that final, bright acid punch.
Tips for Success
- For a smoky depth, roast your corn over an open flame or grill prior to sautéing.
- Swap mayonnaise for Mexican crema to keep the creaminess authentic and subtly tangy.
- Adjust chili powder and jalapeño quantity according to heat preference; start mild and build up.
- Make ahead by roasting corn and preparing the mixture separately; combine just before serving to maintain texture.
- If queso fresco isn’t available, crumbly feta or ricotta salata make great substitutes with similar texture.
Serving Suggestions
This esquites salad shines as a vibrant side for grilled meats, tacos, or alongside a fresh avocado salad. Serve in small colorful bowls or mason jars to emphasize its street food roots. Garnish generously with cilantro sprigs and a wedge of lime for that quintessential pop of brightness. For an appetizer twist, spoon it onto warm tostadas or crispy tortilla chips for a playful crunch contrast.
| Nutrient | Per Serving |
|---|---|
| Calories | 180 kcal |
| Protein | 5 g |
| Carbohydrates | 20 g |
| Fat | 9 g |

For more exciting ideas on Mexican street food, check out our Mexican Street Food Classics collection.To deepen your understanding of chili powders and their heat scale, visit this comprehensive guide from PepperScale.
Tips for Choosing the perfect Corn and Fresh Additions
When crafting the vibrant layers of this Mexican esquites salad, selecting fresh, high-quality ingredients is essential to elevate every bite. The secret to unlocking those bright flavors unveiled lies in starting with the freshest corn-preferably sweet, young ears, freshly shucked and plump, bursting with juicy kernels. Opt for corn with tightly closed husks and moist silk threads; these are signs of peak freshness and tender taste that will beautifully complement the tangy and smoky elements of the salad.
Beyond the corn, the fresh additions you choose bring vibrancy and balance.Crisp cilantro with its herbaceous brightness, creamy cotija cheese for a salty punch, and a squeeze of fresh lime juice personalize the salad with authentic Mexican flair. When selecting chili peppers or jalapeños, look for firm, glossy skins free of blemishes-these will add a clean, fresh heat without bitterness.
Don’t overlook the value of a good-quality mayonnaise or Mexican crema if you prefer a luscious, smooth texture that binds the flavors seamlessly. For an exciting twist, fresh additions such as diced red onion, roasted poblano strips, or even tangy pickled jalapeños can be introduced, offering depth and complexity to the dish.
when buying fresh lime, heavier limes with a bright green exterior promise juiciness and aromatic zest.Lastly, balance moisture and texture by patting dry fresh ingredients to prevent the salad from becoming overly watery, maintaining that perfect crispness and creaminess contrast.

Keep these tips in mind and your esquites salad will burst with an authentic freshness that sings with every spoonful-transforming simple ingredients into a sensational culinary experiance.
Creative Twists to Elevate your Mexican Esquites Salad Experience
Bright Flavors Unveiled: The Magic of Mexican Esquites Salad awakens every sense with its vibrant fusion of charred corn, tangy lime, and smoky spices. Originating from street vendors in Mexico City, esquites bring the perfect blend of smoky sweetness and creamy zest that transforms simple corn into a fiesta of taste. My first taste of esquites during a bustling market visit left me hooked on this lively salad, inspiring countless variations that invite you to explore and savor.
prep and Cook Time
Preparation: 10 minutes | Cooking: 10 minutes | Total: 20 minutes
yield
Serves 4 as a side dish
Difficulty Level
Easy
Ingredients
- 4 cups fresh corn kernels (about 5 ears), grilled or roasted
- 3 tbsp mayonnaise
- 2 tbsp Mexican crema or sour cream
- 1 tbsp freshly squeezed lime juice
- 1 tsp chili powder (adjust to taste)
- 1/2 cup crumbled queso fresco or Cotija cheese
- 2 tbsp finely chopped fresh cilantro
- 1 small jalapeño, seeded and finely chopped (optional)
- Salt and freshly ground black pepper to taste
- 1 tbsp melted butter
- Extra lime wedges for serving
Instructions
- Prepare the corn: Grill or roast fresh corn ears over medium-high heat until kernels have slight char marks, about 8 minutes, turning occasionally. let cool, then carefully cut kernels off the cob into a large bowl.
- Sauté the corn: Heat melted butter in a skillet over medium heat. Add the grilled corn kernels and sauté until they begin to caramelize, about 5 minutes, stirring occasionally for an even toast.
- Mix the dressing: In a separate bowl, combine mayonnaise, Mexican crema, lime juice, chili powder, salt, and pepper. Whisk until smooth and creamy.
- Combine and season: Pour the dressing over the warm corn and toss gently to coat each kernel. Adjust seasoning by tasting; add more chili powder or lime juice to balance flavors.
- Add fresh elements: Stir in crumbled queso fresco, chopped cilantro, and jalapeño if using. These fresh and spicy bursts enhance the salad’s complexity.
- Chill or serve warm: For the best intensity, let the salad rest for 10 minutes to meld flavors or serve immediately with lime wedges on the side.
Tips for Success: Unlocking the Best of Bright Flavors Unveiled: The Magic of Mexican Esquites Salad
- Freshness is key: Use fresh corn when in season. If out of season, high-quality frozen corn can be a fine substitute-just thaw and dry thoroughly before grilling.
- Roasting adds depth: Don’t skip charring the corn; it imparts that smoky, toasted note essential to authentic esquites.
- Dairy swaps: for a lighter option,replace mayonnaise with Greek yogurt and use low-fat crema or sour cream.
- Spice it up: Experiment by adding smoked paprika or a dash of cayenne for different smoky heat profiles.
- Make-ahead: Prepare the salad up to 4 hours in advance, but keep garnishes like cilantro and cheese separate until serving to maintain their texture.
Serving Suggestions
Serve this vibrant salad in rustic bowls, garnished with an extra sprinkle of queso fresco and a few fresh cilantro leaves. A wedge of lime on the side invites an extra zing of brightness. For an authentic touch,accompany with warm corn tortillas or crunchy tortilla chips to scoop up every flavorful bite. Pairing with grilled meats or fresh seafood elevates your meal to a festive Mexican celebration.
| Nutrient | Per Serving |
|---|---|
| Calories | 210 kcal |
| Protein | 6 g |
| Carbohydrates | 20 g |
| Fat | 12 g |
Discover more Mexican-inspired salads to complement your esquites by visiting our Mexican Salad Recipes page. For detailed data on the nutritional benefits of corn, check out this comprehensive guide at The Nutrition Source.
Q&A
Q&A: Bright Flavors Unveiled – The Magic of Mexican Esquites Salad
Q1: What exactly is Esquites, and why is it called the “Mexican Esquites Salad”?
Esquites is a vibrant Mexican street food classic-think of it as a warm, savory corn salad bursting with bold, bright flavors. Traditionally, it’s made from toasted or boiled corn kernels mixed with ingredients like mayonnaise, lime juice, chili powder, cheese, and fresh herbs. The term “salad” here captures its fresh, tossed nature, although it defies the typical leafy greens expectation with its star ingredient: sweet, golden corn.
Q2: What makes Esquites so magical in terms of flavor?
The magic of Esquites lies in its perfect harmony of contrasting tastes and textures. The sweetness of corn meets tangy lime juice, the creaminess of mayonnaise or Mexican crema balances the smoky heat of chili powder, and a sprinkle of crumbly cotija cheese adds a salty finish. each bite is a symphony of bright, savory, spicy, and creamy notes that dance on your palate. It’s comfort food elevated to an artful celebration of Mexican culinary heritage.
Q3: How is esquites typically prepared, and are there regional variations?
Traditionally, fresh corn kernels are sautéed or boiled, then tossed with ingredients like mayonnaise or crema, fresh lime juice, chili powder or hot sauce, chopped cilantro, and cotija cheese.Regional twists abound: some versions add diced jalapeño for extra heat, others stir in epazote (a Mexican herb) for an earthy aroma, or sprinkle with crunchy toasted pumpkin seeds. It’s a versatile dish that adapts to seasonal ingredients and personal preferences, making every bowl uniquely delightful.Q4: Can I make Esquites at home, and what tips should I keep in mind?
Absolutely! Fresh corn is key-if you can’t find fresh ears, frozen kernels work well too. Toast the corn lightly in a hot pan to coax out a smoky, caramelized flavor. Be generous with the lime and chili powder but balance them carefully to suit your spice tolerance. don’t forget a good sprinkle of cotija or a similar crumbly cheese to finish. And remember: Esquites tastes best warm, so serve immediately for that magical, melt-in-your-mouth experience.Q5: Why is Esquites considered a cultural treasure in Mexican cuisine?
Esquites represents more than just a delicious dish; it’s a celebration of mexico’s rich agricultural roots and street food culture. Corn,or “maíz,” is a sacred staple in Mexican history,and Esquites transforms this humble grain into a contemporary,crowd-pleasing snack. It’s also a social food-sold by street vendors, shared among friends, and enjoyed year-round. This simple salad embodies the vibrant spirit, bold flavors, and communal joy that define mexican gastronomy.
Q6: How can Esquites inspire culinary creativity beyond traditional recipes?
Esquites invites experimentation-swap mayo for avocado crema for a luscious twist, add roasted poblano peppers for smoky depth, or toss in fresh mango for a tropical burst. It’s a perfect canvas for chefs and home cooks alike to explore fusion flavors or elevate dinner parties.The magic is in its balance and versatility: by honoring its core ingredients while playing with new textures and tastes, Esquites becomes a culinary adventure that never grows old.
Discovering Esquites is like unlocking a treasure chest of Mexican flavor-each spoonful brimming with sunshine, spice, and soul. Bright, bold, and endlessly delicious, this salad truly unveils the magic of Mexico’s culinary heart.
In Conclusion
As the final kernels of this vibrant Mexican esquites salad linger on your palate, it’s clear that this humble street food is much more than just a snack-it’s a celebration of bright flavors, textures, and cultural heritage. From the smoky char of roasted corn to the zesty kick of lime and chili, esquites transform simple ingredients into a magical medley that awakens the senses and tells a story with every bite. Whether you’re a seasoned foodie or a curious newcomer, embracing the magic of esquites invites you to savor a burst of Mexican tradition that’s as colorful as it is delicious. So next time you crave a taste adventure, remember: sometimes, the brightest flavors come from the simplest of preparations, waiting to be unveiled in a bowl of esquites.
]]>