In the bustling rhythm of modern life, finding meals that are both satisfying and simple to prepare can feel like a culinary treasure hunt. enter the power-packed chicken katsu curry-a vibrant fusion of crispy, golden chicken paired with rich, aromatic curry sauce that not only delights the taste buds but also transforms meal prep from a chore into a breeze. Whether you’re fueling a busy week ahead or craving comfort without the hassle, this recipe brings together bold flavors and practical convenience, proving that delicious, wholesome food can be effortless and exciting all at once. let’s dive into how you can master this meal prep marvel and elevate your dinner routine with a dish that’s as powerful as it is pleasing.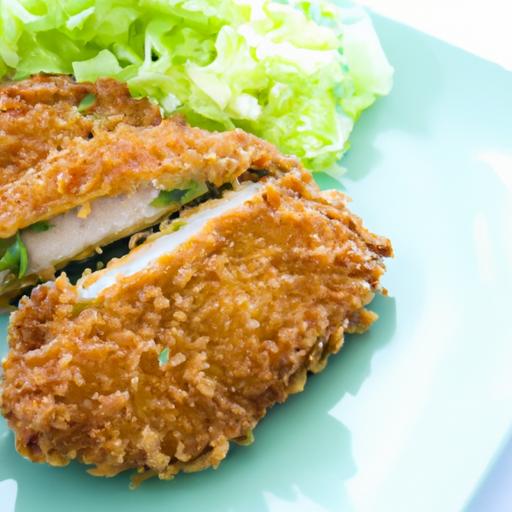
Crafting the Perfect Crispy Chicken Katsu for Meal Prep
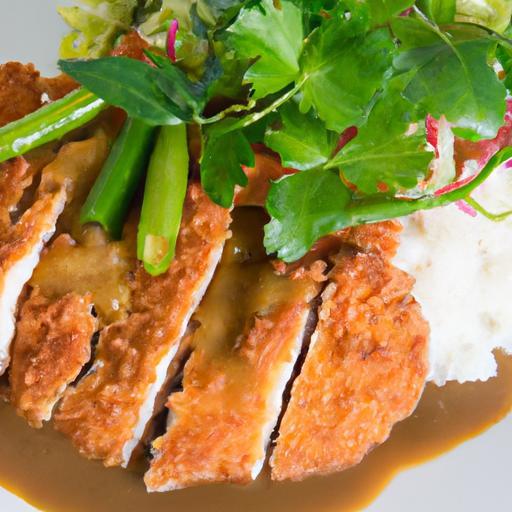
Power-Packed Chicken Katsu Curry invites you to create a meal that’s as exhilarating to make as it is indeed comforting to eat. This classic Japanese-inspired dish blends the perfect crispy, golden fried chicken katsu with a rich, flavorful curry sauce-ideal for anyone craving a hearty yet approachable meal prep option. Originating from Japanese yoshoku cuisine,chicken katsu curry balances textures and bold tastes,making it a global favorite. Whether it’s your first time or your fiftieth, this recipe will guide you through crafting irresistibly crunchy chicken strips fit for busy weekdays or weekend feasts.
Prep and Cook Time
- Preparation: 20 minutes
- Cooking: 25 minutes
- Total: 45 minutes
Yield
serves 4 generous portions, perfect for meal prep lunches or dinners.
Difficulty Level
Medium-requires some frying skills but fully approachable with clear guidance.
Ingredients
- For the chicken Katsu:
- 4 boneless, skinless chicken breasts (about 6 oz each), pounded to ½ inch thickness
- 1 cup all-purpose flour, sifted
- 2 large eggs, beaten
- 1 ½ cups panko breadcrumbs
- 1 tsp kosher salt
- ½ tsp freshly ground black pepper
- Vegetable oil for frying (about 2 cups)
- For the Curry Sauce:
- 2 tbsp vegetable oil
- 1 medium onion, finely chopped
- 2 cloves garlic, minced
- 1 medium carrot, grated
- 2 tbsp Japanese curry powder or roux
- 2 tbsp all-purpose flour
- 3 cups chicken broth
- 1 tbsp soy sauce
- 1 tsp honey or maple syrup
- Salt and pepper to taste
- To Serve:
- Steamed Japanese short-grain rice (about 4 cups)
- Thinly sliced green onions or fresh parsley (optional garnish)
Instructions
- Prepare the Chicken: Season the chicken breasts evenly with salt and pepper. Set three shallow dishes: one with flour,one with beaten eggs,and one with panko breadcrumbs.
- Coat the Chicken: Dredge each chicken breast first in flour, shaking off excess. Next, dip in the beaten eggs, and finally press firmly into panko breadcrumbs, ensuring a full, even coating.
- Heat the oil: Pour vegetable oil into a large skillet to a depth of ½ inch. Heat over medium heat until a breadcrumb dropped in sizzles instantly (about 350°F or 175°C).
- Fry the Chicken: Carefully place the coated chicken breasts in the hot oil. Fry for about 3-4 minutes per side or until the crust is golden brown and crisp. Use tongs to turn gently. Avoid overcrowding the pan-fry in batches if necessary.
- Drain and Rest: Transfer cooked katsu to a wire rack or paper towel-lined plate to drain excess oil. Let rest 5 minutes before slicing into fingers or strips.
- Make the Curry Sauce: In a separate saucepan, heat 2 tbsp of vegetable oil over medium heat. Sauté the onions until soft and translucent, about 5 minutes. Add garlic and grated carrot; cook for another 2 minutes, stirring.
- Add Curry Roux: Sprinkle in curry powder and flour; stir constantly for 1-2 minutes to form a roux and avoid lumps.
- Simmer the Sauce: Gradually whisk in chicken broth, bringing the mixture to a gentle boil. Reduce heat and simmer for 10-15 minutes until thickened, stirring frequently.
- Finish the Curry: stir in soy sauce and honey.season with salt and pepper to taste.Remove from heat once the sauce reaches a luscious, velvety consistency.
- Assemble and serve: Spoon steamed rice onto plates or meal prep containers. lay sliced chicken katsu on top or beside the rice. generously ladle curry sauce over the dish. Garnish with sliced green onions or parsley for a fresh pop of color and flavor.
Tips for Success: Perfect Crispy Chicken Katsu Every Time
- Pound Evenly: Use a meat mallet or rolling pin to pound chicken breasts uniformly-this ensures speedy, even cooking.
- Panko Mastery: Press the chicken firmly into panko to create a thick,crunchy crust. For added flavor, try toasting the panko lightly before coating.
- Oil Temperature Is key: Keep your frying oil steady around 350°F. If it’s too cool, the katsu absorbs oil and becomes soggy. Too hot, and it burns before the inside cooks through.
- Make Ahead: Prepare chicken and curry sauce separately, then store chilled. Reheat in the oven or on a skillet to maintain crispiness-avoid microwaving the katsu directly.
- Vegan Variation: Swap chicken for thick slices of firm tofu or eggplant, following the same breading and frying technique.
Serving Suggestions
For a visually stunning plating, slice chicken katsu into neat strips and fan out over a mound of fluffy steamed rice. Pour warm curry sauce generously but carefully around the edges, so the katsu stays crisp.Garnish with thinly sliced green onions or a sprinkle of toasted sesame seeds.Pair with a crunchy Asian slaw or pickled ginger on the side for an exciting contrast that wakes the palate with every bite.
| Nutrient | Per Serving |
|---|---|
| Calories | 520 kcal |
| Protein | 38 g |
| carbohydrates | 45 g |
| Fat | 18 g |

Looking for more flavorful meal prep ideas? Dive into our Easy Japanese Meal Prep Recipes to keep your lunches exciting. For further depth on authentic japanese curry techniques, check out this informative guide from Serious Eats.
Mastering the Rich and Flavorful curry Sauce from Scratch
Power-Packed Chicken Katsu Curry begins with -it’s the soul of the dish that elevates this Japanese classic to a hearty, comforting meal perfect for meal prep. This sauce boasts a harmonious balance of umami spices and a velvety texture, inviting you to create a kitchen aroma that’s warming and intoxicating. Crafting this curry sauce yourself means every bite bursts with freshness and personality, no shortcuts, just pure culinary satisfaction.
Prep and Cook Time
- preparation: 15 minutes
- Cooking: 40 minutes
- Total: 55 minutes
Yield
Serves 4 hearty portions
Difficulty Level
Medium - approachable for home cooks ready to deepen their technique
Ingredients
- 2 tbsp vegetable oil (neutral, such as canola or sunflower oil)
- 1 large onion, finely diced
- 2 cloves garlic, minced
- 1 tbsp fresh ginger, grated
- 2 medium carrots, peeled and diced
- 1 large potato, peeled and chopped into small cubes
- 3 tbsp all-purpose flour
- 2 tbsp mild curry powder (adjust to taste)
- 1 tbsp garam masala
- 1 tsp turmeric powder
- 3 cups chicken broth (low sodium preferred)
- 1 tbsp soy sauce
- 1 tbsp honey or maple syrup
- 1 tsp Worcestershire sauce (vegetarian-friendly if preferred)
- Salt and freshly ground black pepper, to taste
Instructions
- Heat the oil in a large saucepan over medium heat.Once shimmering, add the finely diced onion and sauté until soft and golden, about 8 minutes. Stir often to avoid burning.
- Add the garlic and ginger and cook for another 1-2 minutes until fragrant.
- Incorporate the diced carrots and potatoes, stirring well to combine. Cook for 5 minutes, allowing the vegetables to soften slightly while absorbing the aromatic base.
- Sprinkle the flour over the vegetables. Stir constantly for 2 minutes to form a roux-this step thickens the sauce and builds a subtle nuttiness.
- Mix in the curry powder, garam masala, and turmeric, ensuring even coating. Sauté the spices for another 1-2 minutes to bloom their flavors.
- Gradually pour in the chicken broth,stirring continuously to avoid lumps. Bring to a gentle simmer.
- Add the soy sauce, honey, and Worcestershire sauce and stir to integrate these layers of flavor.
- Allow the curry to simmer on low heat for 20-25 minutes, stirring occasionally, until the sauce thickens and the vegetables are tender to the bite.
- Using an immersion blender or regular blender, carefully puree the sauce until smooth but still slightly textured for body. Adjust seasoning with salt and pepper.
- Your power-packed curry sauce is now ready to complement your crispy chicken katsu, transforming the dish into an unforgettable experience!
Tips for Success
- For an extra depth of flavor: Roast the vegetables briefly before sautéing to enhance natural sweetness.
- Thickness control: If the sauce thickens too much, thin it out with a splash of water or broth. Conversely, simmer longer if too thin.
- Make-ahead magic: The sauce improves overnight as flavors meld. Refrigerate in an airtight container for up to 3 days, or freeze for 1 month.
- Substitution advice: For a gluten-free version, replace all-purpose flour with chickpea flour or cornstarch slurry.
- Spice variation: Adjust curry powder to taste-mild for family-friendly, more robust for heat lovers.
Serving Suggestions
This sumptuous sauce beautifully blankets your golden, crispy chicken katsu.Serve it alongside fragrant steamed jasmine rice or even cauliflower rice for a lighter option. Garnish with freshly chopped green onions and a sprinkle of toasted sesame seeds to add vibrant color and a textural pop. A side of pickled ginger or crisp shredded cabbage salad balances richness with brightness. for an extra pop of umami,add a drizzle of Japanese katsu curry sauce variations after plating.

| Nutrient | Per Serving |
|---|---|
| Calories | 320 kcal |
| Protein | 8 g |
| Carbohydrates | 42 g |
| Fat | 10 g |
For those ready to go beyond the curry sauce, explore our crispy chicken katsu recipe to complete your power-packed meal prep perfectly.
Essential Tips for Storing and Reheating Your Chicken Katsu Curry
Power-Packed chicken Katsu Curry is not just a meal; it’s an experience-a perfect fusion of crispy, golden chicken cutlets paired with a rich, velvety Japanese curry sauce. Originating from Japan, this dish has captivated food lovers worldwide, becoming a beloved comfort food that can easily be made ahead for busy weekdays. Whether you’re prepping for a week of delicious lunches or craving a hearty dinner that reheats without losing its magic, mastering the art of storing and reheating this dish ensures you enjoy its full flavor and texture every time.
Prep and Cook Time
Preparation: 20 minutes | Cooking: 30 minutes | Total Time: 50 minutes
yield
Serves 4 generous portions
Difficulty Level
Medium - ideal for confident cooks eager to impress with meal prep finesse
Ingredients
- 4 boneless, skinless chicken breasts, pounded to even thickness
- 1 cup all-purpose flour, sifted
- 2 large eggs, beaten
- 1 ½ cups panko breadcrumbs
- vegetable oil, for frying (about 1 inch deep)
- 2 large onions, finely chopped
- 2 medium carrots, peeled and diced
- 3 cloves garlic, minced
- 1 tbsp ginger, freshly grated
- 3 tbsp curry powder
- 2 tbsp tomato paste
- 500 ml chicken stock
- 1 tbsp soy sauce
- 1 tbsp honey
- Salt and freshly ground black pepper, to taste
- Steamed white rice, to serve
- Chopped fresh parsley or scallions, for garnish
Instructions
- Prepare the chicken katsu: Season each chicken breast with salt and pepper. Dredge the chicken pieces first in the flour, shaking off excess, then dip into the beaten eggs, and finally coat evenly with panko breadcrumbs. Press gently to adhere well.
- Heat oil in a deep skillet over medium heat. Once shimmering, carefully fry the breaded chicken until golden brown and cooked through, about 4-5 minutes per side. Transfer to a wire rack to retain crispiness and drain excess oil.
- Make the curry sauce: In a large saucepan, sauté onions and carrots until softened and translucent, about 8 minutes. Stir in garlic and ginger – cook for 1 minute until fragrant.
- Add curry powder and tomato paste, stirring constantly for 2 minutes to bloom the spices.
- Pour in chicken stock, soy sauce, and honey, then bring to a simmer. Cook, stirring occasionally, until the sauce thickens and vegetables are tender, about 15-20 minutes. Adjust seasoning with salt and pepper.
- Slice the chicken katsu into thick strips and ladle the curry sauce over cooked steamed rice. Place sliced chicken atop the curry, garnishing with fresh parsley or scallions.
To preserve the crispy allure of your Power-Packed Chicken Katsu Curry when storing, separate the chicken cutlets from the curry sauce. Wrap the chicken katsu individually in parchment or paper towels to absorb moisture, then place in an airtight container. Store the curry sauce in a separate container to prevent sogginess. Refrigerate both parts within two hours of cooking, and consume within 3 days for optimal freshness.
When reheating, the secret lies in restoring the katsu’s crunch and warming the curry without compromising the textures. Reheat the curry sauce gently on the stovetop over low heat until warm and slightly thickened, stirring occasionally to prevent sticking.For the chicken, avoid microwaving, which can soften the crust; rather, reheat cutlets on a wire rack in a preheated oven at 350°F (175°C) for 8-10 minutes to revive crispness.
For a speedy lunch, consider microwaving the curry sauce with steamed rice and then briefly popping the sliced chicken katsu in a toaster oven or skillet to crisp - an effortless way to replicate the freshly made experience.
Freeze cooked chicken katsu and curry separately for up to one month by tightly wrapping each and using freezer-safe containers. Defrost overnight in the fridge before reheating as described. This method keeps your meal just as flavorful and visually enticing after thawing.
Remember, presentation is key-even after reheating! Arrange slices of chicken atop the curry, drizzle with a little extra soy sauce or sriracha for a zing, and sprinkle with sesame seeds or scallions to elevate your Power-Packed Chicken Katsu Curry to a restaurant-worthy plate.
Chef’s notes and Tips for Success
- Panko is your best friend: The light,airy texture of Japanese breadcrumbs keeps katsu irresistibly crunchy.
- Double dredging: For extra thick, crunchy coating, dip chicken back into the eggs and panko a second time before frying.
- Make curry sauce ahead: The sauce often tastes even better the next day, making this meal perfect for meal prep.
- Use a thermometer: Fry chicken until it reaches an internal temp of 165°F (74°C) for juiciest results.
- Rice tip: Use freshly steamed Japanese short-grain rice or sushi rice for authenticity and optimal texture.
Serving Suggestions
Serve your Power-Packed Chicken Katsu Curry on a bed of fluffy steamed rice with a side of pickled ginger or crunchy cabbage slaw to brighten the palate. A simple drizzle of tonkatsu sauce or a scatter of toasted sesame seeds adds depth and enhances the vibrant presentation. For an easy weeknight dinner,pair with steamed greens or a crisp cucumber salad for balance and color.

| Nutrient | Per Serving |
|---|---|
| Calories | 650 kcal |
| Protein | 45 g |
| Carbohydrates | 60 g |
| Fat | 25 g |
For additional meal prep inspiration, check out our guide on Easy Weeknight Dinners. To deepen your understanding of Japanese curry origins and variations, visit Japan-Guide.com.
Creative Variations to Elevate Your Weekly Meal Prep Routine
Power-Packed Chicken Katsu Curry is not just a meal; it’s an invitation to bring vibrant flavors and satisfying textures into your weekly meal prep. Originating from Japanese comfort cuisine, this dish melds the crispy golden chicken katsu with a rich, aromatic curry sauce that’s both soothing and deeply flavorful. Bringing this dish into your meal prep routine means embracing a fantastic balance of protein, spice, and crunch – perfect for those who crave something hearty yet wholesome. Let’s dive into exciting ways to personalize this classic and keep your lunches fresh and inspiring.
Prep and Cook Time
- Prep Time: 20 minutes
- Cook Time: 25 minutes
- Total Time: 45 minutes
Yield
serves 4 hearty portions,ideal for batch preparation and portion control throughout the week.
Difficulty level
Medium – approachable for most home cooks, with clear steps to get that perfectly crispy coating and luscious curry sauce.
Ingredients
- For the chicken Katsu:
- 4 boneless, skinless chicken breasts
- 1 cup all-purpose flour, sifted
- 2 large eggs, beaten
- 1 ½ cups panko breadcrumbs
- ½ tsp salt
- ¼ tsp black pepper
- Vegetable oil, for frying
- For the Curry Sauce:
- 2 tbsp unsalted butter
- 1 medium onion, finely chopped
- 2 cloves garlic, minced
- 1 tbsp ginger, grated
- 2 tbsp all-purpose flour
- 3 cups low-sodium chicken broth
- 1 tbsp mild curry powder
- 1 tsp garam masala
- 1 tsp soy sauce
- 1 tsp honey or maple syrup
- salt and pepper, to taste
- Optional Garnishes:
- Chopped scallions
- Sesame seeds
- Fresh cilantro
Instructions
- Prepare the chicken: Butterfly each chicken breast by slicing horizontally but keeping them hinged. Pound lightly to even thickness (about ½ inch). Season with salt and pepper.
- Set up the dredging station: Place the flour in one shallow dish, beaten eggs in another, and panko breadcrumbs in a third.
- Coat the chicken: Dredge each piece first in flour, shaking off excess. Dip in the egg wash, then press firmly into the panko breadcrumbs until evenly coated. Set aside on a plate.
- Fry the chicken: Heat vegetable oil in a deep skillet over medium heat until shimmering (around 350°F). carefully fry the cutlets for 3-4 minutes per side, or until golden and cooked through. Drain on paper towels.
- Make the curry sauce: In a separate saucepan, melt the butter over medium heat. add onions and sauté until translucent and fragrant, about 5 minutes. Stir in garlic and ginger, cooking 1 minute more.
- Create the roux: Sprinkle flour over the softened onions. Stir constantly to cook the raw flour taste out, about 2 minutes, until light golden.
- Add broth and spices: Gradually whisk in the chicken broth to avoid lumps. Stir in curry powder, garam masala, soy sauce, and honey. Bring to a simmer and cook until sauce thickens, about 10 minutes.Season with salt and pepper.
- serve: Slice the chicken katsu and pour generous amounts of curry sauce over the top. Garnish with scallions, sesame seeds, or cilantro for added freshness.
Tips for Success
- Crunch Factor: For ultra-crispy chicken katsu, double-dip the panko layer by repeating the egg and breadcrumb steps. This also helps seal in moisture.
- Spice Customization: adjust the curry powder to your spice tolerance – or try adding a dash of smoked paprika for a smoky undertone.
- Make-Ahead Magic: prepare the curry sauce and chicken separately. Store in airtight containers in the fridge for up to 4 days. Reheat gently on the stove to preserve crispiness.
- Gluten-Free Variation: Use rice flour and gluten-free panko breadcrumbs for a gluten-free alternative that doesn’t compromise texture.
- Vegetable Boost: Stir roasted sweet potatoes, steamed broccoli, or sautéed mushrooms into your curry sauce for added nutrition and color.
Serving Suggestions
power-Packed Chicken Katsu Curry shines when served over fluffy steamed jasmine rice or sticky short-grain rice.For a lighter twist, opt for cauliflower rice or soba noodles. A side of pickled ginger or crunchy shredded cabbage salad adds a refreshing balance. Drizzle with a little extra soy sauce or a squeeze of fresh lime to brighten the dish. Consider topping with a soft-boiled egg for richness.
| Nutrient | Per Serving |
|---|---|
| calories | 520 kcal |
| Protein | 42 g |
| Carbohydrates | 45 g |
| Fat | 18 g |
Excited to explore more bold and wholesome meal prep ideas? Check out our Hearty Asian-Inspired Batch Cooking guide for a flavorful week ahead. For detailed culinary science behind perfect curry roux,visit Serious Eats.
Q&A
Q&A: Power-Packed Chicken Katsu Curry – Meal Prep Made Easy
Q1: What makes Chicken Katsu Curry a power-packed meal?
A1: Chicken Katsu Curry combines tender, crispy chicken cutlets with a rich, flavorful japanese curry sauce packed with veggies and spices. It’s a balanced meal offering protein, vital nutrients, and comforting carbs-all in one bowl. This hearty combo fuels your body and satisfies your taste buds, making it perfect for an energizing lunch or dinner.
Q2: how can chicken Katsu Curry simplify meal prep for busy weeks?
A2: The dish’s components-breaded chicken, curry sauce, and rice-can be made in batches ahead of time. Prepare the chicken and sauce on the weekend, portion them out, and refrigerate or freeze individual servings.When ready to eat, simply reheat, add fresh greens or steamed veggies, and enjoy a restaurant-quality meal in minutes.
Q3: What’s the secret to achieving crispy chicken katsu without deep frying?
A3: Baking or air-frying the breaded chicken cutlets offers a healthier alternative to deep frying while still delivering crispiness. Using panko breadcrumbs adds extra crunch, and a light mist of oil before cooking helps achieve that golden crust-perfect for meal preppers aiming for ease and texture without the mess.
Q4: Can the Japanese curry sauce be customized for different dietary needs?
A4: Absolutely! The sauce’s base is typically a blend of onions, carrots, potatoes, and curry roux, which you can tweak to suit vegan or gluten-free needs by using plant-based butter and gluten-free curry blocks or spice blends. Adding extra vegetables like mushrooms or spinach boosts fiber and nutrients without sacrificing flavor.
Q5: How long does Chicken Katsu Curry keep in the fridge, and can it be frozen?
A5: Stored in airtight containers, cooked Chicken Katsu Curry lasts about 3-4 days in the fridge. It also freezes beautifully-just portion the chicken and sauce separately in freezer-safe containers. When freezing, omit rice for best texture; prepare fresh or keep separately frozen. Reheat gently to maintain crispness and warmth.
Q6: What side dishes or accompaniments work well with Chicken Katsu Curry?
A6: Simple steamed rice is classic, but you can swap in cauliflower rice or quinoa for a different twist. Fresh pickled vegetables, shredded cabbage salad, or lightly steamed green beans provide a zingy crunch and freshness that balance the rich curry flavors, rounding out your power-packed meal.
Q7: How can beginners master the Chicken Katsu Curry at home without hassle?
A7: Start by prepping each element separately-coat and bake the chicken while simultaneously simmering the curry sauce. Use pre-made curry roux for simplicity or create your own spice blend for a personal touch. Keep the chopping straightforward by using common vegetables, and set a timer to avoid overcooking. Practice makes perfect, and the results are more than worth it!
This Q&A guides you through the essentials of creating a flavorful, nourishing Chicken Katsu Curry perfect for meal prep, with tips to keep cooking efficient, healthy, and delicious-no fuss, just pure satisfaction on your plate.
Wrapping Up
As the aroma of golden, crispy chicken katsu mingles with the rich, velvety curry sauce, you realize that meal prep doesn’t have to be mundane-it can be a flavorful adventure. This power-packed Chicken katsu Curry isn’t just a dish; it’s your new secret weapon for delicious, hassle-free meals that fuel your busy life.Whether you’re batch-cooking for the week or simply craving a comforting dinner, this recipe promises convenience without compromise. So go ahead, roll up your sleeves, and bring a taste of Japan to your kitchen-meal prep made easy never tasted so good.