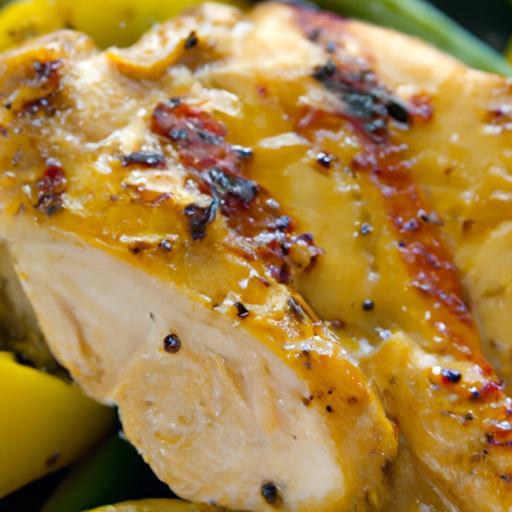
There’s nothing quiet like the satisfying sizzle of chicken breasts searing in a cast iron skillet - that moment when the kitchen fills with mouthwatering aromas and the promise of a juicy, flavorful meal. Yet, mastering the art of cooking chicken breast to tender perfection can feel elusive, often resulting in dry, overcooked bites rather than succulent, juicy slices. But fear not: with a few carefully guarded secrets and a bit of know-how, your cast iron skillet can become the ultimate tool to unlock chicken breasts that are crisp on the outside, melt-in-your-mouth tender on the inside, and bursting with flavor. In this article, we’ll reveal the insider tips and techniques that transform ordinary chicken breasts into perfectly juicy masterpieces, turning your weeknight dinner into a culinary triumph.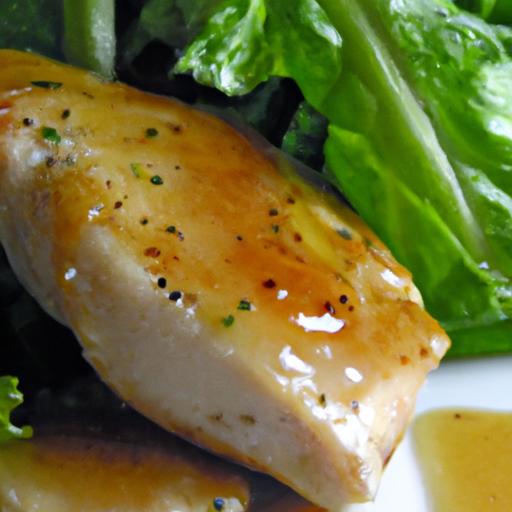
Selecting the Ideal Chicken Breast for Maximum juiciness
Perfectly juicy cast iron skillet chicken breast begins long before the first sear-it starts at the butcher’s counter or the supermarket shelf. Choosing the right chicken breast is the foundation for a tender, succulent dish that impresses every time. Whether you prefer organic, free-range, or conventional chicken, knowing what to look for transforms your cooking experience and dramatically amps up the flavors and texture.
When selecting chicken breasts, opt for fresh, plump, and flesh-pink breasts with a slight sheen and no discoloration or dryness. Avoid packages with excessive liquid pooling, which frequently enough indicates previously frozen or low-quality cuts. If possible, check for breasts that are uniform in thickness-this helps them cook evenly in your cast iron skillet, preventing dry edges while the center remains undercooked.
size matters: Medium-sized breasts, roughly 6-8 ounces each, are easiest to work with for skillet cooking. Extra-large breasts frequently enough have thick ends that dry out easily, so consider pounding them gently to an even thickness with a meat mallet or rolling pin. This small step enhances juiciness by ensuring even heat distribution and shortening cooking time.
For those who value exceptional quality, USDA recommendations on safe poultry handling are a great reference. Choosing chicken raised without antibiotics or hormones can also subtly elevate flavor and peace of mind.

Prep and Cook Time
- Preparation: 10 minutes
- Cooking: 15 minutes
- Total Time: 25 minutes
yield
Serves 4 people
Difficulty Level
Easy
Ingredients
- 4 boneless, skinless chicken breasts (6-8 ounces each, preferably fresh)
- 1 tablespoon olive oil (extra virgin for the best flavor)
- 1 teaspoon kosher salt
- ½ teaspoon freshly ground black pepper
- 1 teaspoon smoked paprika
- 1 teaspoon garlic powder
- 1 tablespoon unsalted butter
- Fresh rosemary or thyme sprigs (optional, for aromatics)
- Juice of half a lemon (for finishing)
Instructions
- Prepare the chicken breasts: pat the chicken dry thoroughly with paper towels to remove excess moisture. If breasts vary in thickness, gently pound them to an even ¾-inch thickness for uniform cooking.
- Season liberally: Combine kosher salt, black pepper, smoked paprika, and garlic powder in a small bowl. Rub this spice blend evenly over both sides of each chicken breast, pressing gently to adhere.
- Preheat your cast iron skillet: Place it over medium-high heat for about 5 minutes until it’s hot but not smoking. Add olive oil and swirl to coat the bottom.
- Sear the chicken: Carefully place the breasts in the skillet, spacing them evenly without crowding.Sear untouched for 5 minutes until golden brown on the first side.
- Flip and add butter and herbs: Turn each breast over, add butter and fresh rosemary or thyme sprigs to the pan. Allow the butter to melt, occasionally spooning the flavored butter over the chicken while it cooks for another 6-7 minutes.
- Check for doneness: The chicken is perfectly juicy when its internal temperature reaches 160°F (71°C). Remove from heat slightly before the final target temperature to allow residual heat to finish cooking.
- Rest and finish: Transfer the chicken breasts to a plate and let them rest for 5 minutes. Squeeze fresh lemon juice over the top for brightness and enhanced flavor.
Tips for Success with Perfectly Juicy Cast Iron Skillet Chicken Breast
- Always dry the chicken breasts wholly before seasoning to achieve a beautiful golden sear.
- Use a meat thermometer for precise cooking-overcooking is the enemy of juiciness.
- Don’t skip the resting period: Resting redistributes the juices, ensuring moistness with every bite.
- Try buttering the chicken towards the end of cooking for that rich, silky finish and extra flavor.
- If you prefer, marinate your breasts in lemon juice, olive oil, and herbs for 30 minutes before cooking for subtle freshness.
serving Suggestions
To showcase the perfectly juicy cast iron skillet chicken breast, slice on a slight diagonal and arrange atop a bed of creamy mashed potatoes or alongside vibrant sautéed seasonal vegetables. Garnish with freshly chopped parsley or a sprinkle of flaky sea salt to add an elevated touch. For a bright contrast, serve with a simple arugula salad drizzled in lemon vinaigrette. This dish pairs wonderfully with garlic roasted asparagus or a light quinoa salad for a balanced, nourishing meal.
| Nutrient | Per Serving |
|---|---|
| Calories | 280 kcal |
| Protein | 40 g |
| Carbohydrates | 1 g |
| Fat | 11 g |
For those hungry to explore more, check out our guide to crispy skin chicken thighs-another cast iron skillet favorite packed with flavor and texture.
Mastering the Art of Seasoning and Marinating
Perfectly Juicy Cast Iron Skillet Chicken Breast Secrets begin with an intimate understanding of seasoning and marinating that transforms simple chicken breasts into a flavorsome masterpiece. Whether you’re craving weeknight comfort food or aiming to impress guests, this approach marries bold, balanced flavors with a tender, succulent texture that will keep you coming back for more. The magic lies not just in slapping spices on but in layering well-chosen ingredients that coax out the chicken’s natural juiciness.
Growing up, I was always fascinated by how a simple marinade could turn a humble chicken breast into a dish bursting with complex aromas. From classic lemon-herb infusions to more adventurous blends of smoky paprika and fresh garlic, mastering these fundamentals will elevate your skillet technique and make your chicken irresistible every time.
Prep and Cook Time
- Preparation: 15 minutes (plus optional marinating time: 1-4 hours)
- Cooking: 15-20 minutes
- total Time: 30-35 minutes (up to 4 hours including marinating)
Yield
- Serves 4
Difficulty Level
- Easy to Medium
Seasoning and Marinating Ingredients
- 4 boneless, skinless chicken breasts (about 6 oz each)
- 3 tbsp extra virgin olive oil
- 2 tbsp fresh lemon juice (about 1 lemon)
- 4 garlic cloves, minced
- 1 tsp smoked paprika
- 1 tsp ground cumin
- 1 tsp sea salt
- ½ tsp freshly ground black pepper
- 1 tbsp fresh chopped thyme (or 1 tsp dried thyme)
- 1 tbsp honey (to balance acidity)
- Optional: pinch of red chili flakes for a subtle heat
Step-by-Step Instructions
- Prepare the marinade: In a medium bowl, whisk together the olive oil, lemon juice, minced garlic, smoked paprika, ground cumin, salt, black pepper, thyme, and honey until fully combined.
- Marinate the chicken breasts: Place the chicken breasts in a resealable plastic bag or shallow dish and pour the marinade over them. Massage gently to coat thoroughly. Seal and refrigerate for at least 1 hour, or up to 4 hours for deeper flavor penetration.
- Preheat your cast iron skillet: Heat over medium-high heat until a drop of water sizzles instantly,ensuring a hot surface for perfect searing.
- Sear the chicken breasts: Remove chicken from marinade, letting excess drip off. Place breasts in the skillet,cooking undisturbed for about 5-6 minutes to develop a golden crust.
- Flip and finish cooking: Turn breasts over and reduce heat to medium. Cook for another 8-10 minutes or until internal temperature reaches 165°F (74°C). Use a meat thermometer for precise results.
- Rest before slicing: Transfer chicken to a plate and tent loosely with foil.Let rest 5 minutes to redistribute juices and enhance tenderness.
- Serve with your favorite sides or garnishes, such as fresh lemon wedges and chopped parsley.
Tips for Success: Unlocking Flavor and Juiciness
- Don’t skip the marinating time: Even 30 minutes will infuse the chicken with flavor, but a longer sit lets the acids and aromatics tenderize the meat beautifully.
- Pat dry before cooking: Excess marinade on the skin can prevent proper browning. Gently pat chicken with paper towels before placing it in the skillet.
- Use a meat thermometer: It’s the best way to avoid dry chicken. Pull the chicken off the heat right at 165°F and let rest; carryover heat will finish the process.
- Customize your herbs and spices: Swap thyme with rosemary or oregano for a Mediterranean twist. For a smoky depth, add a pinch more smoked paprika.
- Make ahead: Chicken can be marinated up to 4 hours in advance. For meal prep, you can cook, cool, and refrigerate; reheat gently to avoid drying out.
Serving Suggestions to Elevate Your Meal
Plate your perfectly cooked chicken breast alongside vibrant,crunchy salads,roasted seasonal vegetables,or buttery mashed potatoes for a balanced plate. A drizzle of flavored olive oil or a dollop of fresh chimichurri or avocado salsa adds a fresh, aromatic contrast. Garnish with lemon zest, a sprinkle of fresh herbs, and a few flakes of sea salt to make every bite a celebration.

| Nutrient | Per Serving |
|---|---|
| Calories | 320 kcal |
| Protein | 45 g |
| Carbohydrates | 4 g |
| Fat | 12 g |
for additional seasoning inspiration and variations to complement these perfectly juicy cast iron skillet chicken breast secrets, explore our Ultimate Herb-Marinated Chicken Guide. For comprehensive details on food safety and meat cooking temperatures, visit the USDA Food Safety and Inspection Service.
Achieving the Perfect Sear and Even cooking in Your Cast Iron Skillet
Perfectly juicy cast iron skillet chicken breast secrets truly begin with mastering the art of the sear. The hallmark of a flawless skillet-cooked chicken breast is the irresistible golden crust that locks in juicy tenderness while cooking the interior evenly. Achieving this involves understanding your skillet, controlling the heat, and preparing the chicken with intention.
Cast iron offers unparalleled heat retention, creating a consistent surface temperature that’s ideal for developing that coveted Maillard reaction-the browning that transforms simple chicken into a feast for the senses. But beware: too hot,and you risk burnt exterior with an undercooked center; too low,and you miss depth of flavor and texture.Let’s dive into the essential steps to get this balance just right.
Prep and Cook Time
- Preparation: 10 minutes
- Cooking: 15-20 minutes
- Total Time: 30 minutes
Yield
Perfectly serves 4 guests
Difficulty Level
Medium – approachable for confident beginners and beyond
Ingredients
- 4 boneless, skinless chicken breasts (about 6 oz each), patted dry
- 1 ½ tsp kosher salt
- 1 tsp freshly ground black pepper
- 1 tsp smoked paprika
- 2 tbsp olive oil, divided
- 2 tbsp unsalted butter
- 3 cloves garlic, smashed
- 2 sprigs fresh thyme
- 1 lemon, zested and quartered
Instructions
- Season generously. Evenly sprinkle the chicken breasts with kosher salt, black pepper, and smoked paprika. Let them rest at room temperature for 10 minutes to enhance moisture retention and seasoning absorption.
- Preheat your cast iron skillet. Place the skillet over medium-high heat and allow it to become very hot-warm it for about 5 minutes until a drop of water dances and evaporates instantly.
- Add oil and chicken. Pour 1 tablespoon of olive oil into the pan, swirling to coat.Immediately add the chicken breasts, smooth side down, ensuring they don’t overcrowd the skillet to maintain heat integrity.
- Sear to a golden crust. Without moving, cook each breast 4-5 minutes until the surface is beautifully golden and releases easily when you gently jiggle it. This is the magic that seals in juices.
- Flip and add aromatics. turn the chicken breasts over, reduce heat to medium, and add butter, smashed garlic, thyme, and lemon zest around the pan. Allow the butter to melt and spoon it continuously over the chicken to infuse flavor and moisture.
- Finish cooking evenly. Cook for another 6-8 minutes, spooning butter often, until the chicken registers 160°F internally using a meat thermometer. This precise heat ensures juicy, never dry meat.
- Rest and serve. Transfer the chicken to a plate, tent loosely with foil, and rest for 5 minutes. The carryover heat finishes cooking while distributing juices evenly throughout the breast.
Tips for Success
- Thinner or thicker breasts: Pound thicker breasts gently to an even thickness (about ¾ inch) to guarantee uniform cooking without burning the exterior.
- Don’t skip drying: Pat the chicken extremely dry with paper towels. Moisture is the enemy of a crisp, golden sear.
- Avoid overcrowding: Give your chicken room. Crowding traps steam and prevents that sought-after crust from forming.
- Control heat: Cast iron heats intensely; adjust burner temperature after searing to avoid burning and allow gentle internal cooking.
- Butter basting: This step not only boosts flavor but also helps keep chicken moist. Use fresh herbs and lemon zest to add a fresh, aromatic layer.
- Use a meat thermometer: Accuracy is key-160°F yields perfectly juicy chicken without safety compromises.
Serving Suggestions
This chicken shines when paired with vibrant, fresh sides that contrast its richness. Try serving atop creamy mashed cauliflower or alongside roasted seasonal vegetables tossed with fresh lemon juice and olive oil. Garnish with additional fresh thyme sprigs and a few lemon wedges for brightness and elegance.For a rustic flair, drizzle a little pan jus from the skillet over the plated chicken.

Nutritional Information
| Nutrient | Per Serving |
|---|---|
| Calories | 280 kcal |
| Protein | 42 g |
| Carbohydrates | 1 g |
| Fat | 9 g |
for additional insights on cooking chicken breast perfectly, check out our guide on juicy cooked chicken breast techniques. For food safety and detailed temperature info, visit the USDA’s official cooking guidelines.
Resting and Serving Tips to Lock in Flavor and Moisture
Perfectly juicy cast iron skillet chicken breast is not just about the sear and seasoning; the final moments of resting and serving make all the difference in preserving its luscious texture and deep flavor. Right after cooking, resist the urge to slice immediately-this step is your secret weapon to ensure every bite bursts with moisture and tenderness.
Once you’ve removed your chicken breasts from the skillet, transfer them to a warm plate and tent loosely with aluminum foil. Allowing them to rest for at least 5 to 7 minutes helps the natural juices redistribute evenly throughout the meat, rather than pooling on the cutting board or escaping the moment the knife hits. this brief pause transforms your simple skillet chicken breast into a juicy masterpiece that feels like a restaurant-quality dish.
When it’s time to serve, slice your chicken breast against the grain, revealing the beautifully cooked interior and accentuating tenderness. Garnish with fresh herbs like rosemary or thyme, or a sprinkle of flaky sea salt to highlight the flavors subtly.Pairing your chicken with complementary sides such as roasted vegetables or a bright citrus salad not only adds texture contrast but also elevates the entire plate.
For visually enticing presentation, arrange slices fanned on a warm platter, drizzled lightly with pan juices or a zesty herb vinaigrette-this extra touch seals the deal for both your eyes and palate. Remember, the resting and serving ritual is as essential as the cooking; mastering it ensures your skillet chicken breast stays perfectly juicy and full of vibrant flavor from first bite to last.
Q&A
Perfectly Juicy Cast Iron Skillet Chicken Breast Secrets: Q&A
Q1: Why is cast iron the secret weapon for juicy chicken breasts?
A1: Cast iron’s magic lies in its even heat distribution and excellent heat retention. This means once the pan is hot, it stays hot, creating a perfect sear that locks in moisture. The result? A beautifully caramelized crust that seals the chicken’s natural juices, keeping each bite succulent and satisfying.
Q2: How do I prepare the chicken breast before it hits the skillet?
A2: Start by pounding the chicken breast to an even thickness; this ensures even cooking and prevents dry edges. Pat it dry with paper towels, then season generously with salt, pepper, and your favorite herbs or spices. A light brush of oil will help achieve that golden-brown sear while keeping the surface crisp-but juicy inside.
Q3: What temperature should the skillet be when cooking chicken breast?
A3: Preheat your cast iron skillet over medium-high heat until it’s scorching hot-think “heat shimmering off pavement on a summer day.” This heat level is essential to quickly sear the surface, creating a crust that locks moisture in. If it’s too cool,the chicken will stew rather than sear; too hot,and you risk burning.
Q4: How long should I cook the chicken on each side?
A4: Timing can vary based on thickness, but generally, 4-5 minutes per side works well for a medium-thick breast. After searing both sides, lowering the heat and covering the pan briefly can definitely help the chicken finish cooking gently inside without drying out. Use a meat thermometer-internal temperature should reach 165°F (74°C).
Q5: Is it better to cook chicken breast covered or uncovered?
A5: Start uncovered to build that crisp, flavorful crust.Partway through cooking,lowering the heat and covering with a lid or foil traps steam,gently cooking the inside without drying it out. This two-step approach ensures juicy tenderness paired with a mouthwatering exterior.
Q6: Can I add flavor boosts during cooking without compromising juiciness?
A6: Absolutely! Toss in aromatics like crushed garlic cloves, fresh thyme, or rosemary sprigs during the final minutes. Adding a pat of butter and spooning the melted,herb-infused fat over the chicken-called basting-helps keep the surface luscious and layers of flavor build with every bite.
Q7: What’s the biggest mistake cooks make when pan-searing chicken breasts?
A7: The cardinal sin is overcrowding the pan. Too many pieces release excess moisture, causing the chicken to steam rather than sear. Give each breast plenty of room to sizzle solo in the pan. This creates that coveted golden crust and locks in juicy tenderness.
Q8: How should I rest the chicken after cooking?
A8: Patience is your final ingredient. Let the chicken rest on a warm plate, tented loosely with foil, for about 5 minutes. resting allows juices to redistribute, preventing them from spilling out the moment you slice in. The payoff is a perfectly juicy, tender bite every time.
Q9: Can I use frozen chicken breasts in the skillet method?
A9: It’s best to thaw chicken breasts completely before cooking in a cast iron skillet to ensure even cooking and safe internal temperatures. thaw overnight in the fridge or use a cold water bath for faster defrosting. Cooking frozen chicken directly in cast iron can lead to uneven doneness and a rubbery texture.
Q10: What side dishes complement cast iron skillet chicken breast?
A10: The juicy,golden chicken shines alongside vibrant sides like garlic sautéed greens,creamy mashed potatoes,or a zesty citrus salad. These fresh,bright companions balance the richness of the pan-seared chicken for an irresistible meal that celebrates simplicity and bold flavors.
Ready to unlock juicy chicken breast perfection? Grab your cast iron, bring the heat, and let these secrets guide you to juicy, tender, skillet-success every time!
Insights and Conclusions
Mastering the art of a perfectly juicy cast iron skillet chicken breast isn’t just about technique-it’s about embracing the magic that happens when heat, seasoning, and a trusty skillet come together in harmony. With these secrets in your culinary toolkit, you’ll transform a simple chicken breast into a tender, flavorful masterpiece every time. So next time you hear that comforting sizzle, remember: it’s more than cooking-it’s crafting a succulent experience that delights the senses and elevates your everyday meal to something unusual.Happy skillet adventures!