There’s a magical moment when cold cream meets sweet flavors, spinning together into a luscious, velvety delight that has captivated taste buds for centuries. Ice cream, though often seen as a simple treat, is in fact a fascinating fusion of art and science-a delicate dance of ingredients, temperatures, and textures that transforms humble elements into edible joy. In this article, we’ll delve deep into the sweet science behind “Ice & Cream delight,” exploring how chemistry, physics, and culinary creativity come together to create the perfect scoop. From the role of emulsifiers and freezing techniques to the subtle balance of flavor compounds, prepare to uncover the tasty secrets that make ice cream far more than just a summertime indulgence.
The Chemistry of Creaminess Understanding the Role of Ingredients in Texture
Ice & Cream Delight captivates the senses not only through its luscious flavor but by the intricate science that turns simple ingredients into a velvety, dreamy texture. The secret lies in understanding how each component interacts to create that perfect creaminess we crave. From the rich fat content in cream to the stabilizing power of sugar and eggs, every addition plays a chemical role in harmonizing texture and mouthfeel-transcending the ordinary into the extraordinary.
Prep and Cook Time
- Readiness: 20 minutes
- Cooking: 10 minutes
- Chilling/Freezing: 4 hours (minimum)
Yield
Serves 6 generous portions
difficulty Level
Medium - perfect for adventurous home cooks ready to master the science behind creamy desserts
Ingredients
- 2 cups heavy cream, chilled
- 1 cup whole milk, cold
- ¾ cup granulated sugar
- 5 large egg yolks, at room temperature
- 1 tbsp pure vanilla extract
- 2 tbsp cornstarch (to enhance silky texture)
- Pinch of fine sea salt
- Optional: ½ cup toasted almond slivers or dark chocolate shavings for mix-ins
Instructions
- Whisk the egg yolks, sugar, and cornstarch in a medium bowl until the mixture turns pale and slightly thickened. This blend is vital for stabilizing the cream while adding richness.
- Heat the milk and half of the heavy cream gently in a saucepan over medium heat until just simmering. Avoid boiling,as too much heat can curdle the eggs later.
- Temper the egg mixture by slowly pouring about one-third of the hot milk into the yolks while whisking vigorously-this prevents scrambling.
- Return the tempered yolk mixture to the saucepan with the remaining milk and cream. Cook over low heat, stirring constantly with a wooden spoon until the mixture thickens enough to coat the back of your spoon (170-175°F / 77-80°C).
- Remove from heat and promptly stir in the vanilla extract and salt for flavor balance.
- Pour the custard through a fine-mesh sieve into a clean bowl to ensure a silky texture free from cooked egg bits.
- Cool the mixture to room temperature, then cover tightly with plastic wrap, pressing it directly onto the surface to prevent a skin from forming.
- Refrigerate for at least 4 hours, preferably overnight, to let flavors meld and the base chill thoroughly.
- Churn the mixture in your ice cream maker according to manufacturer instructions until thick and creamy-usually about 20-25 minutes.
- Fold in any optional mix-ins during the last 5 minutes of churning for delightful texture contrast.
- Transfer to an airtight container and freeze for an additional 2 hours to firm up before serving.
Tips for Success
- Egg yolk temperature: Bringing your egg yolks to room temp helps them blend smoothly and avoids lumps during tempering.
- Slow heat is key: cooking custard on low heat while stirring ensures a silky finish without scrambling the eggs.
- cornstarch role: Adding cornstarch adds extra creaminess by preventing ice crystals, enhancing smoothness especially if you don’t have an ice cream stabilizer.
- Chilling matters: Proper chilling before churning allows fat molecules to firm up, trapping air and creating that signature light texture.
- Mix-ins and swirls: Add nuts, dark chocolate, or even swirls of homemade fruit compotes after churning to add bursts of flavor and texture.
- Make-ahead tip: The base keeps well in the fridge for up to 2 days, allowing you to prepare in advance for effortless indulgence.
Serving Suggestions
Serve your Ice & Cream Delight scooped into chilled bowls or elegant dessert glasses. Garnish with fresh berries, mint sprigs, or a sprinkle of toasted almonds for crunch. A drizzle of warm caramel sauce or a dusting of cocoa powder can elevate presentation and add complementary flavor notes. For extra flair, present alongside a crisp almond tuile or homemade shortbread for a contrast of textures.

| Nutrient | Per Serving |
|---|---|
| Calories | 280 kcal |
| Protein | 5 g |
| Carbohydrates | 30 g |
| Fat | 16 g |
Exploring the magic within each ingredient and observing how they transform side by side offers a deep appreciation for culinary chemistry. For further reading on dairy science and ice cream crafting,visit The Ice Cream Science Institute. Also,check out our related post on Creamy Dessert Techniques to broaden your sweet repertoire.
Chilling Techniques and Their Impact on Flavor Development
Ice & Cream Delight is not just a sweet treat-it’s a symphony of texture,temperature,and beautifully orchestrated chilling techniques that bring flavors to life in every bite. Understanding these chilling processes can elevate your homemade ice creams and frozen desserts from ordinary to extraordinary, unlocking nuances in taste that linger on the palate.
Prep and Cook Time
Preparation: 20 minutes | Chilling/Freezing: Minimum 6 hours (preferably overnight) | Total Time: Approximately 6 hours 20 minutes
Yield
4 generous servings
Difficulty Level
Medium – Ideal for home cooks looking to deepen their technical skill in frozen desserts
Why Chilling Matters in Ice & Cream Delight
When crafting your Ice & Cream Delight, chilling is the unsung hero. Slow freezing allows ice crystals to form small and uniform, maintaining a lush, creamy texture. Contrast this with rapid freezing techniques, which can trap air differently, creating variations in smoothness and flavor intensity. Resting the base mixture in the fridge before freezing cultivates flavors, allowing ingredients like vanilla or zest to harmonize deeply. this chilling phase is pivotal-it impacts the way fats emulsify and sugars interplay, ultimately sculpting the body and mouthfeel of your creation.
Ingredients
- 2 cups heavy cream, cold
- 1 cup whole milk, cold
- ¾ cup granulated sugar
- 4 large egg yolks
- 1 tablespoon pure vanilla extract
- Pinch of sea salt
- Optional: ½ cup finely chopped roasted nuts or fresh berries
Instructions
- Combine milk and cream: In a medium saucepan, pour the cold heavy cream and whole milk. Warm gently over medium heat until just simmering; do not boil. This warmth helps dissolve the sugar fully.
- Whisk egg yolks and sugar: In a separate bowl, vigorously whisk the egg yolks with the granulated sugar until the mixture is pale and slightly thickened - about 3 minutes.This preps the base for a smooth custard.
- Temper the yolks: Slowly pour about half the warm cream mixture into the yolks while whisking constantly. this prevents the eggs from cooking prematurely.
- Combine and cook: Pour the tempered yolk mixture back into the saucepan and cook over low heat. Stir continuously with a wooden spoon until the custard thickens enough to coat the back of the spoon (around 175°F/80°C). Remove from heat immediately to avoid curdling.
- Strain and chill: Strain the custard through a fine sieve into a clean bowl. Add the vanilla extract and pinch of sea salt. Cover with plastic wrap pressed directly on the surface and refrigerate for at least 4 hours or overnight. Chilling intensifies flavor melding and ensures a smoother final texture.
- Freeze with care: Transfer the chilled custard to your ice cream maker and churn according to the manufacturer’s instructions until soft-serve consistency. If adding mix-ins like nuts or berries, fold them in during the last 5 minutes of churning.
- Firm up: Place churned ice cream in an airtight container and freeze for at least 2 hours to solidify the texture further. This last chilling step is where Ice & Cream Delight truly develops its luscious mouthfeel and flavor bloom.
Tips for Success
- Use the coldest dairy you can find to speed up the chilling phase, which helps trap smaller ice crystals and maximize creaminess.
- For a dairy-free version, substitute heavy cream and milk with full-fat coconut milk and adjust sweetness accordingly.
- Adding a bit of corn syrup or glucose can help reduce iciness and improve scoopability.
- Never rush the chilling steps; resting the custard enhances vanilla and natural sweetness, creating layers of flavor.
- If you don’t have an ice cream maker, pour the custard into a shallow, freezer-safe dish and stir vigorously every 30 minutes as it freezes to break up ice crystals.
Serving Suggestions
Present your Ice & Cream Delight in chilled bowls or rustic waffle cones for a perfect harmony of crunch and cream. Garnish with fresh mint leaves, a dusting of cocoa powder, or a drizzle of homemade berry compote to contrast with the rich texture. For an elegant twist, serve alongside a slice of warm fruit tart or sprinkle with toasted nuts for added depth.

| nutrient | Per Serving |
|---|---|
| Calories | 320 kcal |
| Protein | 5 g |
| Carbohydrates | 28 g |
| Fat | 20 g |
For more on mastering frozen desserts, explore our deep dive into Perfecting Gelato techniques, or deepen your scientific understanding of freezing points with this Science Daily article on ice crystallization in food.
Balancing Sweetness and Saltiness Crafting the Perfect Ice Cream Profile
Ice & Cream Delight: mastering the dance between sweetness and saltiness is truly an art that elevates every spoonful of homemade ice cream. Achieving this harmonious balance transforms a simple frozen treat into a symphony of flavors that delight the palate with depth, contrast, and unforgettable satisfaction. Imagine a luscious scoop where rich creamy sweetness meets a whisper of salt - unlocking layers of complexity while enhancing every ingredient’s essence.
Prep and cook Time
Preparation: 25 minutes | Chilling: 4 hours minimum | Freezing: 6-8 hours or overnight
Yield
About 1 quart (4 generous servings)
Difficulty Level
Medium - perfect for adventurous home cooks eager to explore refined flavor crafting.
Ingredients
- 2 cups whole milk
- 1 cup heavy cream
- 3/4 cup granulated sugar
- 1/2 tsp fine sea salt
- 1 tbsp vanilla bean paste (or 1 vanilla bean, split and scraped)
- 4 large egg yolks
- 1/4 cup light brown sugar, packed
- Pinch of flaky sea salt (for finishing)
Instructions
- Warm the milk and cream: In a medium saucepan over medium heat, combine whole milk and heavy cream.Add vanilla bean paste and heat gently until hot but not boiling, about 5 minutes. Remove from heat.
- Whisk egg yolks and sugars: In a separate bowl, vigorously whisk egg yolks, granulated sugar, light brown sugar, and fine sea salt until the mixture is pale and slightly thickened, about 3 minutes.
- Temper the eggs: Slowly pour about 1 cup of the hot milk mixture into the egg yolk blend while whisking constantly to prevent curdling, then gradually return the combined mixture to the saucepan over low heat.
- Cook custard base: Stir continuously with a heat-resistant spatula until the mixture thickens enough to coat the back of the spatula (170°F/77°C), about 7-10 minutes.Avoid boiling to keep the texture silky.
- cool and strain: Pour the custard through a fine mesh strainer into a clean bowl to remove any cooked egg bits. Stir in the remaining vanilla bean paste if using and sea salt.Allow to cool to room temperature,then cover and refrigerate for at least 4 hours or overnight to develop flavor.
- Freeze the ice cream: pour the chilled custard into your ice cream maker and churn according to the manufacturer’s instructions until thick and creamy. The perfect balance of sweetness and saltiness will become evident as the rich custard freezes into delicate ice crystals.
- Final freeze and finish: Transfer the freshly churned ice cream to a container and sprinkle with a light pinch of flaky sea salt. Freeze for an additional 2-4 hours until firm but scoopable.
- Serve and savor: Scoop into bowls or cones, and watch as your guests delight in the contrast of sweet creaminess and subtle salt punctuations.
Tips for Success
- Perfect custard texture: Use a thermometer to avoid overheating the custard; it should never boil to prevent curdling.
- Salt selection: Fine sea salt dissolves into the base for a foundational balance, while flaky salt on top adds bursts of crunchy saltiness enhancing deeper flavor nuances.
- sweetener swap: Substituting some granulated sugar with honey or maple syrup adds complexity but reduce overall liquid slightly.
- Make-ahead: The custard base can be made 2 days in advance and refrigerated-just ensure it is indeed well covered.
- Texture enhancer: For silkier mouthfeel, add 1 tablespoon of vodka during final mixing (optional and alcohol will evaporate).
Serving Suggestions
Plate your exquisitely balanced ice cream with a sprinkle of toasted chopped nuts or a drizzle of salted caramel sauce for intensified layering. fresh berries provide brightness, while a crisp biscotti or a light wafer cone add contrasting texture. For visual drama, serve with an edible flower or a small flake of sea salt atop each scoop. Pair with a hot espresso or chai for an irresistible contrast of temperatures and taste signatures.

| Nutrient | Per Serving (1/4 quart) |
|---|---|
| Calories | 320 kcal |
| Protein | 6 g |
| carbohydrates | 27 g |
| Fat | 19 g |
For a deeper understanding of how salt influences sweetness perception in desserts, check out this authoritative science resource on taste science and salt. Meanwhile, explore our Vanilla Bean Ice Cream Recipe for another classic variation that highlights purity and richness in frozen delights.
Innovative Pairings and serving Suggestions to Elevate Your Ice Cream Experience
Ice & Cream Delight isn’t just about indulging in a cold, creamy treat; it’s about awakening your palate to unexpected yet harmonious flavor combinations that elevate the humble scoop into a gourmet experience. Drawing inspiration from global dessert traditions and modern culinary creativity, this approach invites you to explore innovative pairings that transform ordinary ice cream into a culinary canvas bursting with textures, aromas, and vivid colors.
Prep and Cook Time
Preparation: 15 minutes
Assembly: 10 minutes
Yield
Serves 4 generous portions
Difficulty Level
Easy-Medium
Ingredients
- 1 pint high-quality vanilla bean ice cream, slightly softened
- 1/2 cup toasted pistachios, roughly chopped
- 1/3 cup tangy passion fruit pulp, fresh or frozen thawed
- 1 tablespoon flaky sea salt
- 2 tablespoons honey (preferably wildflower or acacia)
- 8 thin slices ripe poached pear
- 1 teaspoon freshly grated lemon zest
- Fresh mint leaves for garnish
- Dark chocolate shavings (optional, for contrast)
- Edible flower petals (optional, for presentation)
Instructions
- Prepare the passion fruit drizzle: In a small bowl, gently warm the passion fruit pulp with honey until combined but not hot, about 1 minute in the microwave. Set aside to cool slightly.
- Toast pistachios: On medium heat, toast the shelled pistachios in a dry skillet, stirring constantly until fragrant and lightly browned, about 3-4 minutes. Remove from heat and let cool.
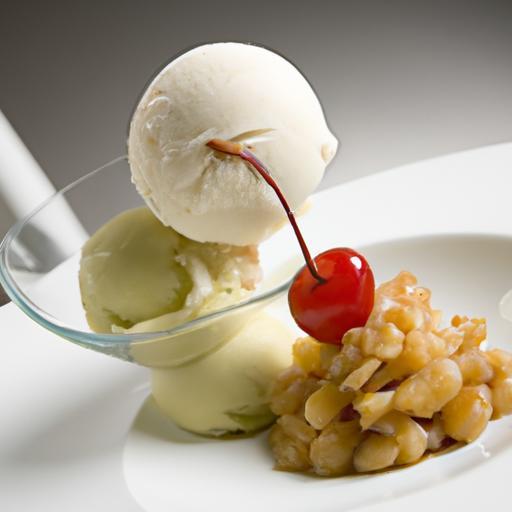
- Plate your canvas: On chilled dessert plates, carefully spread slices of poached pear in a delicate fan shape as the base layer. The sweet yet soft pear texture pairs beautifully with creamy ice cream.
- Scoop ice cream: Using a warmed ice cream scoop, place 2 generous scoops of vanilla bean ice cream atop the pear slices. The warmth from the scoop will help create perfectly round, smooth servings.
- Drizzle and sprinkle: Drizzle the passion fruit and honey mixture evenly over the ice cream, allowing some to cascade naturally onto the plate. Sprinkle the toasted pistachios and flaky sea salt evenly to add crunch and depth.
- Finish with zest and garnish: Grate fresh lemon zest directly over the ice cream for a citrusy brightness. Garnish with fresh mint leaves and optional chocolate shavings or edible petals for a visually stunning presentation.
- Serve immediately: Encourage guests to enjoy immediately for the best textural contrast of cold ice cream, crunchy nuts, juicy pear, and vibrant passion fruit sweetness.
Tips for Success
- Ice cream texture: Slightly soften your ice cream before plating.It makes scooping easier and invites the flavors to meld.
- Pear variation: If you cannot source poached pears, caramelized apples or fresh figs also create a divine base.
- Passion fruit substitute: Fresh mango or a tangy berry coulis can provide a similar bright and tropical flavor.
- Crunch element: Substitute pistachios with toasted almonds or hazelnuts for a different nutty profile.
- Make-ahead: prepare toasted nuts and passion fruit drizzle a day in advance, stored separately to retain freshness.
Creative Serving Suggestions to Elevate Your Ice Cream Experience
to truly embody the Ice & Cream Delight spirit, present your creation in an artistic style. Consider using shallow glass bowls so the layers are visible, or rustic wooden plates for a natural aesthetic. Adding a sprinkle of edible gold dust over the nuts instantly uplifts the presentation for special occasions. Lightly torching the zest before plating can impart subtle smoky undertones, surprising the palate.
For a playful texture twist, pair each serving with a crisp tuile cookie or a thin almond biscotti, perfect for dipping. If you prefer a chilled drink pairing, a sparkling elderflower lemonade complements the cool cream and bright passion fruit beautifully.
experiment also with temperature contrast by serving alongside a warm spiced fruit compote-figs stewed with cinnamon and star anise add complexity and depth to the dessert’s profile.
| Nutrient | Per Serving |
|---|---|
| Calories | 320 kcal |
| Protein | 5 g |
| Carbohydrates | 38 g |
| Fat | 16 g |

To deepen your knowledge of flavor layering and dessert plating techniques, check out our detailed guide on prosperous plating methods. For an exploration of passion fruit’s fascinating nutritional benefits, visit Nutrition.org.
Q&A
Q&A: Ice & Cream Delight – Exploring the Sweet Science Behind It
Q1: What makes ice cream such a fascinating treat from a scientific outlook?
A1: Ice cream is a marvelous concoction of physics, chemistry, and artistry. At its core, it’s an emulsion-a delicate balance of fat, water, air, and sugar. the magic lies in how these ingredients interact under freezing temperatures to create that creamy texture and delightful mouthfeel. Tiny ice crystals form, but the presence of fat and sugar slows their growth, preventing a hard, icy block and instead producing a smooth, luscious scoop each time.
Q2: Why is the process of churning so vital in making ice cream?
A2: Churning is like the rhythmic dance that keeps ice cream from turning into a solid iceberg. By continuously stirring as the mixture freezes, churning incorporates air bubbles that lighten the texture-a process called overrun-and breaks up ice crystals, keeping the texture soft and pliable. Without it, you’d end up with a dense, icy slab rather than a fluffy, creamy delight.
Q3: How does sugar influence the texture and flavor of ice cream?
A3: Sugar is much more than a sweetener; it’s a texture architect.By lowering the freezing point of the mixture, sugar keeps the ice cream softer at typical freezer temperatures. This means your scoop remains scoopable rather than rock hard. additionally, sugar enhances flavor perception and balances any bitterness or tartness, allowing the other ingredients to shine.
Q4: What role does fat play in the creamy indulgence of ice cream?
A4: fat is the indulgent whisper in every bite-it coats your tongue and provides a rich, smooth sensation. It stabilizes the air bubbles and emulsifies the mixture, which helps maintain a consistent texture. The more fat present (within reason), the silkier and more velvety the ice cream feels, transforming each spoonful into a luxurious experience.
Q5: Can the science behind ice cream help in creating dairy-free or vegan versions?
A5: absolutely! The challenge in dairy-free ice creams is mimicking the fat content and creamy texture of traditional dairy. Plant-based fats from coconut, almond, or avocado can be used to replicate the mouthfeel.Science steps in by balancing sugars, stabilizers, and emulsifiers to keep the texture smooth and prevent large ice crystals, ensuring the vegan delight is just as luscious as its dairy counterpart.
Q6: Why do some ice creams feel icier or grainier than others?
A6: That’s mainly a chilly tale of ice crystal size! If the freezing process is slow or the mixture isn’t churned well, large ice crystals form, resulting in a grainy or icy texture. Faster freezing and continuous churning encourage smaller crystals, yielding that creamy texture we crave. Additionally, stabilizers like guar gum and xanthan gum help keep crystals tiny and evenly distributed.
Q7: How does temperature management impact the perfect scoop?
A7: Temperature is the gatekeeper of ice cream’s texture. If it’s too cold, the ice cream freezes too hard, making scooping a workout and dulling flavors. Too warm, and it melts too quickly, losing that firm-then-creamy experience. Ideally, storing ice cream at about -12°C to -15°C preserves its structure and flavor balance, giving you the perfect treat every time.
Q8: What’s the secret behind the vibrant flavors in artisanal ice creams?
A8: artisanal ice cream makers combine science and creativity, using high-quality, often natural ingredients that are carefully balanced for flavor intensity and stability. Volatile compounds that carry aromas can be lost if heated excessively, so gentle preparation preserves freshness. Moreover, pairing certain flavors with complementary fat content enhances the overall sensory experience, creating a taste adventure in every scoop.
Q9: How does air incorporation change the ice cream experience?
A9: Air is the invisible ingredient that lightens ice cream’s texture and influences what’s called its overrun-the increase in volume from air whipped into the base. Higher air content means a lighter, fluffier ice cream, while lower air content produces a denser, richer scoop. The perfect balance ensures a creamy consistency that melts delightfully on the tongue.
Q10: Can understanding the science of ice cream help home cooks make better frozen treats?
A10: Definitely! Knowing how fat, sugar, temperature, and churning interplay empowers home cooks to tweak recipes and techniques for superior results. for example, chilling the base thoroughly before churning or using the right sugar-to-fat ratio can elevate homemade ice cream from simply tasty to irresistibly smooth and creamy. Science is the secret ingredient that unlocks endless possibilities in your freezer!
To Wrap It Up
As we close the chapter on the fascinating world of Ice & Cream Delight, it’s clear that this beloved treat is much more than just a sweet indulgence.Behind every velvety scoop lies a delicate dance of science – from the precise balance of ingredients to the artistry of temperature and texture control. Whether you savor it as a cooling escape on a hot day or a comforting dessert to end a meal,understanding the sweet science elevates the experience to something truly extraordinary. So next time you dive into a bowl of ice cream, remember: you’re not just enjoying a dessert, you’re partaking in a symphony of chemistry and creativity – a delicious celebration of science in every delightful bite.