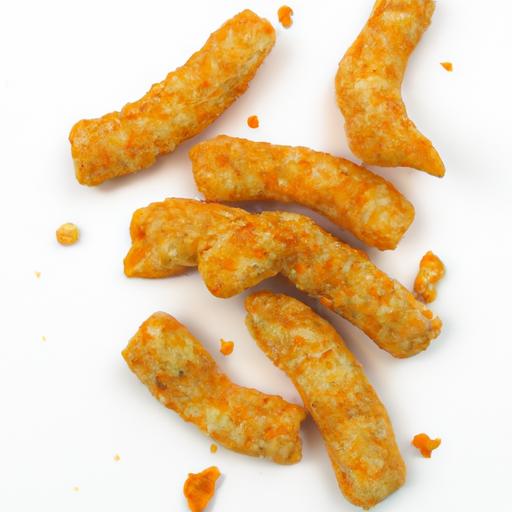
There’s something undeniably satisfying about biting into chicken tenders that are perfectly crispy on the outside, tender and juicy on the inside-a golden symphony of textures that delights every craving. But achieving that flawless crunch without deep-frying can feel like a culinary quest. Enter the oven-bake method at 400°F: a game-changing technique that promises all the crispy goodness with less oil and less mess. In this guide, we’ll unravel the secrets to mastering oven-baked chicken tenders, exploring tips, tricks, and step-by-step instructions to help you serve up irresistibly crunchy, oven-roasted bites every time. Say goodbye to soggy coatings and hello to a healthier, hassle-free crunch that’s ready whenever hunger calls.
Choosing the Right Coating for Ultimate Crunch
Perfectly Crispy: Oven-Bake Chicken Tenders at 400°F Guide bring an amazing home-cooked experience that balances flavor, texture, and ease seamlessly. Achieving that irresistible crunch without deep frying hinges on selecting the ideal coating-an aspect often overlooked but utterly transformative. Whether you’re craving a golden crust with a delicate crumb or a bold, extra-crispy bite, your choice of coating sets the tone for every tender.
Start by envisioning your crunch: panko breadcrumbs are a classic champion, offering a light, airy crispness thanks to their flaky texture. They brown beautifully at 400°F, creating an inviting crust that stays satisfyingly brittle with each bite. If you want earthier flavor and crunch, crushed cornflakes provide an exciting option, adding a slightly sweet undertone and extra texture variance.
For those experimenting with gluten-free options, almond flour mixed with grated parmesan cheese crafts a savory, nutty coat that crisps perfectly while introducing a subtle depth of flavor. Alternatively,a mix of seasoned flour and finely chopped nuts can up the crunch factor and provide a gourmet touch. Each coating type has its unique response to the oven’s heat, so adjusting your bake time by just a few minutes can ensure your tenders emerge flawlessly crisp without drying out inside.
Prep and Cook Time
- Preparation: 15 minutes
- Cooking: 18-20 minutes at 400°F
- Total Time: 35 minutes
Yield
Serves 4, approximately 12 chicken tenders
Difficulty Level
Easy – perfect for home cooks seeking a fuss-free crunchy delight
Ingredients
- 1 lb chicken tenders, trimmed and patted dry
- 1 cup panko breadcrumbs (or substitute with crushed cornflakes or almond flour mixture)
- ½ cup all-purpose flour, sifted
- 2 large eggs, beaten with 1 tablespoon water
- 1 teaspoon smoked paprika
- 1 teaspoon garlic powder
- ½ teaspoon onion powder
- ½ teaspoon salt
- ¼ teaspoon black pepper
- Cooking spray or 2 tablespoons olive oil for brushing
Instructions
- Preheat your oven to 400°F and line a baking sheet with parchment paper or a silicone mat for easy cleanup and even baking.
- Prepare the dry mix: In a shallow dish, combine the flour, smoked paprika, garlic powder, onion powder, salt, and pepper. mix thoroughly.
- Set up your dredging stations: Place the beaten eggs in a second shallow bowl, and the panko breadcrumbs in a third. If using a nut or alternative coating, mix any additional seasonings or cheese now.
- Coat each chicken tender: First dredge in the flour mixture, shaking off excess. Dip into the egg wash, then press firmly into the breadcrumb mixture until completely coated.
- Arrange tenders on the baking sheet in a single layer, leaving space between each piece to ensure the heat circulates and crisps every edge perfectly.
- Lightly spray or brush olive oil over the coated tenders. This step encourages that golden crunch and deep browning while keeping the interior juicy.
- Bake for 18-20 minutes, flipping halfway through for even crispness. Check the internal temperature reaches 165°F for food safety.
- Remove from oven and let rest for 3 minutes before serving to lock in juices and crunch.
Tips for Success
- Moisture balance: Make sure chicken tenders are patted dry with paper towels before coating to help the breading adhere better and crisp up brilliantly.
- Customize the crunch: Mix ¼ cup Parmesan cheese into your panko for a savory twist or add crushed red pepper flakes for heat.
- Make-ahead: Coat tenders and refrigerate them uncovered for up to 2 hours before baking-this dries the surface slightly for extra crunch.
- Check oven hotspots: Rotate your baking sheet halfway to prevent uneven browning.
- Alternative coatings: For gluten-free, replace flour with rice flour and use almond meal or gluten-free panko substitutes.
Serving Suggestions
Serve these flavorful chicken tenders with a side of creamy ranch dressing or spicy honey mustard for a dipping duo that amplifies every bite.
Garnish with fresh parsley or chopped chives for a pop of color and fresh aroma. Pair with roasted sweet potato fries or a crisp, tangy coleslaw to balance textures and flavors.
For a kid-friendly twist, include carrot and celery sticks for added crunch and nutrition, making this dish as wholesome as it is delicious.
Nutritional Data
| nutrient | Per Serving |
|---|---|
| Calories | 320 kcal |
| Protein | 35 g |
| Carbohydrates | 18 g |
| Fat | 9 g |

Mastering Oven Temperature and Timing for Crispy Perfection
Perfectly crispy oven-bake chicken tenders at 400°F offer a harmonious blend of golden crunch and juicy tenderness that every home cook dreams of achieving.The magic lies not only in the seasoning but in mastering the oven temperature and timing-to coax out that irresistible crisp without drying out the meat. Whether you’re craving a cozy family dinner or an elegant appetizer for guests,precision in this stage transforms simple tenders into a crave-worthy culinary triumph.
Prep and Cook Time
- Preparation: 15 minutes
- Cooking: 20 minutes
- Total Time: 35 minutes
Yield
Serves 4 (approximately 12 tenders)
Difficulty Level
Easy - perfect for beginners but impressively delicious for all skill levels
ingredients
- 1 lb boneless, skinless chicken tenders
- 1 cup all-purpose flour, sifted
- 2 large eggs
- 1 tbsp water
- 1 ½ cups panko breadcrumbs
- 1 tsp garlic powder
- 1 tsp smoked paprika
- ½ tsp freshly ground black pepper
- 1 tsp kosher salt
- Cooking spray or light olive oil mist
Instructions
- Preheat your oven to 400°F. Position a wire rack on a baking sheet to allow hot air circulation for ultimate crispiness.
- Set up a dredging station: place the flour in one shallow bowl; whisk eggs with water in a second; and combine panko,garlic powder,smoked paprika,salt,and pepper in a third.
- Pat each chicken tender dry with paper towels-this step is essential to help the coating adhere properly.
- Coat each tender thoroughly in flour, shaking off the excess. Then, dip into the egg wash, and finally roll evenly in the seasoned panko mixture. Press gently to adhere the crumbs.
- Arrange the coated tenders neatly on the wire rack. Lightly mist them with cooking spray to encourage a golden crust.
- Bake for 18-20 minutes, turning halfway through to ensure uniform browning. The tenders should be an inviting golden brown, and the internal temperature must reach 165°F.
- once baked, let the tenders rest on the rack for a couple of minutes to retain their crisp exterior.
Chef’s Notes: Tips for Success
- Temperature precision: Maintaining a steady 400°F is key. Lower temps risk a soggy crust; higher temps can dry out the chicken.
- Wire rack advantage: Baking on a rack prevents steaming and helps air circulate, vital for crispiness on all sides.
- Panko magic: Use fresh, flaky panko for an ultra-crunchy texture. for gluten-free options, substitute with gluten-free breadcrumbs.
- Make-ahead: Prep coated tenders and refrigerate up to 2 hours before baking. Just mist with cooking spray right before the oven.
- Oil spray swap: Use avocado oil mist for higher smoke point and subtle flavor.
- Internal doneness: Always check with a meat thermometer to avoid undercooked poultry.
Serving Suggestions
Present these perfectly crispy chicken tenders alongside vibrant dipping sauces like a tangy honey mustard, smoky chipotle aioli, or classic ranch. Garnish with freshly chopped parsley and a wedge of lemon to brighten each bite. Pair with crunchy celery sticks or a fresh garden salad for a balanced plate. For an indulgent twist, serve atop creamy mashed potatoes or sweet potato fries.

| Nutrient | Per Serving |
|---|---|
| Calories | 320 kcal |
| Protein | 35 g |
| Carbohydrates | 18 g |
| Fat | 9 g |
For a detailed guide on complementary sides, check out our crispy sweet potato fries recipe. To deepen your understanding of cooking temperatures for poultry, visit the USDA Food Safety and Inspection Service.
Essential Tips for Juicy and Flavorful Chicken Tenders
Perfectly crispy oven-bake chicken tenders at 400°F can transform a simple weeknight meal into something truly memorable. Achieving that ideal balance of juicy tenderness inside and a golden, crunchy crust outside starts with a few strategic techniques anyone can master. From proper seasoning to baking tricks, these tips unlock the secret to chicken tenders that stay moist and explode with flavor every single time.
Start by choosing fresh, high-quality chicken tenders-the naturally tender strips that cook quickly and uniformly. Marinating them briefly in a simple blend of buttermilk or yogurt with spices not only tenderizes the meat but also infuses it deeply with flavor, setting the stage for an irresistible bite. Next, the breading process is key: incorporate a mix of panko and seasoned flour to ensure that signature crunch without the greasiness of conventional frying.
When baking at 400°F, preheat your oven thoroughly and use a wire rack set over a baking sheet to allow hot air to circulate around the tenders. This technique helps to crisp every inch evenly while preventing sogginess from steam trapped underneath.Lastly, resist the urge to overcrowd the pan, as space is essential for perfect crispness.
With just a little attention, you’ll have tender pieces that are delightfully juicy inside, with a perfectly crispy crust that’s bursting with flavor-truly a winner for busy cooks and picky eaters alike!
Prep and Cook Time
- Preparation: 15 minutes
- Marinating Time: 30 minutes to 1 hour (optional but recommended)
- Cook Time: 18-20 minutes
Yield
Serves 4 (about 16 tenders)
Difficulty Level
Easy – perfect for beginner cooks and busy weeknights
Ingredients
- 1.5 lbs chicken tenders, trimmed
- 1 cup buttermilk (for marinating)
- 1 cup all-purpose flour, sifted
- 1 cup panko breadcrumbs
- 1 teaspoon garlic powder
- 1 teaspoon smoked paprika
- 1/2 teaspoon onion powder
- 1/2 teaspoon salt
- 1/2 teaspoon freshly ground black pepper
- 2 large eggs, beaten
- Cooking spray or olive oil spray, for baking
Instructions
- Marinate the tenders: Place chicken tenders in a bowl and pour in buttermilk. Cover and refrigerate for 30 minutes to 1 hour to tenderize and add subtle tang.
- Prepare the breading stations: In one shallow dish, combine flour, garlic powder, smoked paprika, onion powder, salt, and pepper. In a second dish, whisk the eggs. In a third, place the panko breadcrumbs.
- Coat each tender: Remove tenders from the buttermilk, letting excess drip off. dredge each piece in the seasoned flour, then dip into the egg wash, and finally press it firmly into the panko breadcrumbs. Repeat for all tenders.
- Arrange for baking: preheat your oven to exactly 400°F and position a wire rack over a rimmed baking sheet. Place the breaded tenders in a single layer on the rack, ensuring they do not touch-this helps air circulation for an even crisp.
- Lightly spray the tenders: Use cooking spray or olive oil spray to mist the tenders lightly. this step ensures a beautifully golden crust without frying.
- Bake: Place the baking sheet in the oven and bake for 18-20 minutes, flipping the tenders halfway through. Bake until the exterior is crisp and golden and the internal temperature reaches 165°F.
- rest and serve: Let tenders rest on the rack for 3-5 minutes after baking to lock in juices before serving.
Tips for Success
- For extra juiciness: Never skip the buttermilk soak-it tenderizes and adds moisture, keeping chicken succulent after baking.
- Mix textures: Use half panko and half finely crushed cornflakes for a dynamic crunch.
- Season boldly: Feel free to add cayenne or your favorite spice rub to the flour mix for a personalized kick.
- make ahead: Prepare breaded tenders on a sheet and freeze them flat; bake directly from frozen, adding a few extra minutes to cook time.
- don’t overcrowd the pan: Overlapping tenders trap steam and cause sogginess instead of crispness.
Serving Suggestions
For an irresistible presentation, arrange chicken tenders on a rustic wooden board or colorful platter. Garnish with freshly chopped parsley or chives to add a shining contrast. Offer a trio of dipping sauces-cool ranch, spicy honey mustard, or a smoky chipotle aioli-to delight every palate.
Pair with crunchy celery sticks, a crisp green salad, or sweet potato fries for a balanced, vibrant meal. For a fun twist at gatherings, serve alongside mini slider buns and coleslaw for DIY chicken sandwiches.
Nutritional Information (Per Serving)
| Calories | Protein | Carbs | Fat |
|---|---|---|---|
| 320 | 35g | 18g | 10g |
For an extended dive into chicken recipes and poultry preparation techniques, visit our Ultimate Guide to Juicy Chicken. For evidence-based tips on baking proteins perfectly at high temperatures, check out Food Network’s Cooking Proteins Science.
Serving Suggestions and Creative Dipping Sauces to Elevate Your Dish
Perfectly Crispy: Oven-Bake Chicken Tenders at 400°F guide
Perfectly Crispy oven-bake chicken tenders at 400°F offer a foolproof way to enjoy juicy, tender chicken with a golden, crunchy coating - all without the need for deep frying.This method brings out the best of classic comfort food with a healthier twist, making it a weeknight favorite that pleases both kids and adults. Inspired by countless kitchen experiments and family dinners, this guide will get you baking the crispiest tenders every time while keeping cleanup minimal.
Prep and Cook Time
- Preparation: 15 minutes
- Cooking: 20 minutes
- total Time: 35 minutes
Yield
Serves 4 (about 12 medium-sized tenders)
Difficulty Level
Easy – perfect for home cooks of all skill levels
Ingredients
- 1 lb chicken tenders, trimmed
- 1 cup all-purpose flour, sifted
- 2 large eggs
- 1/2 cup buttermilk
- 1 1/2 cups panko breadcrumbs
- 1 tsp smoked paprika
- 1 tsp garlic powder
- 1/2 tsp onion powder
- 1/2 tsp dried oregano
- 1/2 tsp salt
- 1/4 tsp freshly ground black pepper
- Cooking spray or avocado oil spray, for coating
Instructions
- Preheat your oven: Set it to 400°F (204°C) and line a large baking sheet with parchment paper or a silicone baking mat for easy cleanup.
- Prepare the dredging stations: In one shallow bowl, combine the flour with smoked paprika, garlic powder, onion powder, oregano, salt, and pepper. In a second bowl, whisk together the eggs and buttermilk.In a third bowl, place the panko breadcrumbs.
- Coat the chicken tenders: one by one, dip each tender into the seasoned flour, shaking off excess, then plunge into the egg mixture, and finally press firmly into the panko to ensure a thick, even crust. Lay them on the prepared baking sheet with a small gap between each piece.
- Spray liberally: Give each coated tender a light but thorough spray of cooking oil. This step is key to achieving that golden crispy exterior while baking.
- Bake: Place the tray in the preheated oven and bake for 18-20 minutes. Halfway through,flip each tender and spray again to help maintain crispiness on both sides.
- Rest and serve: Remove from oven once tenders are crisped, golden, and cooked through (internal temp 165°F). Let them rest 3 minutes before serving for optimal juiciness.
Tips for Success
- Double-dip technique: For ultra-crunchy tenders, repeat the egg and panko dredging step before baking.
- Buttermilk substitute: Use plain yogurt or milk mixed with 1 tsp lemon juice if buttermilk isn’t on hand.
- Keep it dry: Pat chicken tenders dry before dredging for better adhesion and crispier results.
- Make-ahead: Coat your chicken tenders up to 24 hours ahead and keep them covered in the fridge. Bring to room temperature before baking for even cooking.
- Crispiness hack: Elevate the pan with a wire rack so hot air circulates around tenders, enhancing their crunch.
Imagine serving your perfectly crispy chicken tenders piled high on a rustic wooden platter, garnished with fresh parsley and a sprinkle of flaky sea salt for added texture and aroma. these golden beauties pair exquisitely with a crisp homemade slaw – thinly shredded cabbage, carrots, and a tangy apple cider vinaigrette create a refreshing contrast that brightens every bite.
For a level-up dining experience, offer a lineup of creative dipping sauces that take your chicken tenders from simple snack to gourmet centerpiece. Try a zesty Chipotle Lime Aioli (blend mayo, lime juice, smoked chipotle powder, garlic, and a touch of honey) which delivers smoky, spicy, and tangy notes. Alternatively, a cool Avocado Cilantro Dip brightens the palate, or a classic Honey Mustard Sauce offers sweet and sharp balance that’s always a crowd-pleaser.
For those seeking a more adventurous twist, a creamy Buffalo Blue Cheese Dip - a mixture of crème fraîche, crumbled blue cheese, a splash of hot sauce, and lemon zest – brings bold decadence. Keep a bowl of crisp celery sticks and crunchy carrot batons on the side to complement the range of flavors and add textural harmony.
Plating tip: drizzle a little extra sauce directly onto the platter for visual appeal, and serve the tenders on a bed of fresh greens like arugula or baby spinach to add pops of color and freshness.Don’t forget to include lemon wedges for a fast squeeze of brightness just before eating.

| Nutrient | Per Serving |
|---|---|
| Calories | 320 |
| Protein | 28g |
| Carbohydrates | 22g |
| fat | 11g |
Explore more crispy chicken inspiration in our collection of crispy chicken recipes or learn about the science of baking at serious Eats.
Q&A
Q&A: Perfectly Crispy - Oven-Bake Chicken Tenders at 400°F Guide
Q1: Why bake chicken tenders at 400°F instead of a lower or higher temperature?
A1: Baking chicken tenders at 400°F strikes the perfect balance between cooking speed and crispiness. This temperature is hot enough to create a golden, crunchy coating without drying out the juicy chicken inside. Lower temps might make the tenders soggy or undercooked, while higher temps risk burning the crust before the chicken cooks through.
Q2: how can I ensure my chicken tenders come out crispy without frying?
A2: The key lies in a few simple tricks-first, lightly pat the chicken dry before coating to help the breading stick better. Use a combination of panko breadcrumbs and a touch of oil or melted butter in your breading mix to encourage crispness. Baking on a wire rack set over a baking sheet allows hot air to circulate around each tender, promoting an even, crunchy exterior.
Q3: Is it necessary to flip the chicken tenders while baking?
A3: While you can bake tenders without flipping, turning them halfway through the cooking process helps to develop an evenly crispy crust on all sides. This ensures no side stays soggy and maintains that irresistible crunch.
Q4: How long should chicken tenders bake at 400°F?
A4: Typically, 15 to 20 minutes is ideal. However, thickness matters-thicker tenders may need a few extra minutes. Use a meat thermometer to check that the internal temperature reaches 165°F for safe, juicy results.
Q5: What’s a foolproof breading method for maximum crunch?
A5: The classic three-step breading method works wonders: dust chicken strips lightly in flour (seasoned with salt and pepper), dunk them in beaten eggs, then coat generously with panko crumbs mixed with your favorite spices. Press the crumbs gently onto the chicken to avoid any bare spots.Q6: Can I prep chicken tenders ahead of time for baking later?
A6: Absolutely! You can coat your tenders and arrange them on a baking sheet, then cover and refrigerate them for up to 24 hours. When ready, just pop them in the preheated oven at 400°F. This makes meal prep a breeze without compromising crispiness.
Q7: What are some creative seasoning ideas for the breading?
A7: Boost flavor by mixing in smoked paprika, garlic powder, cayenne pepper, or Italian herbs into your breadcrumb blend. For a zesty kick, add lemon zest or a pinch of chili flakes. It’s a simple way to make oven-baked tenders uniquely yours.
Q8: How can I make these tenders kid-friendly while keeping them flavorful?
A8: Stick to mild, familiar spices like garlic powder, onion powder, and a little parsley. Avoid overly spicy seasonings, and serve with kid-approved dips like honey mustard, ranch, or a homemade ketchup blend.
Q9: Is it possible to make a gluten-free version of crispy chicken tenders?
A9: Yes! Swap regular flour and breadcrumbs for gluten-free alternatives such as rice flour and gluten-free panko or crushed cornflakes. The breading technique and baking temperature remain the same for that perfect crunch.
Q10: What sides pair best with crispy oven-baked chicken tenders?
A10: classic combos like crisp carrot sticks and celery with ranch dip, tangy coleslaw, or a refreshing cucumber salad balance the richness of the tenders. For a heartier meal, roasted sweet potatoes or a light quinoa salad complement the texture beautifully.
Let this Q&A be your trusty guide to mastering perfectly crispy oven-baked chicken tenders at 400°F – all the crunch, none of the fuss!
The Conclusion
With these tips in your culinary arsenal, achieving perfectly crispy oven-baked chicken tenders at 400°F is no longer a fleeting dream but a crispy, golden reality. Whether you’re cooking for a family dinner or a casual snack, this method promises tender, flavorful bites with a satisfying crunch every time. So preheat that oven, gather your favorite spices, and get ready to savor chicken tenders that are as wholesome as they are crave-worthy-because perfection is just a bake away.