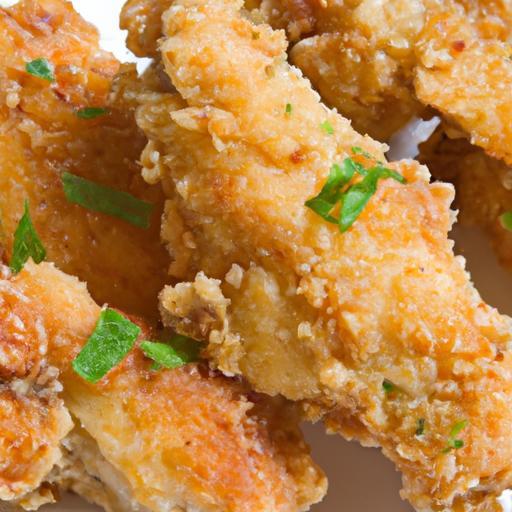
There’s something undeniably satisfying about biting into chicken tenders that boast a golden, perfectly crispy exterior while remaining tender and juicy inside. Traditionally achieved through deep frying, this coveted texture frequently enough comes with the trade-off of extra oil and mess.But what if you could achieve that same irresistible crunch without the grease or fuss? Enter the magic of oven-baking at 400°F-a simple, healthier method that transforms everyday chicken tenders into a crispy delight straight from your oven. In this article, we’ll explore how to master this technique, unlocking tips and tricks to help you create the ultimate crave-worthy chicken tenders with ease. Say goodbye to soggy or dry bites and hello to perfectly crispy perfection every time.
Choosing the Ideal Coating for Maximum Crispiness
Perfectly Crispy: oven-Baking Chicken Tenders at 400°F begins with choosing the ideal coating-this step can truly make or break your crispy ambitions. Nothing compares to a coating that locks in moisture yet crisps to a golden, irresistible crunch. Whether you crave a classic Southern-style crust or prefer a lighter,nutty texture,the right coating combination ensures every bite delivers maximum crispiness without the excess oil of frying.
To achieve that coveted crisp texture, the magic lies in balancing moisture and texture. Start with a dry flour base seasoned with aromatic spices like smoked paprika, garlic powder, and a pinch of cayenne to add depth. The flour acts as a dry barrier, encouraging browning while the chicken tender remains juicy inside. But don’t stop there-layering flavors through a wet dip like buttermilk (or a dairy-free substitute for those with sensitivities) guarantees the coating adheres smoothly, creating a craggy crust that crisps beautifully in the oven.
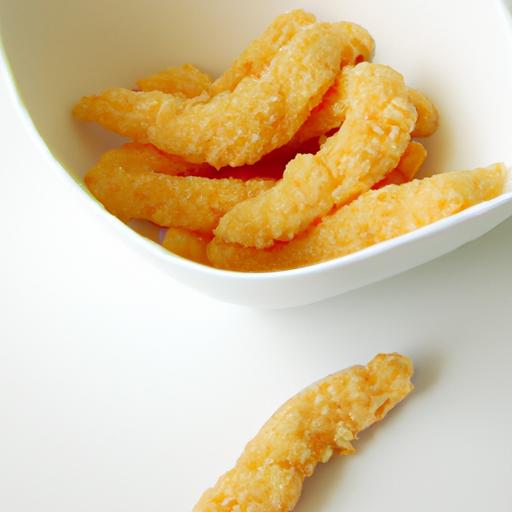
For an added crunch that sings with texture, try incorporating crushed cornflakes, panko breadcrumbs, or finely chopped almonds into the coating mix. These ingredients introduce irregular surfaces that crisp faster and provide a satisfying snap.
Also, lightly spraying the coated tenders with oil before baking enhances browning, simulating the texture of deep-fried chicken but with far less fat.
Prep and Cook Time
- Prep time: 15 minutes
- Cook Time: 20 minutes
- Total Time: 35 minutes
Yield
Serves 4 (about 12 chicken tenders)
Difficulty Level
Easy – Perfect for home cooks seeking crispy success without frying
Ingredients
- 1 lb chicken tenders, trimmed
- 1 cup all-purpose flour, sifted
- 1 teaspoon smoked paprika
- 1 teaspoon garlic powder
- ½ teaspoon cayenne pepper (optional, for mild heat)
- 1 teaspoon salt
- ½ teaspoon freshly ground black pepper
- 1 cup buttermilk (or plain yogurt thinned with milk)
- 1½ cups panko breadcrumbs or crushed cornflakes
- Cooking spray or olive oil spray, to coat
Instructions
- Preheat your oven to 400°F (200°C). Line a large baking sheet with parchment paper or a wire rack set atop a baking sheet for even crisping.
- In a shallow bowl, combine flour, smoked paprika, garlic powder, cayenne pepper, salt, and black pepper. Whisk together to evenly distribute spices.
- Pour the buttermilk into a separate bowl. In a third bowl, place the panko breadcrumbs or crushed cornflakes.
- Dip each chicken tender first into the seasoned flour, shaking off excess. Next, fully immerse in the buttermilk, letting excess drip off.
- Coat the chicken thoroughly with the panko or cornflake crumbs, pressing gently to ensure the coating sticks well. Place coated tenders onto your prepared baking sheet or wire rack.
- Lightly spray the tops of the tenders with cooking spray or olive oil; this step encourages that golden finish.
- Bake in the preheated oven for 18-20 minutes, flipping halfway through. Watch for edges turning beautifully crisp and an internal temperature of 165°F (75°C) for perfectly cooked tenders.
- remove from oven and let rest for 3 minutes before serving to allow juices to redistribute and coating to firm up further.
Tips for Success:
- Layering textures: Combining flour with panko or crushed cornflakes creates surface irregularities, which crisp up faster and hold crunch better then flour alone.
- Spice infusion: Infuse your flour with spices before dredging to ensure every bite bursts with flavor-paprika adds smokiness,garlic powder deepens richness,and cayenne offers a subtle kick.
- Wet dip alternatives: Buttermilk tenderizes the chicken and helps the coating grab tight, but you can substitute with a mixture of plain yogurt and a splash of milk for a similar affect.
- avoid soggy coatings: Use a wire rack on the baking sheet rather than placing tenders directly on parchment to encourage air circulation and even crisping.
- Oil submission: A light spritz of oil before baking mimics deep-fried textures without the extra calories or mess.
- Make ahead: Coat your tenders up to 2 hours ahead, keep refrigerated on the baking rack, then bake just before serving for convenient entertaining.
Serving suggestions
Serve your perfectly crispy chicken tenders with a side of zesty homemade ranch dressing or a tangy honey mustard dip. Garnish with freshly chopped parsley or chives to add a pop of color and fresh herbaceous note. Pair with crisp green salads, baked sweet potato fries, or crunchy coleslaw for the ultimate balanced plate that dazzles both in taste and texture.
| Nutrient | Per Serving |
|---|---|
| Calories | 310 |
| protein | 32g |
| Carbohydrates | 18g |
| Fat | 10g |

For further inspiration on oven-baked crispy recipes, see our article on Crisp Air Fryer Favorites. For detailed scientific insight into the Maillard reaction that gives these tenders their signature golden color and flavor, visit ScienceDaily.
Mastering Oven Temperature and Timing for Tender Perfection
Oven-baking chicken tenders at 400°F is a game changer for anyone craving perfectly crispy and tender bites without the mess of frying. This technique infuses the chicken with a golden crunch while locking in juicy flavors, creating an irresistible balance that’s both wholesome and comforting. The high heat ensures a rapid cook that seals in moisture, resulting in tenders that stay succulent on the inside yet boast a satisfyingly crisp exterior-ideal for weeknight dinners, family gatherings, or a fun snack anytime.
Prep and Cook Time
- Readiness: 15 minutes
- Cooking: 20 minutes
- Total time: 35 minutes
Yield
Serves 4 (approximately 16 tenders)
Difficulty Level
Easy
Ingredients
- 1 ½ lbs chicken tenders, trimmed and patted dry
- 1 cup all-purpose flour, sifted
- 2 large eggs, beaten
- 1 ½ cups panko breadcrumbs for extra crunch
- ½ cup finely grated Parmesan cheese
- 1 teaspoon paprika
- 1 teaspoon garlic powder
- ½ teaspoon onion powder
- ½ teaspoon salt
- ½ teaspoon freshly ground black pepper
- Cooking spray or 2 tablespoons olive oil
Instructions
- Preheat your oven to 400°F (200°C). Line a large baking sheet with parchment paper or a non-stick silicone mat to ensure even cooking and easy cleanup.
- Prepare the dredging stations: Place the flour in a shallow bowl. In a second bowl, whisk the eggs until smooth. In a third bowl, combine the panko breadcrumbs, Parmesan cheese, paprika, garlic powder, onion powder, salt, and pepper.
- Coat each chicken tender: First, dust the tender lightly in flour, shaking off excess. Then dip it into the beaten egg, allowing the excess to drip back into the bowl. press firmly into the breadcrumb mixture, coating evenly for that coveted crunch.
- Arrange tenders on the baking sheet in a single layer without overlapping.For an extra crispy finish,lightly spray the tenders with cooking spray or drizzle with olive oil to promote golden browning.
- Bake uncovered in the preheated oven for 18-20 minutes, flipping halfway through to ensure both sides develop a consistent, crispy texture. The chicken is done when the coating is a deep golden brown and the internal temperature reaches 165°F (74°C).
- Remove from oven and let rest for 5 minutes; this final step helps the juices redistribute and keeps the tenders tender inside.
Tips for Success
- Consistent size: Keep your chicken tenders uniform in thickness for even cooking-pound the thicker pieces gently if necessary.
- Double dredge: For ultra-crispy tenders, repeat the egg and breadcrumb coating once before baking.
- avoid overcrowding: Give each tender enough space on the tray; this prevents steaming and ensures crispiness.
- Make-ahead option: Prepare breaded tenders a few hours in advance,store them on the baking sheet covered with plastic wrap in the fridge,then bake before serving for fresh crispiness.
- Substitutions: Swap Parmesan for nutritional yeast for a dairy-free option that still delivers umami depth.
Serving Suggestions
Serve these perfectly crispy chicken tenders with an array of dipping sauces like honey mustard, tangy ranch, or spicy sriracha mayo to excite every palate. Garnish with freshly chopped parsley or a squeeze of lemon for a bright, herbaceous lift. Pair alongside crunchy celery sticks and carrot ribbons for a balanced plate, or place atop a bed of mixed greens for a lighter meal option.
| Nutrient | Per Serving (4 tenders) |
|---|---|
| Calories | 360 kcal |
| Protein | 35 g |
| Carbohydrates | 18 g |
| Fat | 14 g |

For more inspiration on achieving the best oven-baked chicken dishes, check out our guide to Crispy Oven-Fried Chicken. To deepen your understanding of safe poultry cooking temperatures, visit the USDA’s official page on food safety for poultry.
secrets to Even Cooking and Golden Color Every Time
Perfectly crispy oven-baking chicken tenders at 400°F unlock a culinary magic that transforms simple chicken into irresistibly golden, crunchy morsels every single time. Achieving that coveted balance of even cooking and stunning golden color is all about technique and thoughtful attention to heat, coating, and timing – a rewarding process that yields restaurant-quality tenders right from your oven.
Prep and Cook Time
Preparation: 15 minutes
Cooking: 20 minutes
Total Time: 35 minutes
Yield
Serves 4 (about 12 tenders)
Difficulty Level
Easy
Ingredients
- 1.5 lbs boneless,skinless chicken tenders
- 1 cup all-purpose flour,sifted
- 2 large eggs,beaten
- 1.5 cups panko breadcrumbs (for extra crispiness)
- 1 teaspoon garlic powder
- 1 teaspoon smoked paprika
- 1 teaspoon onion powder
- ½ teaspoon salt
- ½ teaspoon freshly ground black pepper
- Cooking spray or 2 tablespoons olive oil
- optional: fresh parsley for garnish
Instructions
- Preheat your oven to 400°F. Position the rack in the center for even air circulation and line a large baking sheet with parchment paper or a nonstick silicone mat.
- Prepare your breading station: In one shallow bowl, place the sifted flour. In a second bowl, whisk the eggs. In a third, combine the panko breadcrumbs, garlic powder, smoked paprika, onion powder, salt, and black pepper.
- Pat the chicken tenders dry with paper towels to remove excess moisture, which ensures the coating adheres properly and crisps perfectly.
- Dredge each tender: first coat in flour, shaking off excess; then dip fully in beaten eggs; finally press firmly into the seasoned panko mixture. For maximum crunch, press down gently to embed the breadcrumbs.
- Arrange the coated tenders on the prepared baking sheet leaving space between each piece. Lightly spritz or drizzle with olive oil to promote golden browning during baking.
- Bake for 18-20 minutes, flipping halfway through. Watch for a beautiful amber golden hue and an internal temperature of 165°F to guarantee juicy, safe-to-eat chicken.
- Remove tenders from the oven and let rest for 5 minutes-it helps lock in juices and crisps up the coating further.
Tips for Success with perfectly Crispy Oven-Baking chicken Tenders
- Dry your chicken thoroughly. Moisture is the enemy of crispiness, so patting tenders dry is a non-negotiable step.
- Use panko breadcrumbs. Their flaky texture is perfect for that crackling crunch.
- Don’t overcrowd the pan. Space allows hot air to circulate evenly,preventing soggy spots.
- Flip halfway through baking. this simple move promotes uniform color and crisp on both sides.
- Try substituting almond flour in the flour stage for a gluten-free alternative without sacrificing texture.
- Make ahead: Bread the tenders, freeze in a single layer, then bake straight from frozen adding a few extra minutes to cook time.
Serving Suggestions
Arrange golden chicken tenders on a rustic wooden board or a bright ceramic plate. Pair with vibrant dipping sauces-think creamy honey mustard, tangy buffalo, or a fresh herb aioli. Garnish with finely chopped fresh parsley or a light sprinkle of smoked paprika for an inviting pop of color. For a wholesome meal, serve alongside crisp garden salad or a bowl of baked sweet potato fries for seasonal flair.

| Nutrient | Per Serving (3 tenders) |
|---|---|
| Calories | 320 |
| Protein | 28g |
| Carbohydrates | 22g |
| Fat | 12g |
For more crunchy, oven-baked delights, check out our Crispy Oven-Baked Fish Fillets. To deepen your understanding of poultry safety and cooking temperatures, visit the FoodSafety.gov guidance on safe minimum cooking temperatures.
Serving Suggestions to Elevate your Oven-Baked Chicken Tenders
Perfectly crispy oven-baking chicken tenders at 400°F deserve the finest accompaniments to transform a simple meal into a memorable feast. Imagine golden, crunchy tenders paired with vibrant, fresh-side dishes that complement their savory crunch and juicy tenderness. Whether you’re preparing a weeknight family dinner or impressing guests, these serving ideas will add color, texture, and delightful flavor contrasts to your plate.
Start by plating your chicken tenders on a rustic wooden board or a crisp white platter for maximum visual impact. Garnish the edges with fresh herbs like finely chopped parsley or cilantro to add a burst of green freshness. For an appealing texture contrast, serve alongside creamy dipping sauces such as homemade garlic aioli, spicy honey mustard, or a cool avocado crema. These dressings not only enhance flavor but also elevate the eating experience with each bite.
Balance the crunchy chicken with light, refreshing sides.A crisp arugula salad tossed with lemon vinaigrette and shaved Parmesan creates a peppery, tangy complement to the rich tenders. For a heartier option, perfectly roasted sweet potato wedges or a vibrant quinoa salad studded with colorful bell peppers, cucumber, and cherry tomatoes bring wholesome nutrition while adding a pop of color. To keep textural harmony, consider a cooling side of cucumber and yogurt raita, infused with fresh mint and a hint of cumin-ideal for cutting through the warmth and crunch of the tenders.
If you’re hosting a casual gathering, assemble a fun platter with an array of dipping sauces like smoky chipotle ranch, tangy BBQ glaze, and classic buffalo sauce.Surround the tenders with crunchy celery sticks, baby carrots, and pickled jalapeños, inviting guests to customize every bite. For a fun international twist,pair your crispy tenders with a side of coconut rice and a tropical mango salsa-bursting with sweetness and acidity to contrast the savory chicken.
don’t overlook the power of presentation.Drizzle a finishing touch of high-quality extra virgin olive oil or a sprinkle of smoked paprika over the tenders just before serving. A wedge of fresh lemon on the side adds brightness and encourages diners to squeeze a little citrus burst over their bites, creating a delightful flavor awakening.
These serving suggestions make your perfectly crispy oven-baking chicken tenders at 400°F not just a meal,but a culinary experience your family and friends will rave about. For more flavorful side ideas, check out our Best Homemade Dipping Sauces to pair flawlessly with your chicken tenders.And for nutritional insights, explore the latest from the Academy of Nutrition and Dietetics, a trusted resource for balanced eating tips.

| Nutrient | per Serving |
|---|---|
| Calories | 280 kcal |
| Protein | 32 g |
| Carbohydrates | 18 g |
| Fat | 8 g |
Q&A
Q&A: Perfectly Crispy – Oven-Baking Chicken Tenders at 400°F
Q1: why bake chicken tenders at 400°F?
A1: Baking at 400°F strikes the perfect balance between a quick cook time and achieving that golden, crispy exterior. This temperature ensures the tenders cook through evenly without drying out, giving you juicy, tender chicken encased in a satisfyingly crunchy crust.
Q2: How can I make my oven-baked chicken tenders extra crispy?
A2: the key to crispy tenders lies in the coating and technique. Start by patting the chicken dry to remove excess moisture, then coat them with a seasoned breadcrumb mixture-panko breadcrumbs are ideal for added crunch. A light spray or brush of oil before baking helps the exterior crisp up beautifully in the oven.
Q3: Can I use alternatives to breadcrumbs for the coating?
A3: Absolutely! Crushed cornflakes, crushed rice cereal, or finely chopped nuts can provide unique textures and flavors. Just keep in mind the cooking time might vary slightly depending on the coating’s thickness and density.
Q4: Should I marinate the chicken tenders before baking?
A4: Marinating is optional but highly recommended. A quick soak in buttermilk or a tangy yogurt-based marinade not only infuses flavor but also tenderizes the chicken, helping the coating adhere better and enhancing juiciness.
Q5: Do I need to flip the chicken tenders during baking?
A5: yes! Flipping the tenders halfway through baking ensures even browning on both sides. It’s a small step that guarantees every bite is crispy and delicious.
Q6: How long do chicken tenders take to bake at 400°F?
A6: Typically, it takes about 15-20 minutes depending on the size and thickness of your tenders. Use a meat thermometer to check that the internal temperature reaches 165°F for perfect doneness.
Q7: Can I prepare the chicken tenders ahead of time?
A7: Definitely. You can coat the tenders and refrigerate them for a few hours or even overnight. Just bake them straight from the fridge, adding a couple of extra minutes if needed to reach crispiness and full doneness.
Q8: Any tips for seasoning the coating?
A8: Spice it up with garlic powder, smoked paprika, onion powder, or a pinch of cayenne for subtle heat. Fresh herbs like thyme or rosemary can also be mixed into the breadcrumbs for an aromatic twist.
Q9: What sides pair best with oven-baked chicken tenders?
A9: Crispy chicken tenders are a blank canvas! Pair them with a zesty homemade dipping sauce, a fresh side salad, roasted veggies, or even sweet potato fries for a satisfying meal. The mild flavor and crunchy texture make them delightfully versatile.
Q10: Is baking the healthiest way to cook chicken tenders?
A10: Yes! Oven baking requires less oil than frying, cutting down on excess fat while still delivering that coveted crunch. It’s a fantastic method for enjoying crispy chicken without the guilt.
Future Outlook
With just a few simple steps and the perfect 400°F oven warmth, achieving irresistibly crispy chicken tenders is no longer a kitchen mystery. From that golden, crunchy exterior to the juicy, tender bite inside, oven-baking offers a healthier, hassle-free way to satisfy your crispy cravings.So next time you’re craving comfort food with a crunch, remember: your oven holds the secret to perfectly crispy chicken tenders every time. Happy baking-and even happier eating!